Connecting to Your Workstation via NICE DCV
To access your cloud workstation session, you have several secure options through NICE DCV. Follow these steps:
Step 1: Initiate Connection
- After clicking Connect via DCV, a connection dialog screen will appear

- In the connection dialog, select how you want to access your remote session:
- Open via Browser: Launches the workstation session directly in your web browser.
- Open DCV Client: Uses the dedicated NICE DCV client application for enhanced performance.
- Download DCV Config File: Downloads a configuration file for advanced client connections.
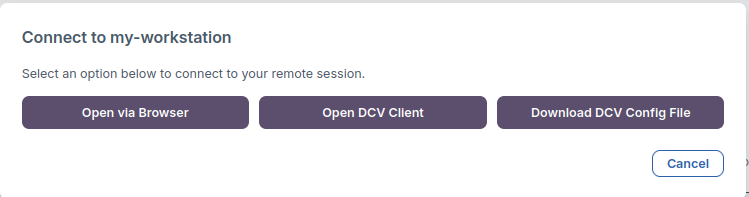
Step 2: Establish Remote Session
- Use any of the connection options to open your remote desktop session and begin working.
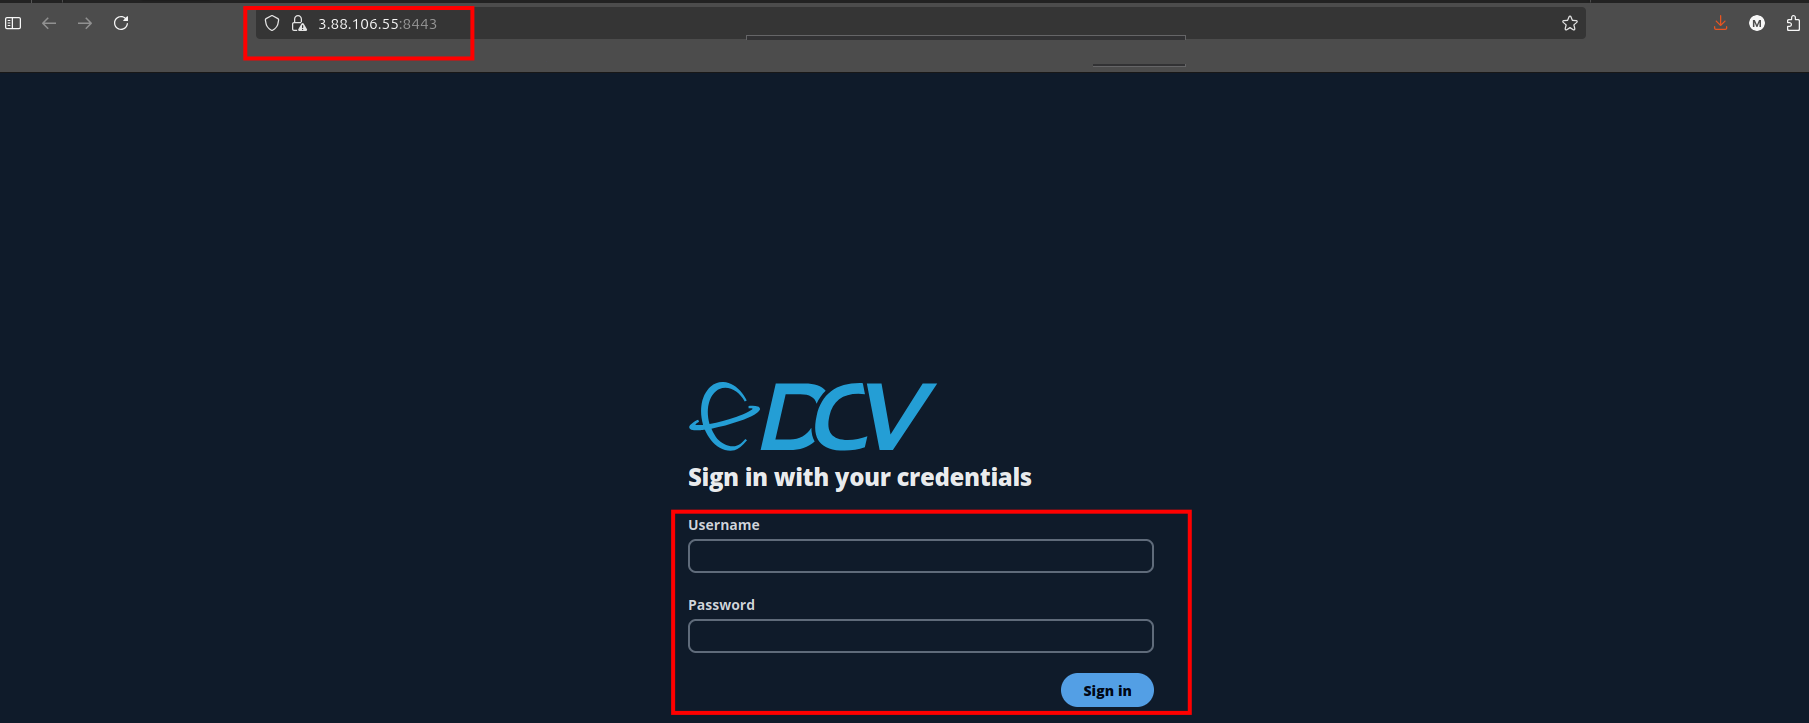
Browser-Based DCV Workstation Login
After selecting Open via Browser on the connection dialog, a login screen is presented to begin your NICE DCV remote session.
Login Process
- The browser navigates to a secure URL (e.g.,
https://<workstation-ip>:8443) displaying the DCV login page. - Enter your Active Directory (AD) username and password in the provided fields.
- Click Sign in to authenticate.
Accessing Your Workstation
- Once logged in, your cloud workstation desktop will appear in the browser window.
- You can now access files, use installed applications, and work just as you would on a local computer.
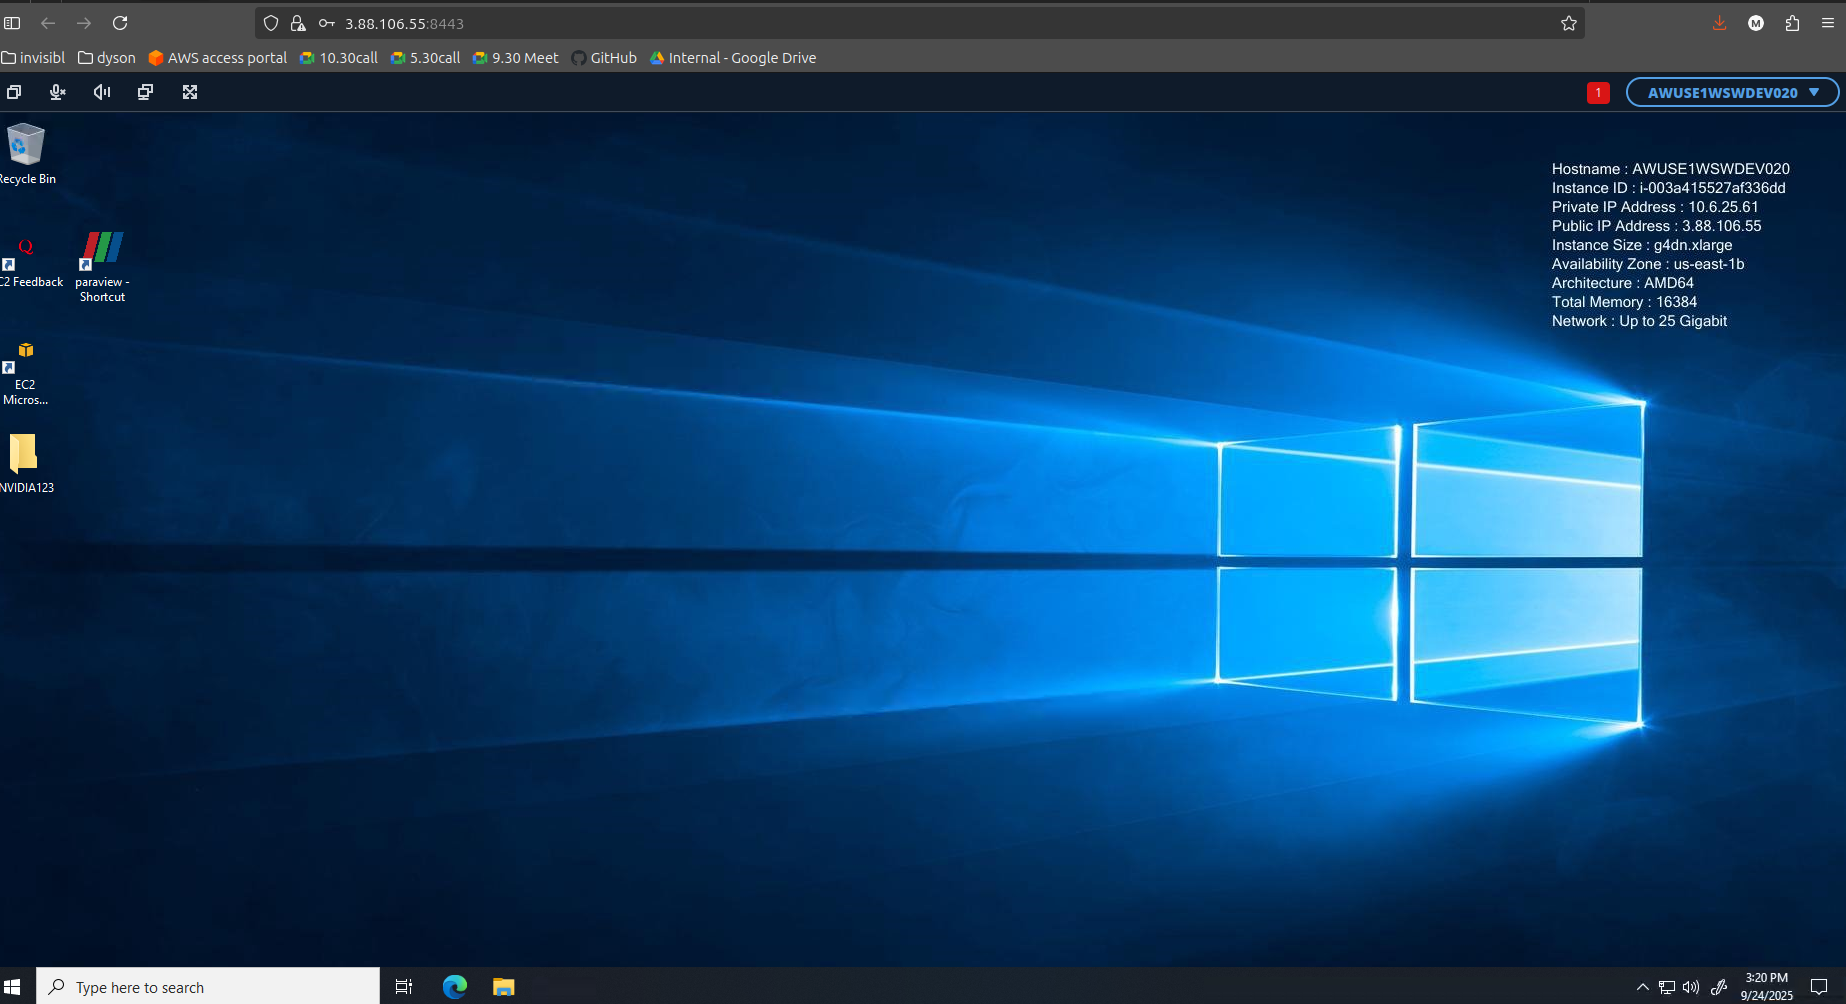
Use your assigned AD credentials for secure access. Browser-based sessions provide a convenient way to interact with your remote workstation without client installation.
Connect to Workstation via DCV Client
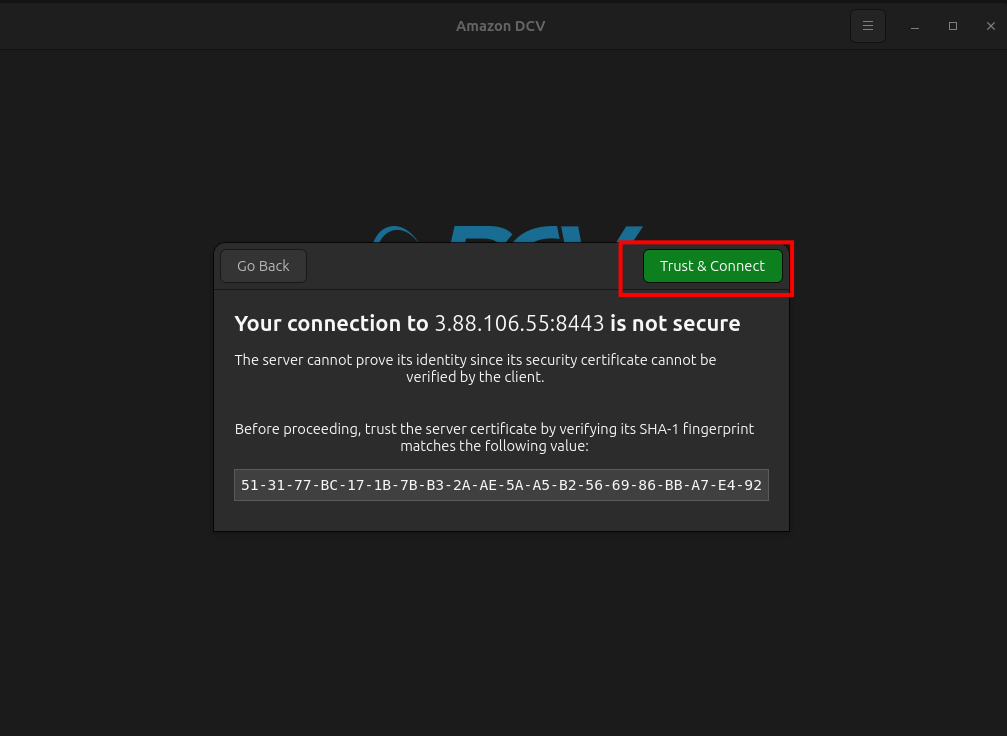
When you select Connect via DCV Client, a secure connection dialog appears before login.
Step 1: Trust and Approve Connection
- The DCV client may prompt that Your connection is not secure because the server's certificate cannot be verified.
- Compare the certificate SHA-1 fingerprint with the value provided by your system administrator.
- If the fingerprints match, click Trust & Connect to approve the connection.
- If uncertain, click Go Back or verify the certificate details for security.
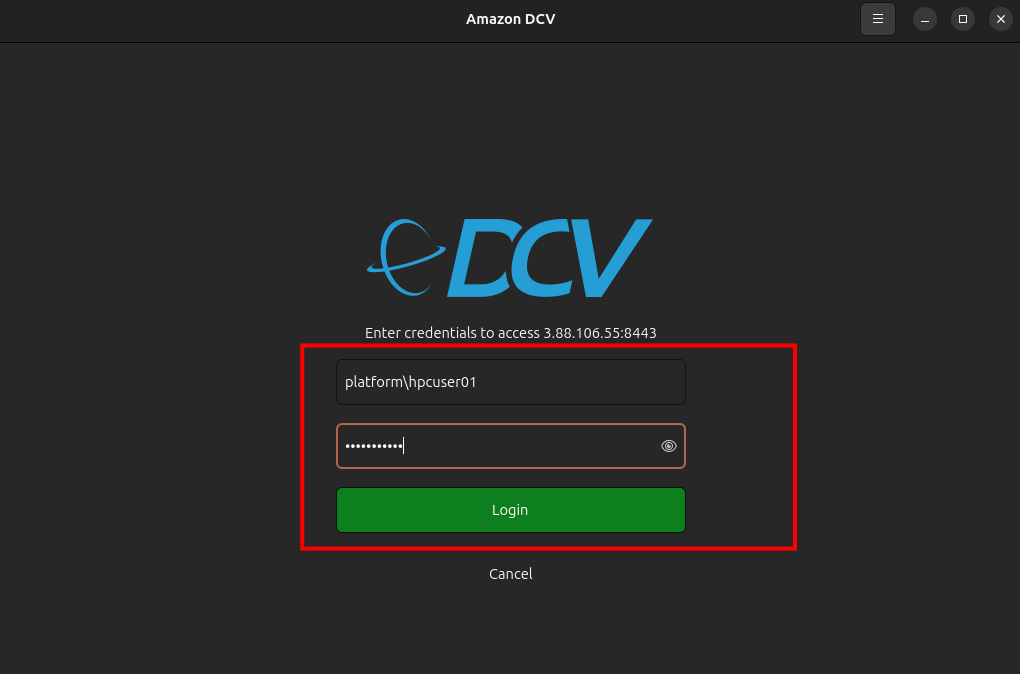
Step 2: Enter Credentials
- After trusting the server, you will be asked for your login details:
- Enter your username (usually your Active Directory or assigned account name).
- Enter your password in the provided field.
- Click Login to authenticate.
Step 3: Access Your Windows Machine
- Upon successful authentication, the DCV client connects you to your remote Windows workstation.
- You can now access the desktop, files, and applications as you would locally.
Connect to Workstation via DCV Config File
If you choose the Download DCV Config File option, follow the steps below to connect to your remote Windows workstation using the NICE DCV viewer application.
Step 1: Download the Config File
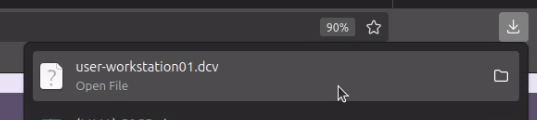
- Click Download DCV Config File from the connection dialog.
- A file (e.g.,
user-workstation01.dcv) will be downloaded to your system.
Step 2: Launch DCV Viewer with Config File
- Open a terminal and navigate to the directory containing the downloaded DCV config file.
- Run the following command to launch the session:
dcvviewer user-workstation01.dcv

Step 3: Login and Connect
- The DCV viewer will open a login window.
- Enter your username and password (typically your Active Directory credentials).
- Click Login to authenticate.
- After successful login, you will be connected to your Windows workstation and can access files and applications.
-
📌 General Notes
- The DCV config file simplifies secure connections directly from your terminal or desktop, ideal for power users or those automating workflows.
- Always verify the server's certificate fingerprint for a secure session. Use your official credentials to log in and access your workstation via the NICE DCV client.
- Choose the connection method that best fits your workflow. Browser access is fastest for quick tasks, while the DCV client offers more features for intensive or long-running sessions.