Groups — Admin Guide
ℹ️ Overview:
- Groups are collections of users managed under a single unit.
- Admins can add users to groups to organize them for easier management and streamline user permissions.
- Each group can define default landing pages and module visibility for all its members.
Purpose
Grouping users simplifies administrative management by:
- Organizing users based on teams, projects, or departments.
- Applying consistent configurations across users in the same group.
- Reducing repetitive user-level configuration.
- Enabling controlled module visibility for better governance.
UI Location
Admin Guide → Groups
🧭 Tip:
- You can access all existing groups or create a new one directly from the Groups section.
- Search and filters are available to quickly locate specific groups.
Create a Group
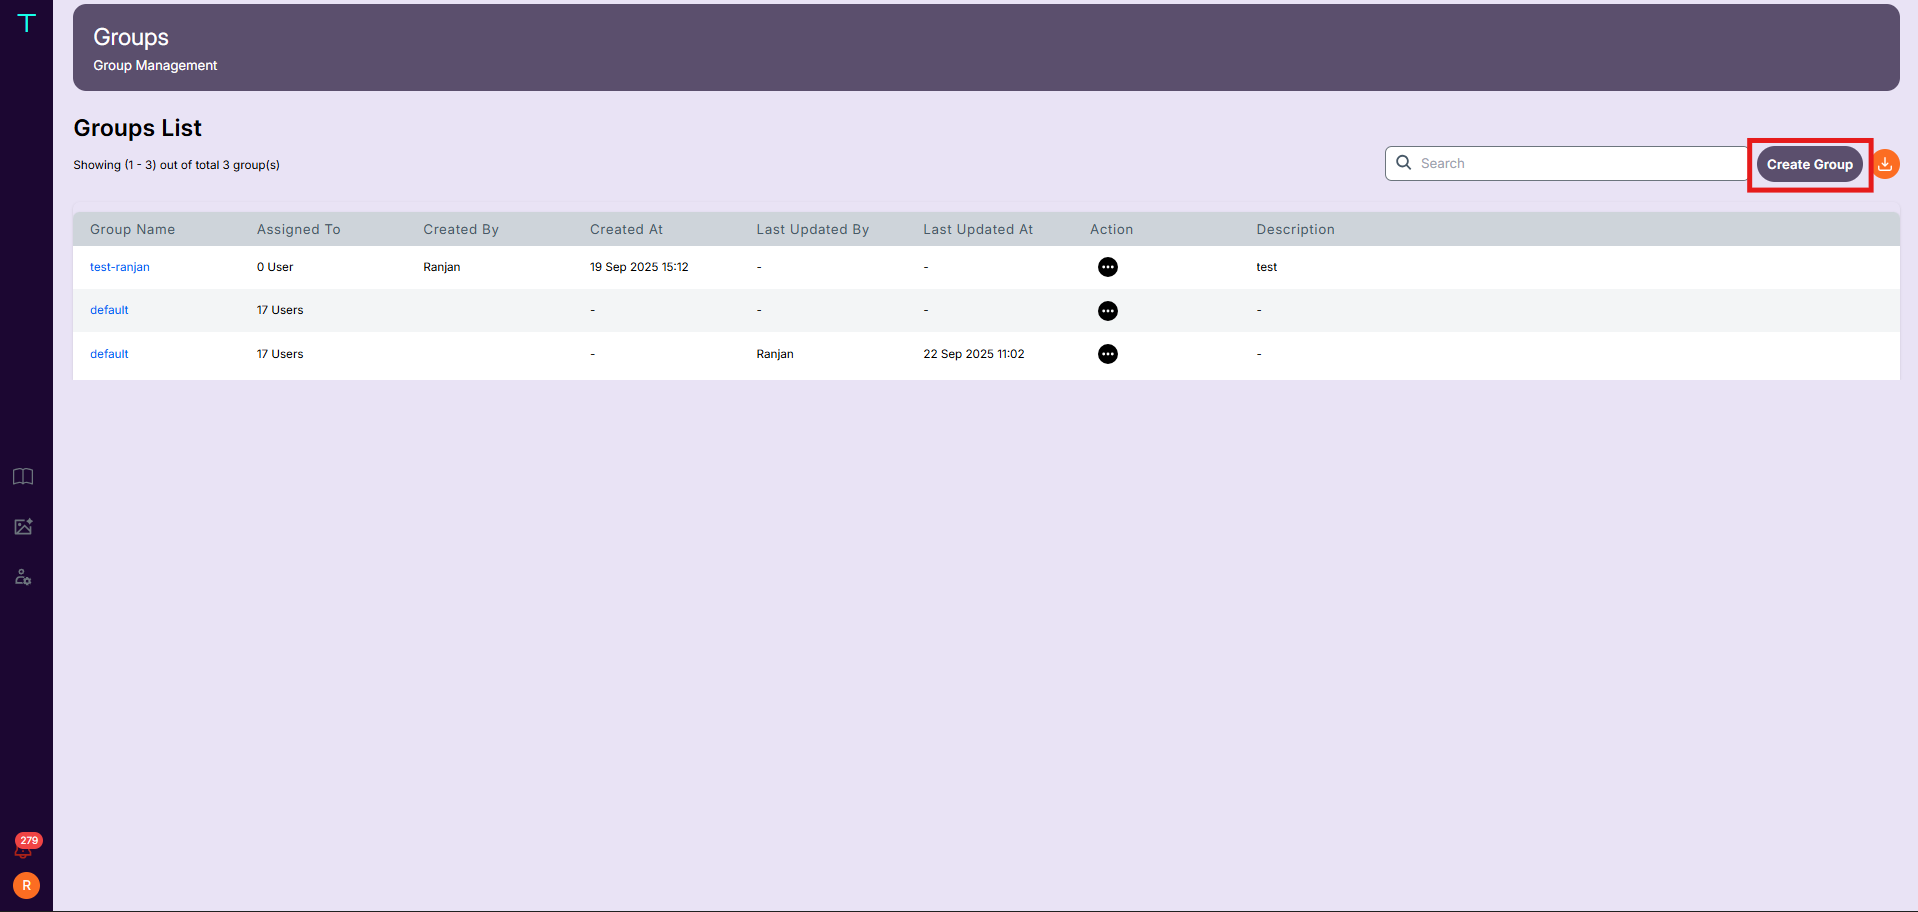
Step 1: Open the Groups page
- Navigate to Admin Guide → Groups.
- Click Create Group.
Screenshot
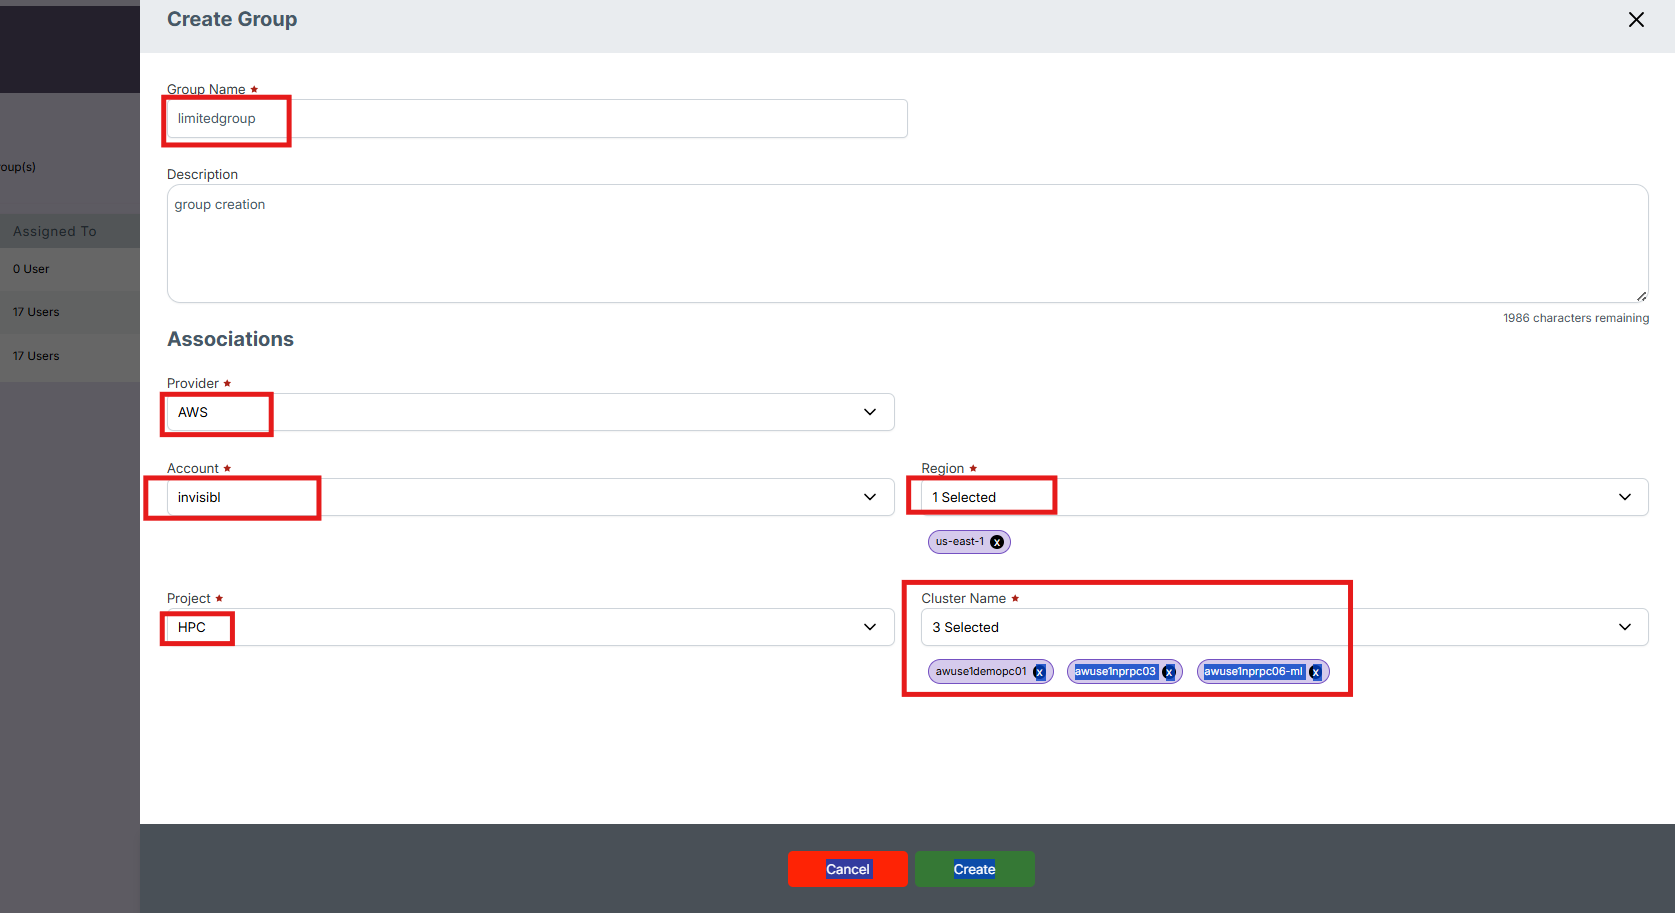
Step 2: Fill Group Details
In the Create Group form:
- Enter a Group Name — must be unique.
- Optionally, add a Description for context or purpose.
- Select a Default Landing Page — where users in this group will be redirected after login.
- Example: If you choose Jobs, all members land on the Jobs page after signing in.
- Choose the Modules accessible to this group.
- Only selected modules appear in the sidebar for members of this group.
Screenshot
💡 Example:
- Group Name:
HPC-Admins - Landing Page:
Dashboard - Modules:
Jobs,Observability,Budgets
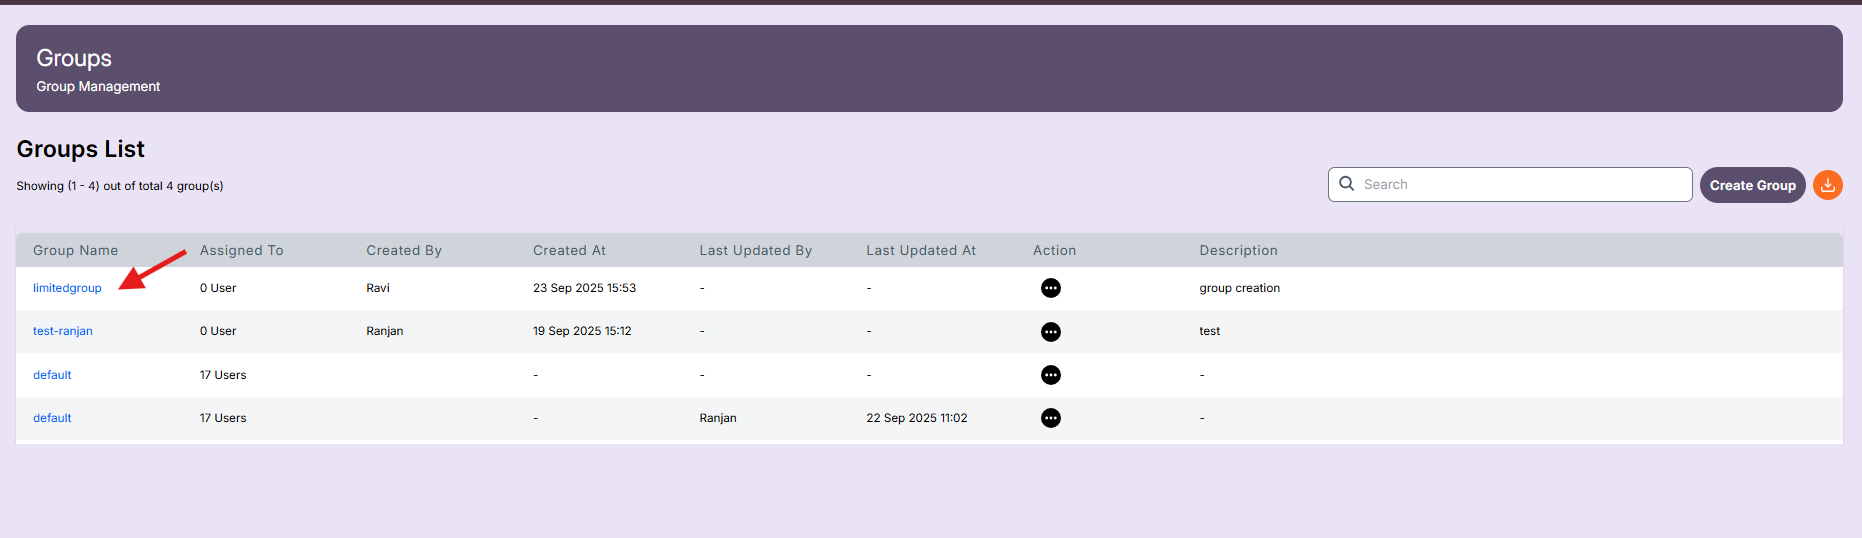
Step 3: Save the Group
Click Save to create the group.
Once saved:
- The new group appears in the Groups List.
- You can start assigning users to it immediately.
Screenshot
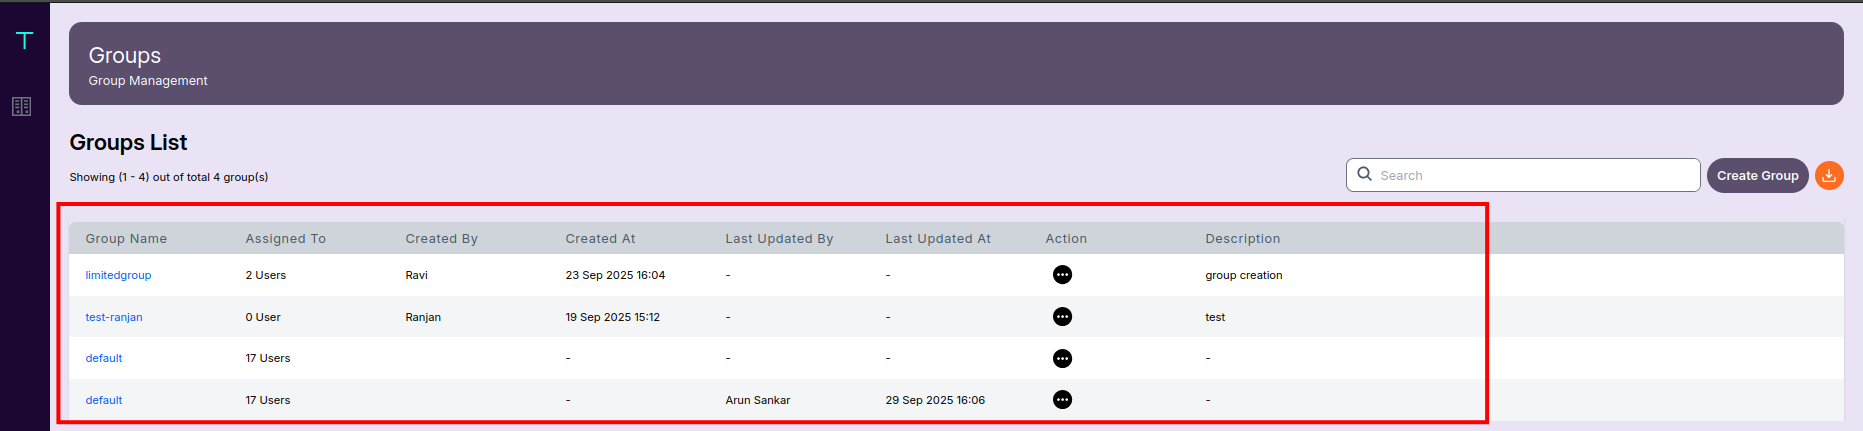
Groups List
The Groups List displays all created groups along with key details:
| Column | Description |
|---|---|
| Group Name | Unique name of the group. |
| Assigned To | Number of users currently in this group. |
| Created By | The admin who created this group. |
| Created On | Timestamp of creation. |
Screenshot
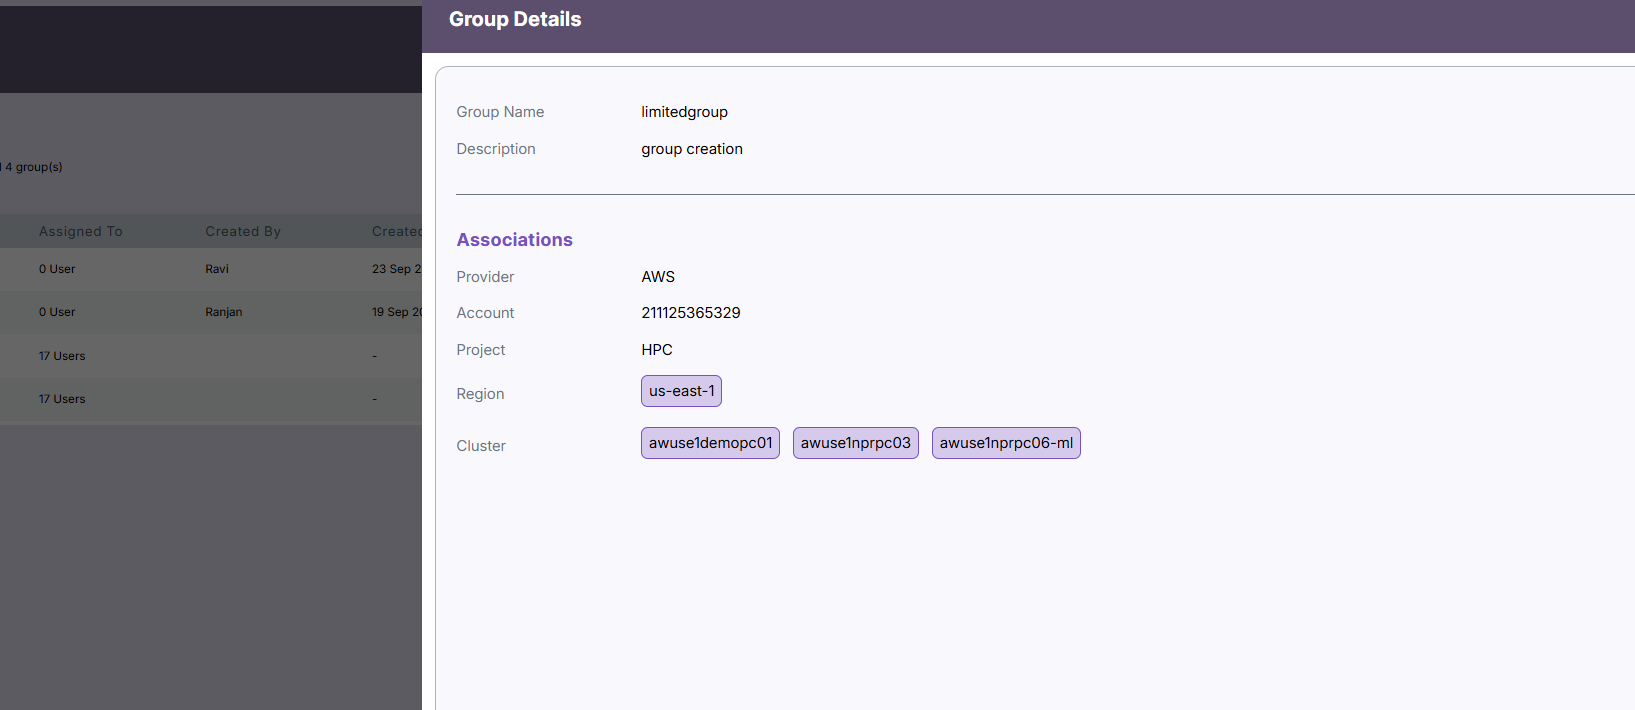
View Group — Details (Read-Only)
When you click Details for any group, a read-only summary appears showing the configurations set during group creation.
🔍 Note:
-
The Details view is read-only — you cannot modify, add, or remove users from this screen.
Information Displayed
- Group Name and Description
- Default Landing Page
- Modules Assigned
- Metadata — Created By and Created On
Screenshot (Example)
Edit a Group
Steps
- From the Groups List, click Edit next to the group you want to modify.
- Update the desired fields (e.g., group name, description, landing page, modules).
- Click Save.
Screenshot
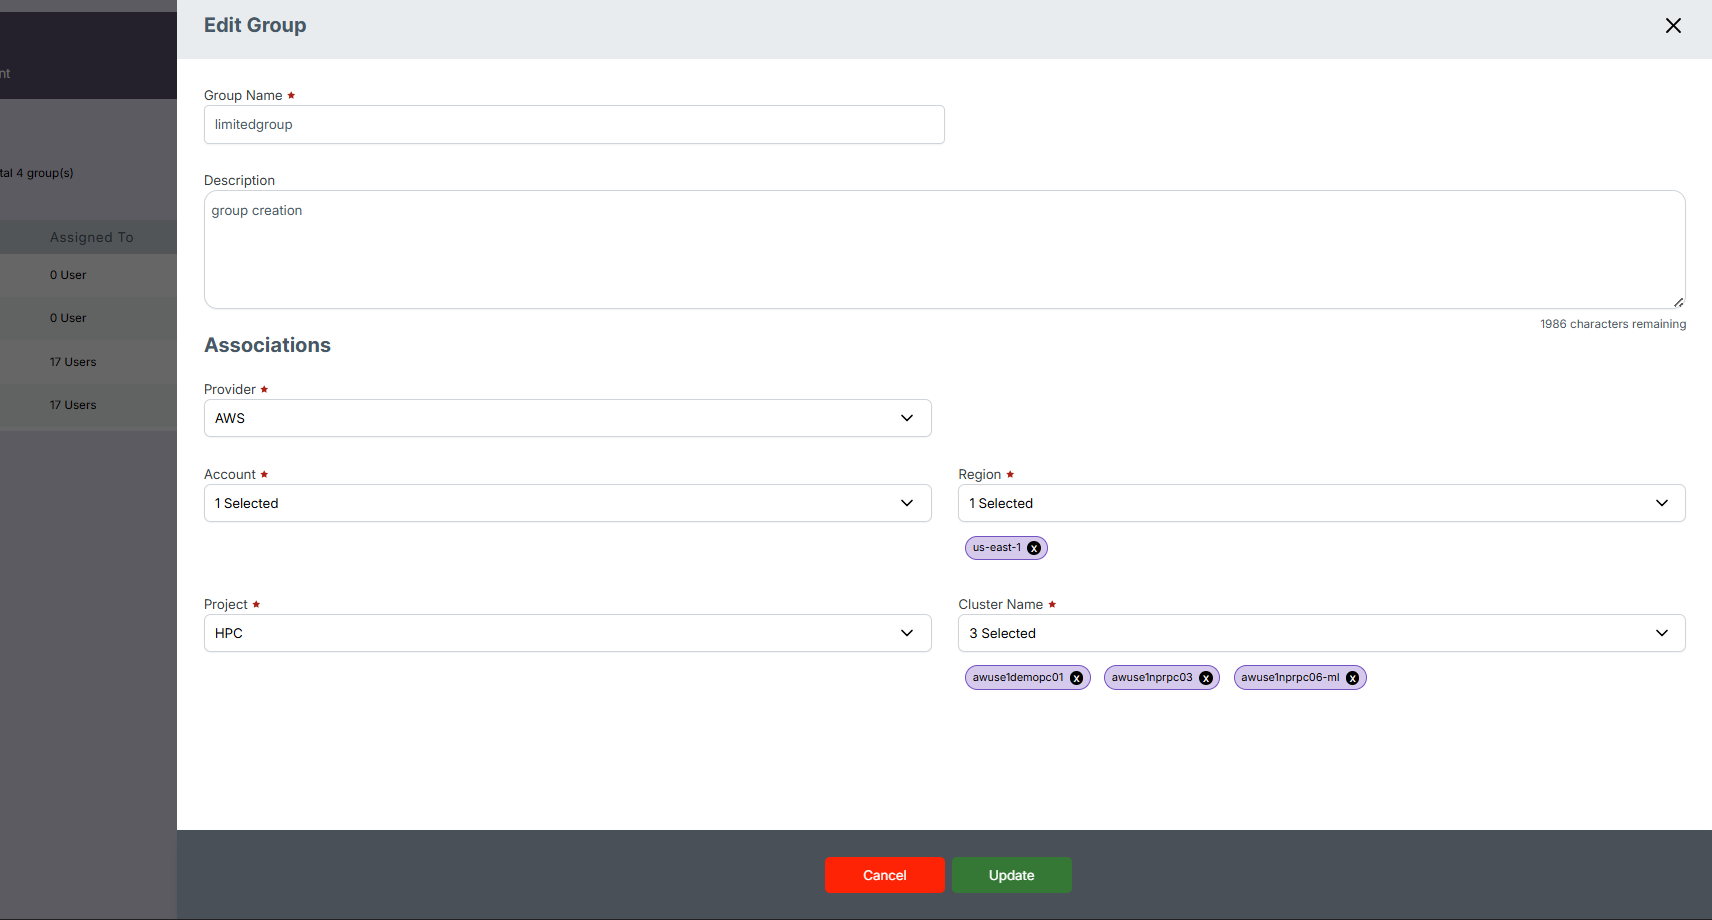
🧩 Tip:
Editing a group instantly updates its configuration for all users assigned to it.
Delete a Group
Steps
- In the Groups List, click Delete beside the target group.
- Confirm the deletion in the confirmation dialog.
Screenshot
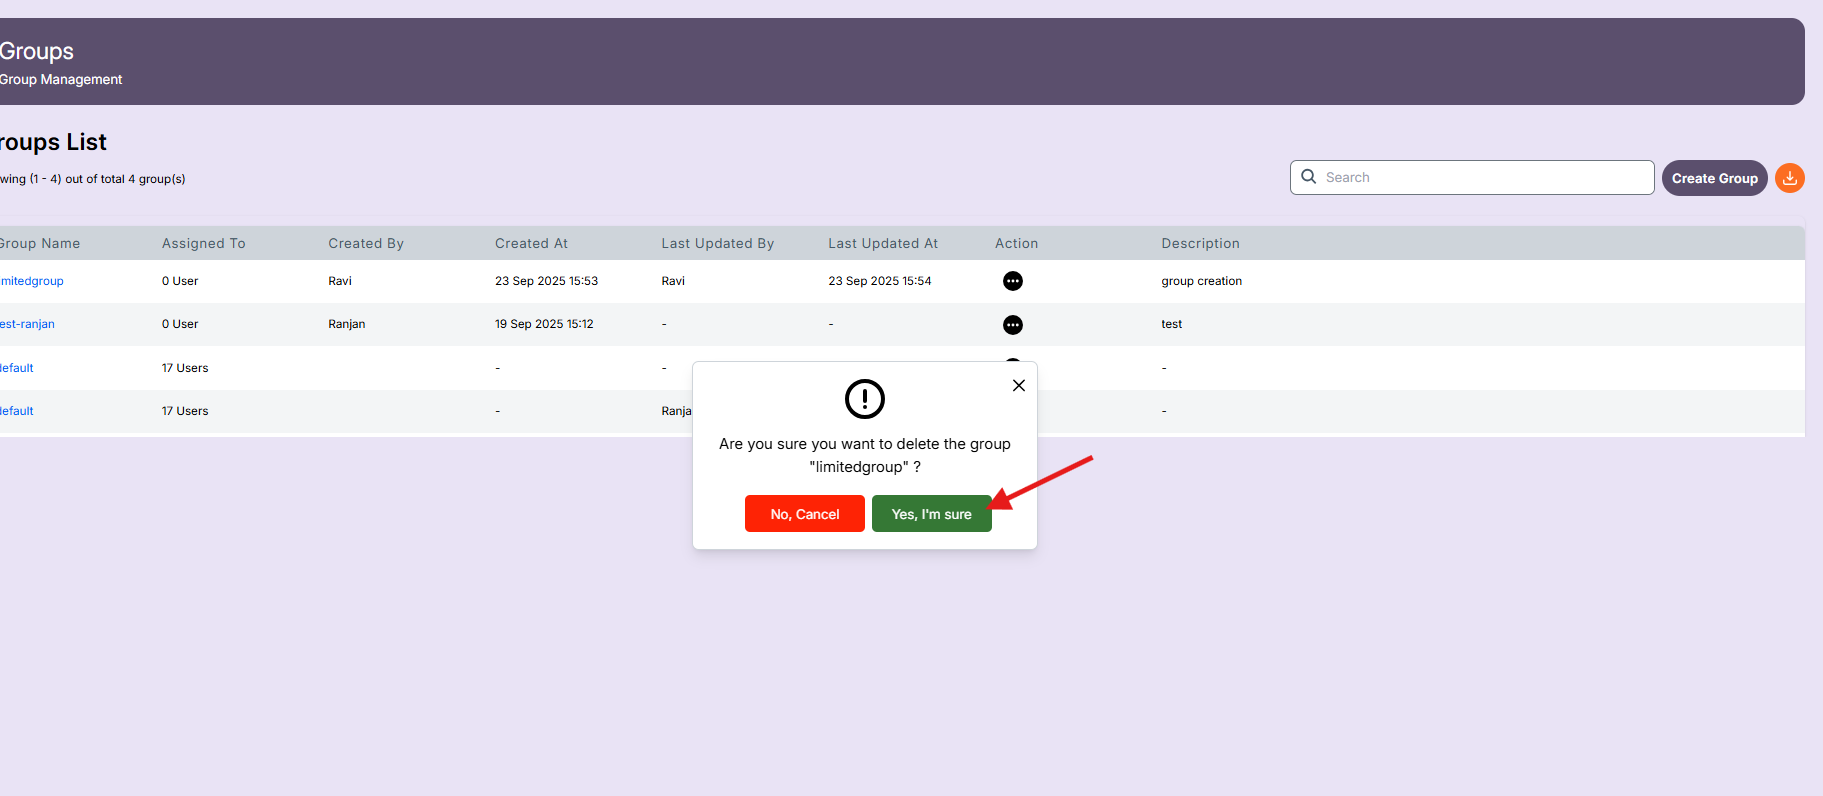
Expected Result
⚠️ Important:
- Once deleted, the group is permanently removed from the system.
- Users remain active, but they will lose any access or permissions inherited from this group.
Summary
- Groups provide a structured way to manage users efficiently.
- Default landing pages and module visibility ensure consistent user experience.
- Use the Groups List to quickly view, modify, or delete existing groups.
✅ Best Practice:
- Regularly review groups to remove unused ones.
- Use descriptive group names (e.g.,
Finance-Team,HPC-Developers) for clarity.