🧑💼 User Management
Provides the steps to perform user onboarding and manage user data.
The following features are covered below:
- Create a new user
- Edit and update existing user
- Remove an existing user
👤 Create a New User
Prerequisites
- Should have the AD username and Email account details of the user to be onboarded.
- Determine the role of the user in the system.
Steps
- Click on Admin in the left menu and click on the Create User button above the user list table.

- Enter a display name for the user in the User Name field.
- Enter the AD username in the AD Short Name field.
- Enter the user's email ID in the Email ID field.

- Select Web from the Application name dropdown.
- Once the application is selected, the app shows the list of Role Name.
- Select the appropriate role from the list:
- hpc-user – Use for R&D-only access.
- platform-admin – Use for complete platform access.
- custom-role – Use for temporary or demo users.
📌 General Notes:
- Refer to Create Roles Guide for details on custom roles and permissions.
- If you want the user to receive alert notifications, check the Send Alert Notification checkbox.

🔧 Enable Shell Access
- Under user settings, check Enable Shell Access to provide the user with access to the browser-based terminal from File Manager.
- This allows the user to see the Terminal icon and launch shell sessions, if enabled at the platform level.

📌 General Notes:
- Shell Access can be enabled either during user creation or later via edit.
- Users with Shell Access will see the Terminal icon in File Manager after completion.
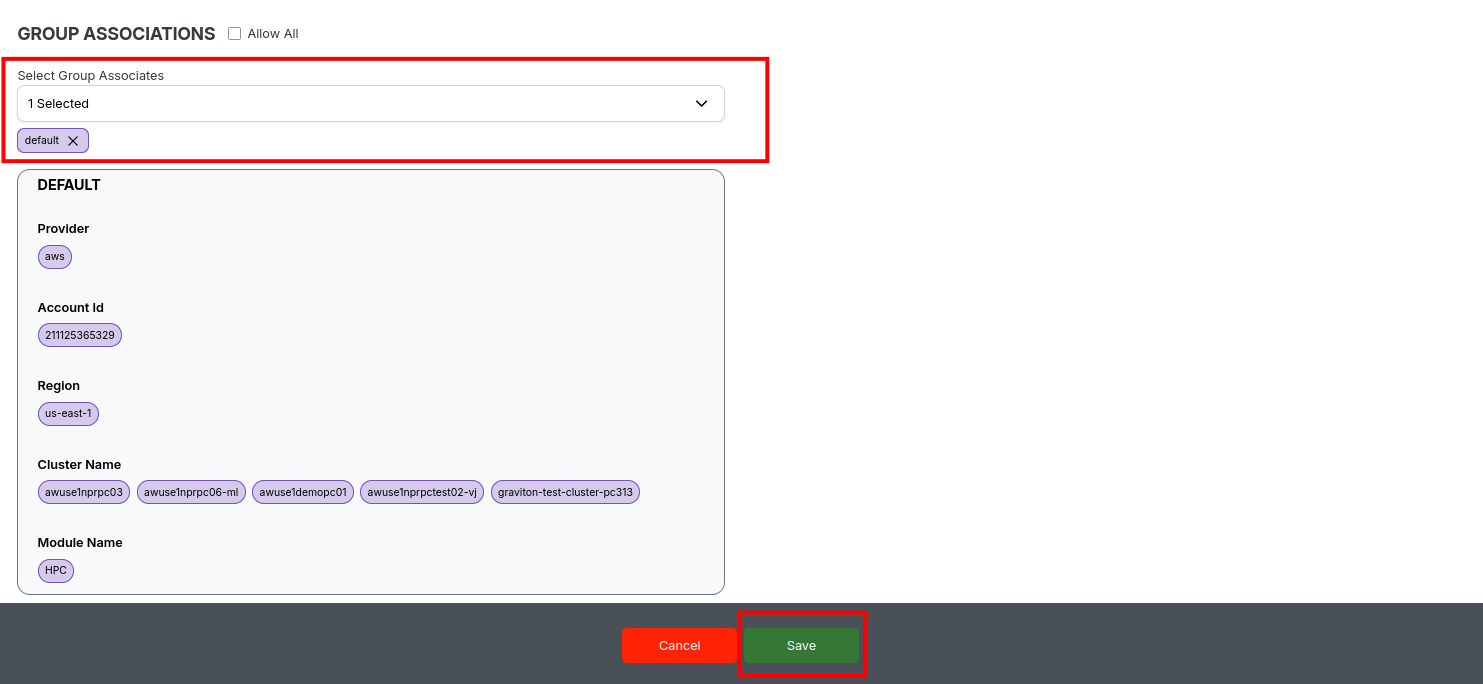
👥 Group Associations
- Select the Allow All checkbox if the user needs access to all user groups.
- Or select specific group associations from the dropdown to restrict access.

📌 General Notes:
- Groups control visibility and permission across platform modules.
🧩 HPC Cluster Group Associations
- Select the Account, Region, Cluster, and HPC Group to associate the user for job submission.
- Add more associations by clicking Add Association if needed.
- When all required inputs are filled, click Save to create the user.
The system will confirm with a “User created successfully” notification.
📌 General Notes:
- If you encounter any UI issues or have questions about job submissions or status, please contact the Admin for support.
- Ensure you have selected the correct cluster, region, and provider when filtering queue data.
✏️ Edit and Update Existing User
Prerequisites
- Must have admin access to the platform.
- Know the user profile to be edited.
Steps
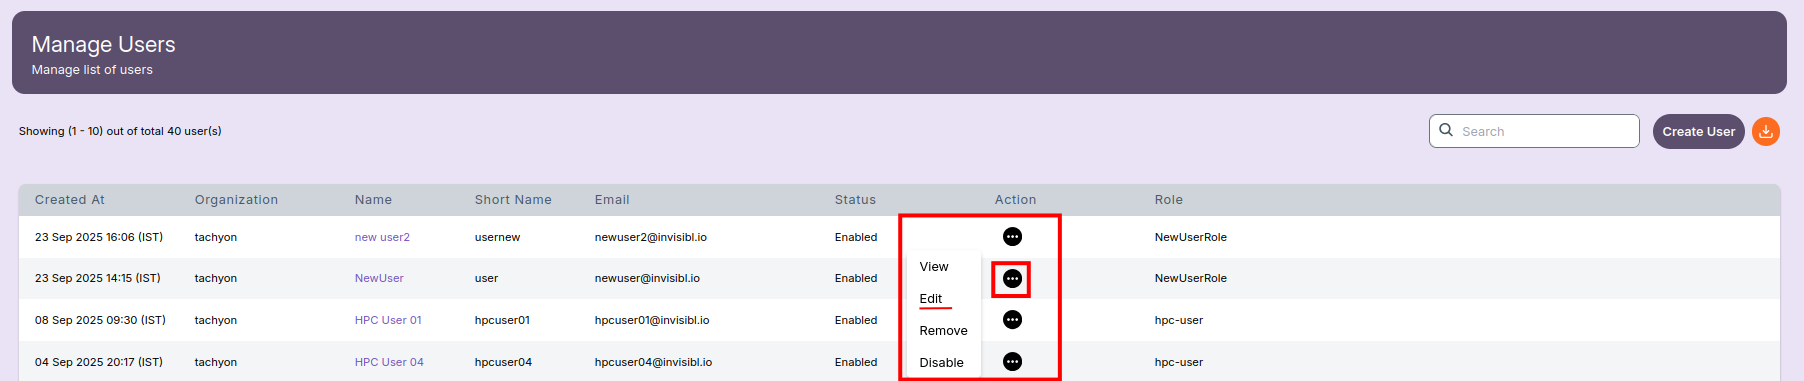
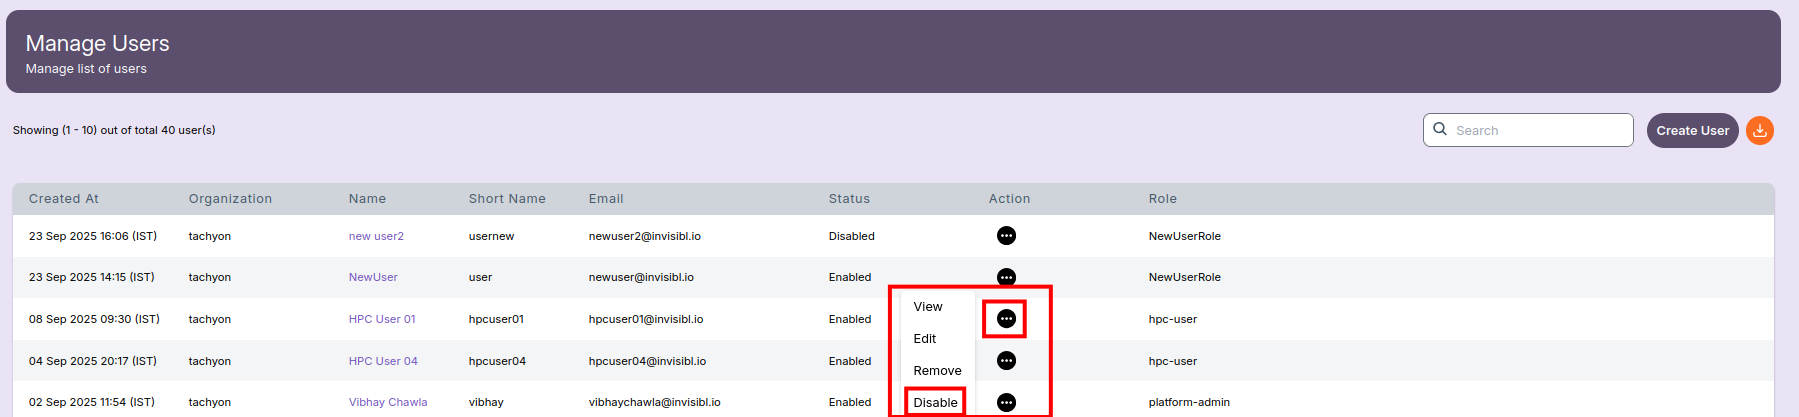
- Navigate to Admin in the left menu and select User to see the user list.
- Find the user you want to edit and click on the action menu (three dots) next to the user's entry.
- In the dropdown, select Edit.
- The Edit User screen will open. Make the necessary changes, such as updating the name, email ID, AD short name, role, notification settings, shell access, or group associations.
- After verifying the changes, click the Update button at the bottom.
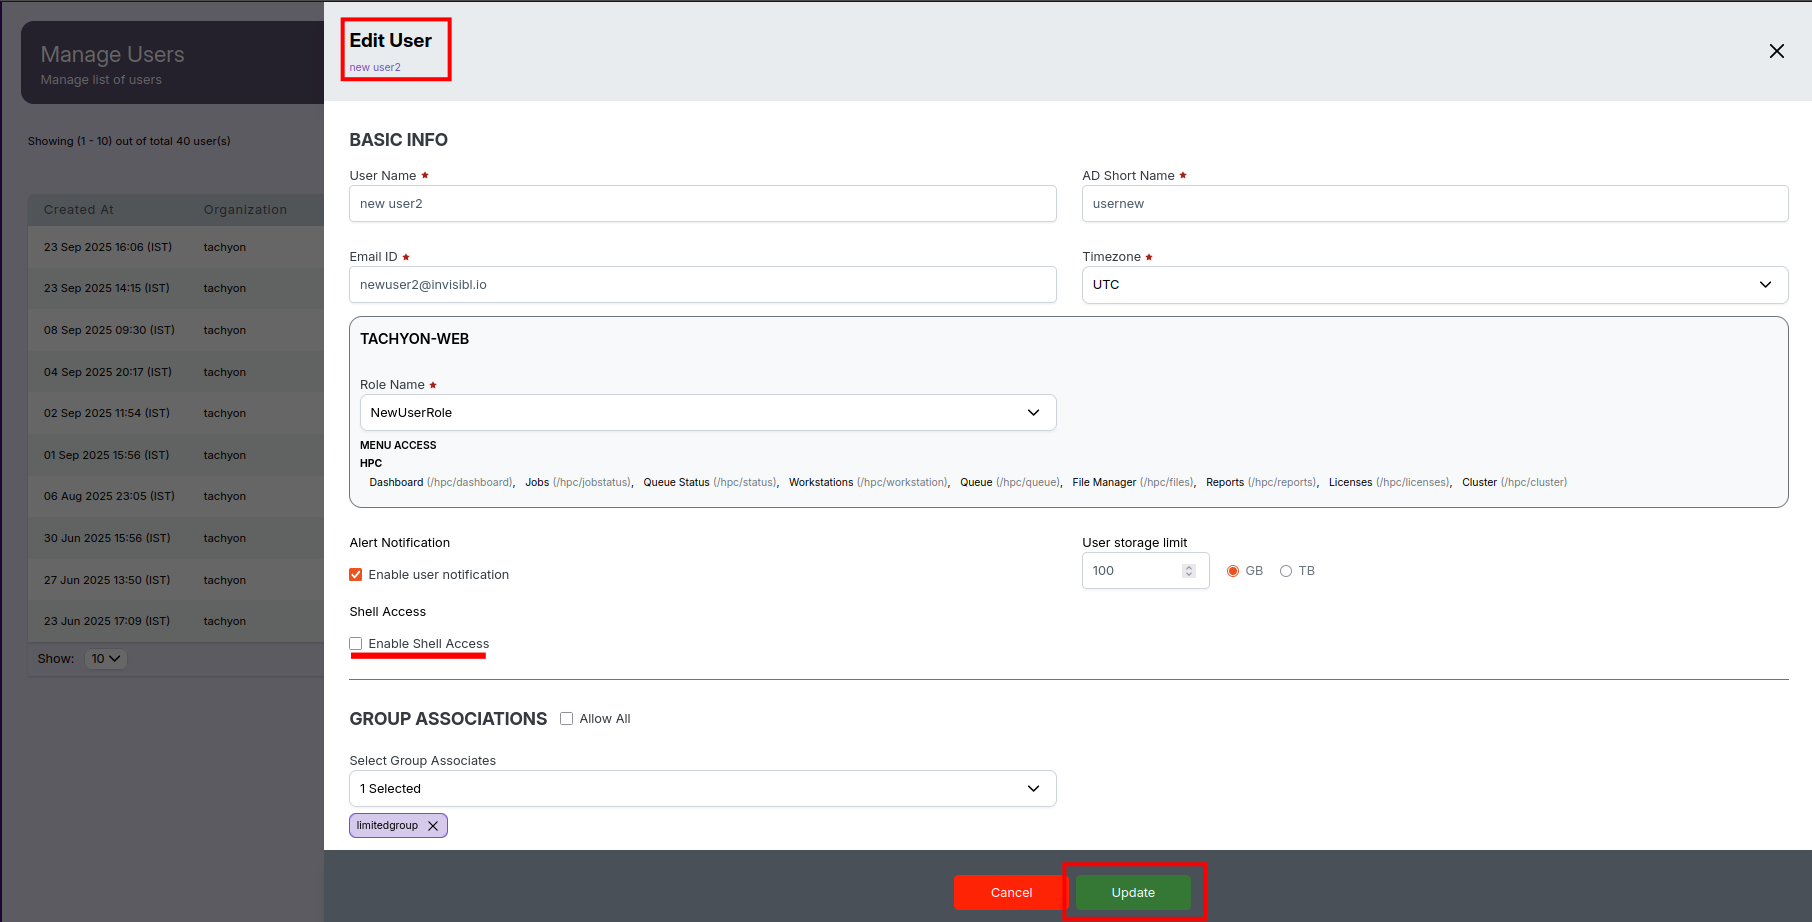
- A popup message will confirm “User updated successfully” once the changes are saved.
📌 General Notes:
- Only admins can edit user profiles and roles.
- Shell access or group association changes take effect immediately after update.
- Verify all updated info before saving to avoid access or permission issues.
🗑️ Remove an Existing User
Prerequisites
- Must have admin access to the platform.
- Confirm which user to remove.
Steps
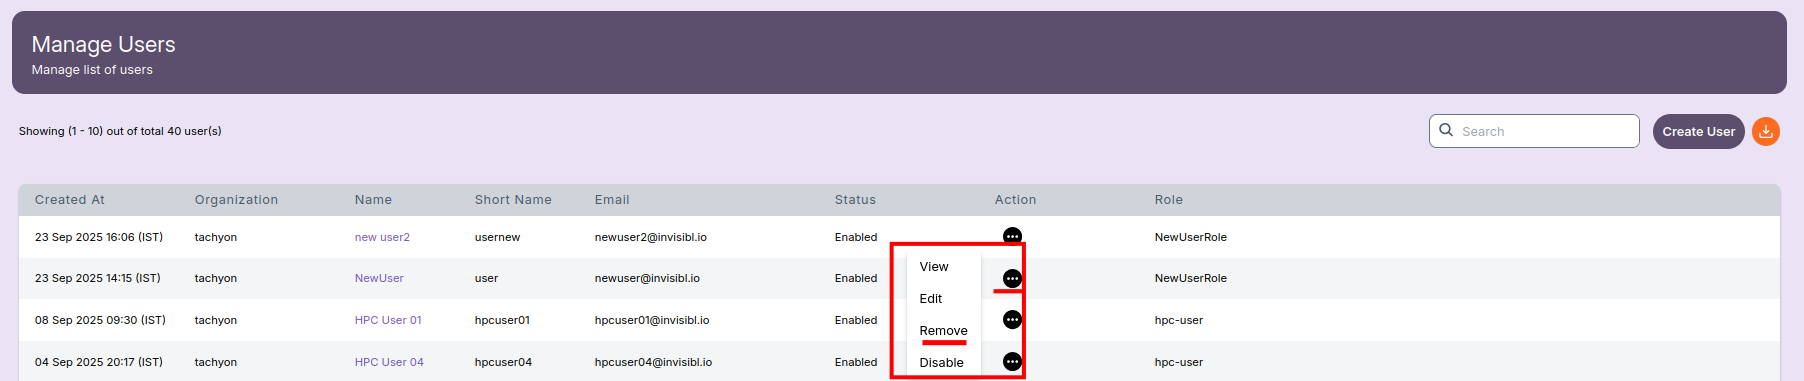
- From the User list in the Admin menu, locate the user to be removed.
- Click on the action menu (three dots) for that user.
- Select Remove from the dropdown.
- A confirmation popup will appear; click Yes, I’m sure to confirm deletion.
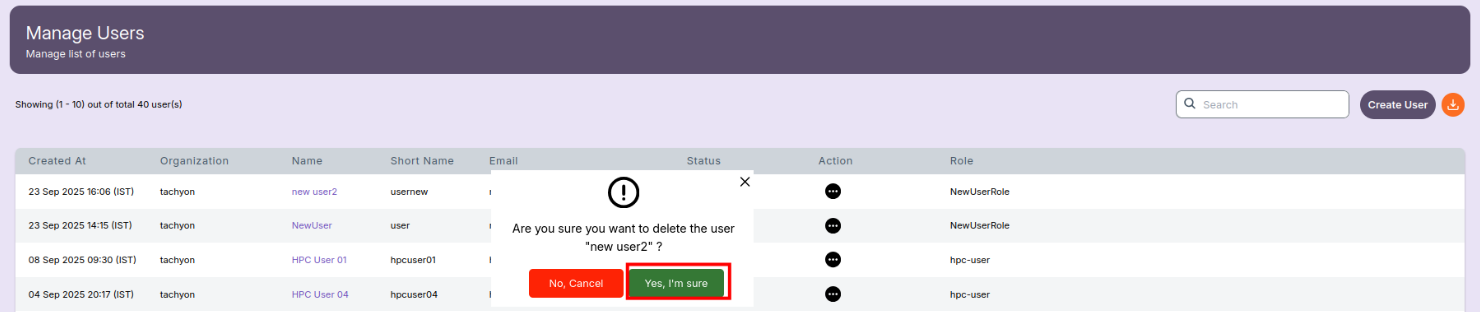
- A popup message will confirm “User removed successfully” after deletion.
📌 General Notes:
- Removed users lose access to all platform resources immediately.
- This action cannot be undone; ensure that user data is backed up or transferred as needed.
- For any issues removing users, contact the platform administrator.
🔄 Enable or Disable a User
Prerequisites
- Must have admin access to the platform.
- Identify the user whose access status needs to be changed.
Steps
- Navigate to Admin in the left menu and select User to view the list of users.
- Locate the user you want to enable or disable.
- Click on the action menu (three dots) next to the user’s entry.
- From the dropdown menu, select Enable or Disable as needed.
- The system will instantly update the user’s status without any confirmation popup.
- A green popup message will appear at the top confirming the action, e.g.
- “User enabled successfully”
- “User disabled successfully”
- The Status column will automatically reflect the updated user state (Enabled or Disabled).

📌 General Notes:
- Only admins can enable or disable user accounts.
- No confirmation popup is shown; the action takes effect immediately after selection.
- Disabled users lose access to all platform resources until re-enabled.
- Ensure the change is intentional before proceeding.