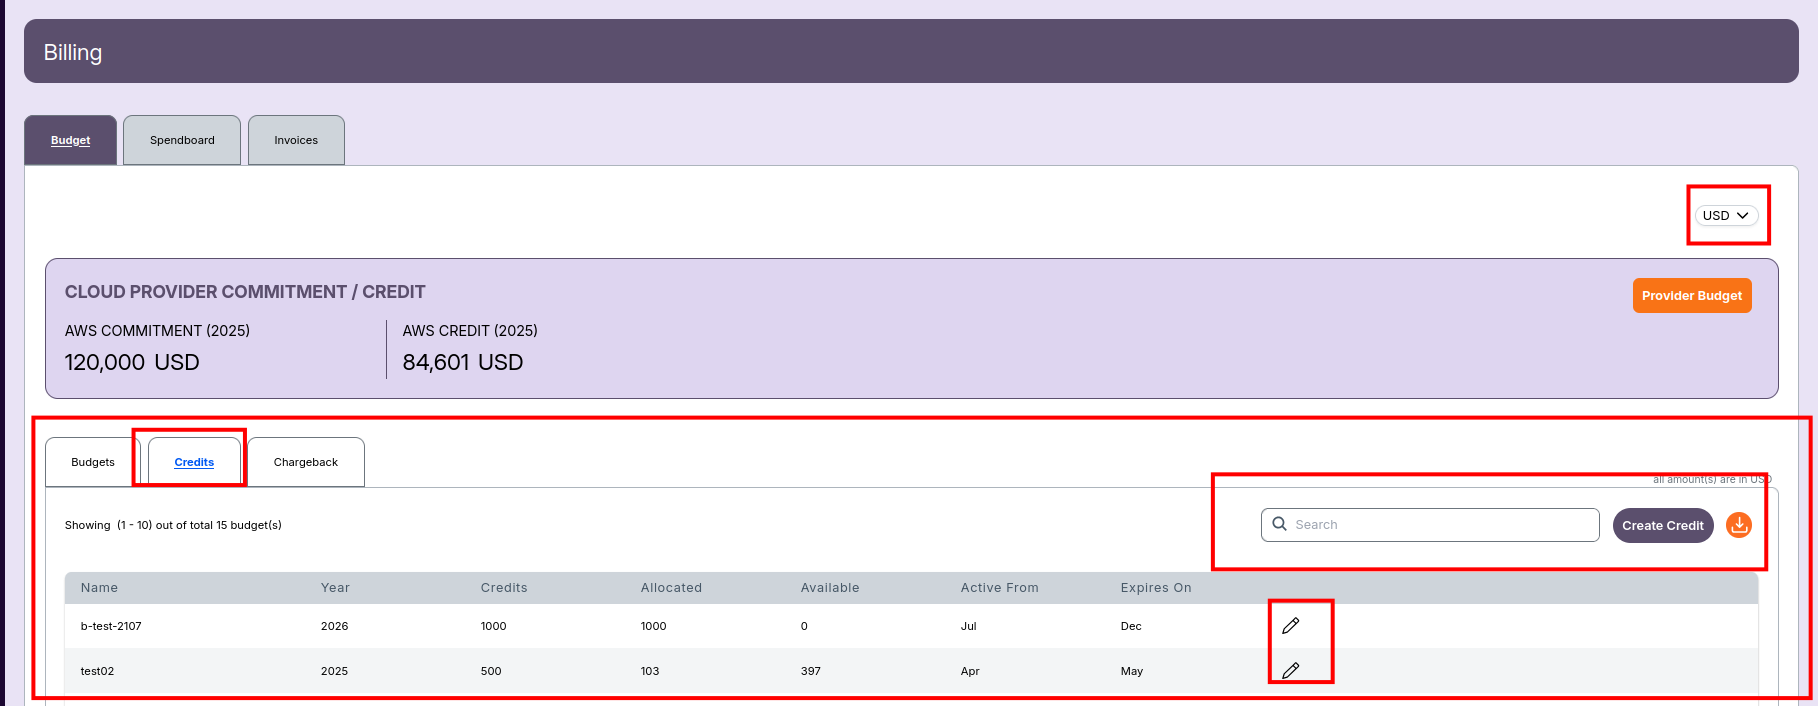
Billing - Credits
The Credits tab in the Billing module displays and manages all available cloud provider credits, along with their allocation and usage status.
Overview
- The Billing screen includes three main tabs:
- Budget – Used to view and manage department budgets.
- Credits – Displays cloud credits and their validity periods.
-
Chargeback – Used for cost-sharing or usage-based chargebacks.
-
The CLOUD PROVIDER COMMITMENT / CREDIT section at the top shows:
- AWS Commitment (2025): Total committed amount for AWS for the year.
- AWS Credit (2025): Total AWS credit value available for 2025.
- To update these values, click the Provider Budget button.
Credits Tab
- The Credits tab lists all available cloud provider credits in a structured list.
- Each entry shows the main details about the credit, including its year, usage, and validity period.
Details Shown
Each credit record displays the following information:
- Name: The name assigned to the credit.
- Year: The year in which the credit is applicable.
- Credits: The total credit amount (in USD).
- Allocated: The portion of the credit already used.
- Available: The remaining unused credit amount.
- Active From: The start month from which the credit becomes valid.
- Expires On: The month when the credit expires.
- Actions: The pencil icon allows editing existing credits.
Available Actions
- Search: Use the search bar to find specific credits quickly.
- Create Credit: Click this button to add a new credit entry.
- Edit: Click the pencil icon to modify an existing credit.
- Download: Use the download icon to Download the credit list.
-
📌 Note
- All amounts are displayed in **USD** by default. You can change the currency from the dropdown on the top-right of the Billing page.
Create Credits
This guide describes how to create credits in the billing interface, including credit assignment, allocation, review, and update steps.
Navigation
- Navigate to Billing > Budget > Credits tab.
- Click Create Credit to start the credit creation process.
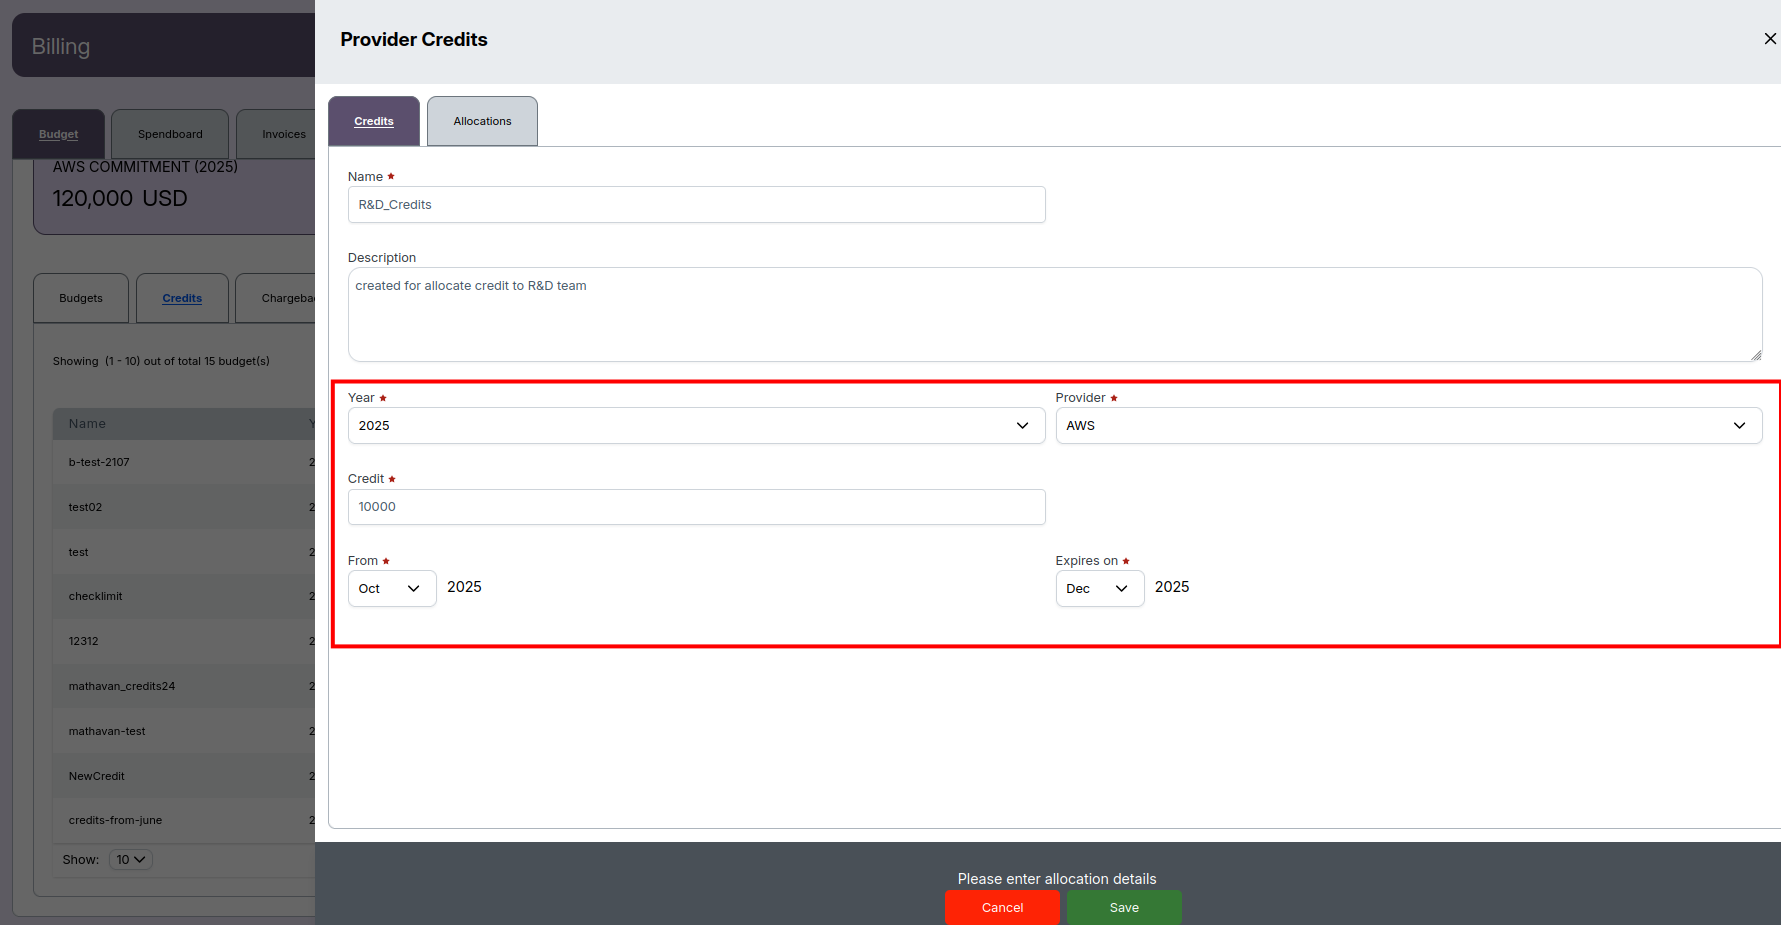
Step 1: Create Credit Details
- Complete the credit creation form:
- Name: e.g.,
R&D_Credits - Description: Brief context (e.g.,
created for allocate credit to R&D team) - Year: e.g.,
2025 - Credit: Enter the amount (e.g.,
10000) - Provider: Choose from dropdown (e.g.,
AWS) - From: Select the start period (e.g.,
Oct 2025) - Expires on: Choose expiry date (e.g.,
Dec 2025)
- Name: e.g.,
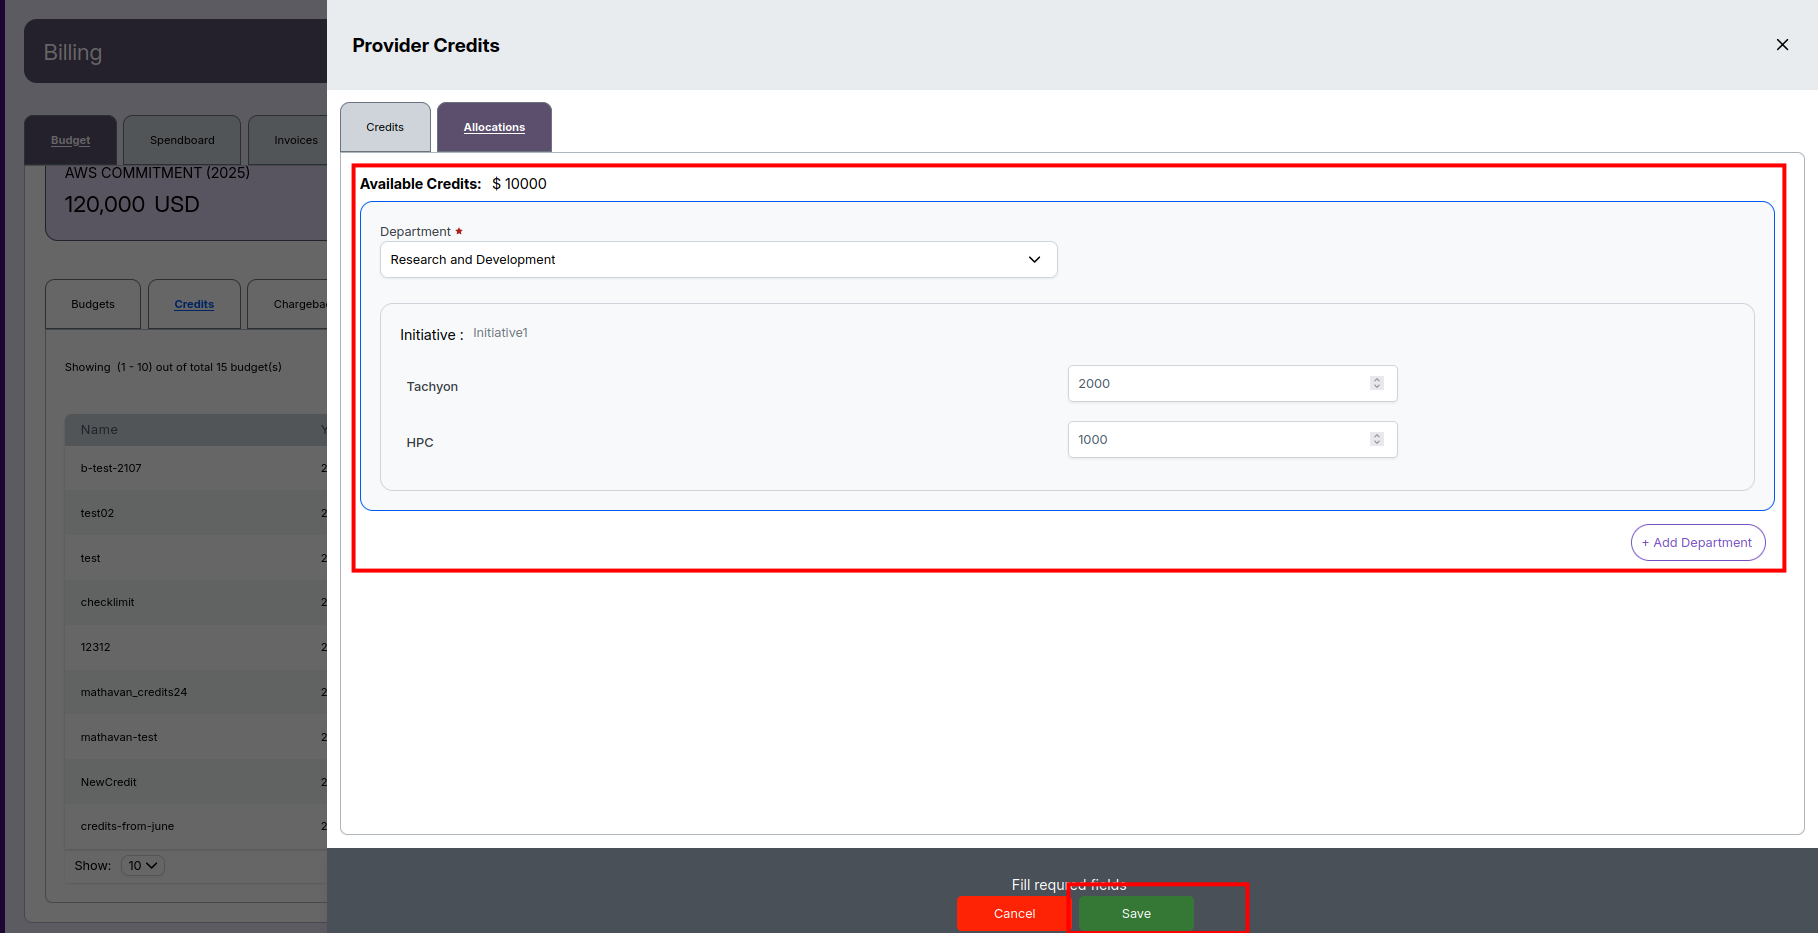
Step 2: Credit Allocation
- After adding basic details, switch to Allocations tab.
- Enter allocation details:
- Department: Select (e.g.,
Research and Development) - Add credit allocations for each initiative (e.g.,
Tachyon: 2000,HPC: 1000) - Use + Add Department to assign credits to additional departments.
- Department: Select (e.g.,
Step 3: Save and Review
- After reviewing entered values, click Save (green button).
- Your new credits will now appear in the credit list.
Step 4: Credits List
- The Credits tab displays all created credits in a table, showing columns like Name, Allocation, Department, Provider, Year, Description, Actions.
Step 5: Edit Provider Credits
- To edit a credit:
- In the list, click the Edit icon for the desired credit.
- The edit form opens with all fields editable.
- Make necessary changes to credit details or allocations.
- Click Update (green button) to save edits.
-
📌 Note
-
Mandatory fields must be completed to save or update credits.
If required fields are missing, validation warnings will prompt for completion.