Billing Overview
The Billing module provides a centralized interface to manage and monitor all financial aspects of your cloud infrastructure, including budgets, credits, commitments, chargebacks, and invoices.
It helps administrators and department heads maintain visibility into spending, allocate budgets effectively, and ensure cost recovery through automated chargeback and invoicing.
Navigation Path
HPC → Billing → Overview
Key Billing Components
The Billing module includes several tabs that categorize information for easy management:
| Tab | Description |
|---|---|
| Budget | Define, view, and manage cloud budgets for each department. |
| Credits | Track and manage available cloud provider credits and their validity. |
| Chargeback | Configure chargeback settings and view or download generated invoices. |
| Invoices | View or download generated invoices. |
| Spendboard | Visualize spending patterns, commitments, and forecasts across departments. |
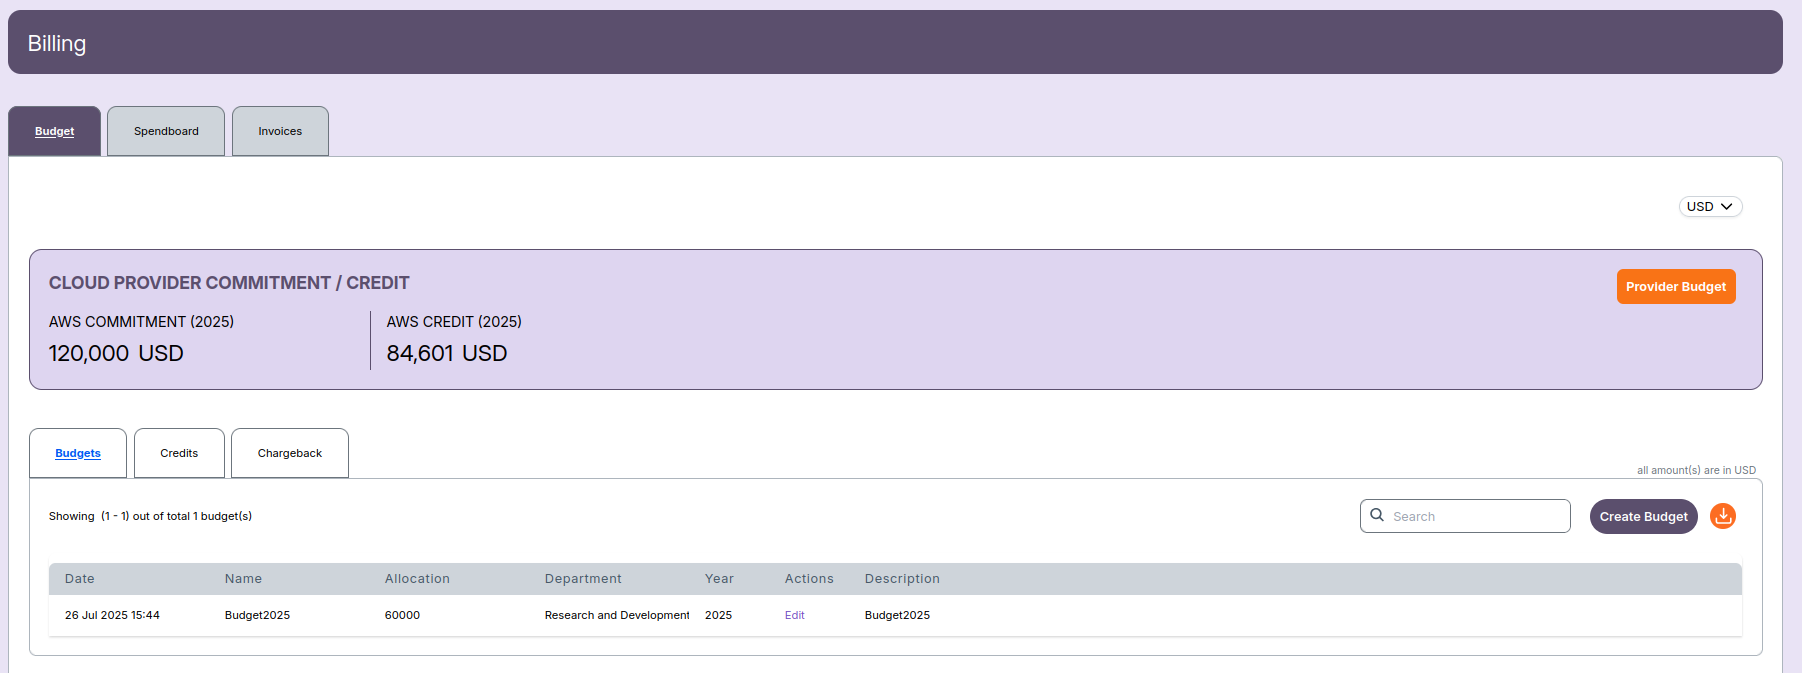
1. Budget Management
The Budget tab allows you to define and track department-wise budgets and cloud provider commitments.
- View total AWS Commitment and Credit for each year.
- Create or edit budgets and assign them to departments.
- Use the Provider Budget button to update yearly commitments or credits.
- Filter, search, or export the budget list.
➡️ To learn how to create or manage budgets, see:
Billing – Budget
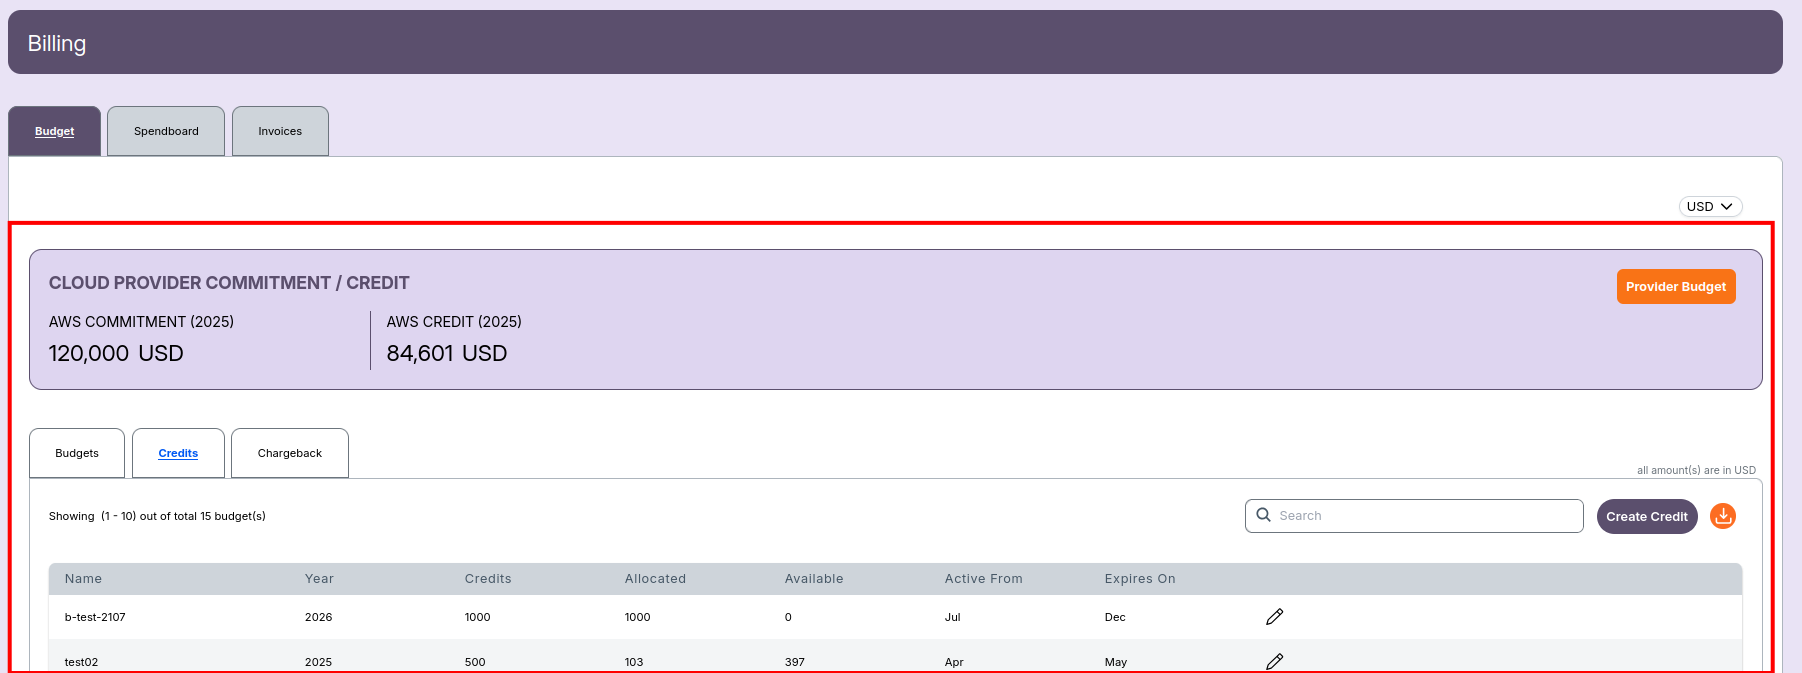
2. Managing Cloud Credits
The Credits tab provides a structured view of all available cloud provider credits.
- Track credit usage, allocation, and remaining balance.
- View activation and expiry periods for each credit.
- Edit existing credits or add new ones.
- Export the list for auditing or reporting.
➡️ To learn more about managing credits, see:
Billing – Credits
3. Chargeback and Invoice Automation
The Chargeback and Invoices tabs automate cost-sharing across departments and ensure transparent cost tracking.
- Chargeback: Define billing logic based on Cost Only or Cost + Margin.
- Configure margin percentage and schedule automatic invoice generation.
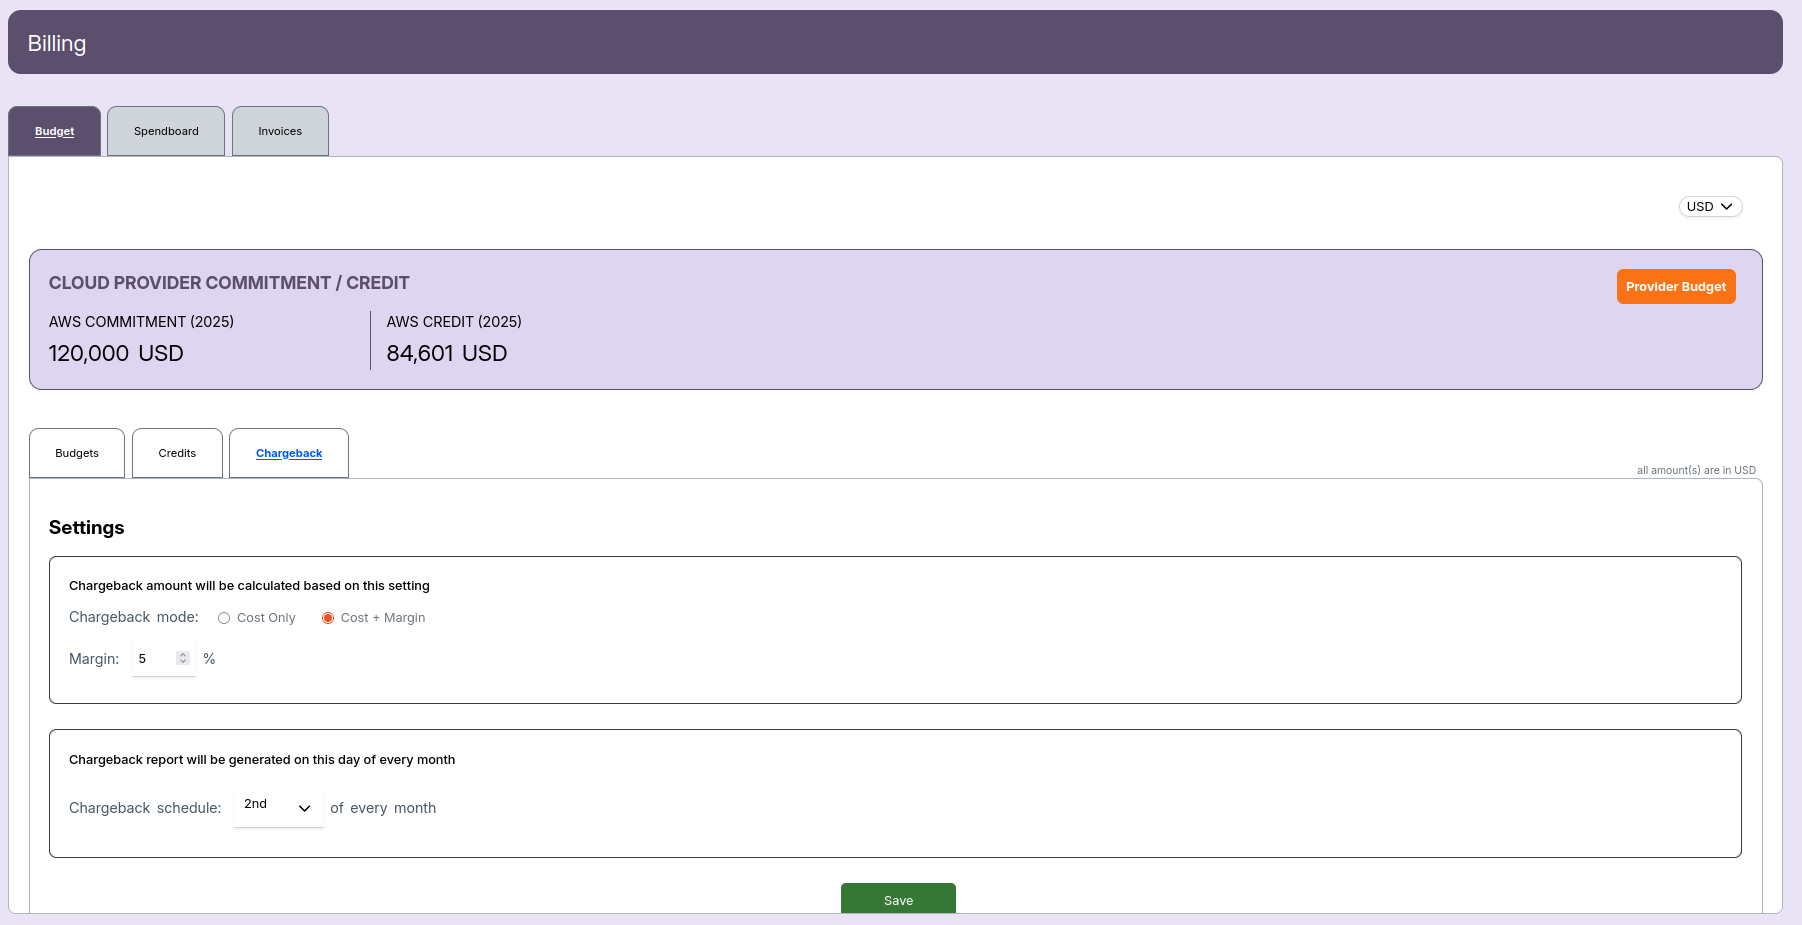
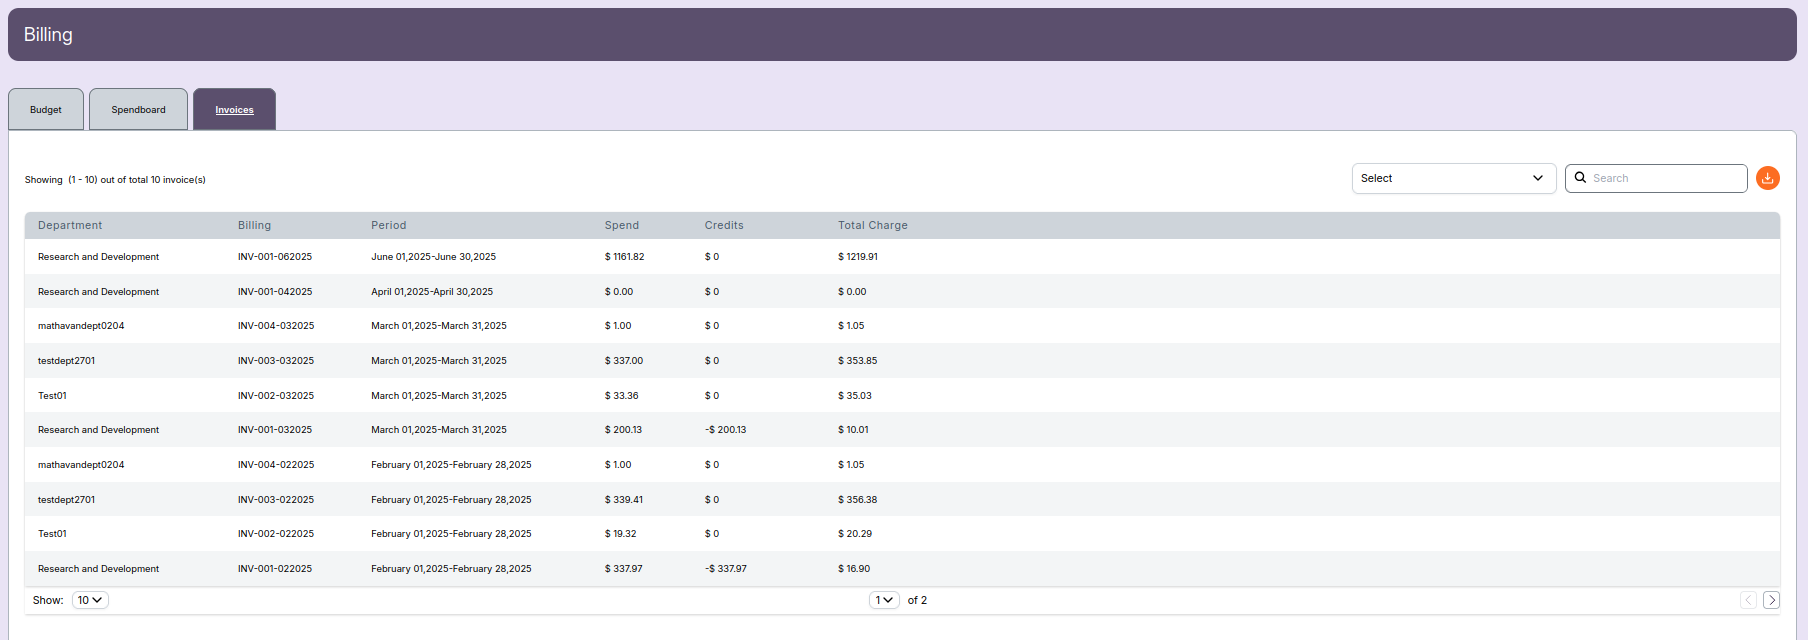
- Invoices: Automatically generated based on the defined chargeback schedule (typically 1st–5th of every month).
- View and download invoices in PDF format.
➡️ For detailed setup and automation process, see:
Billing – Chargeback And Billing – Invoices
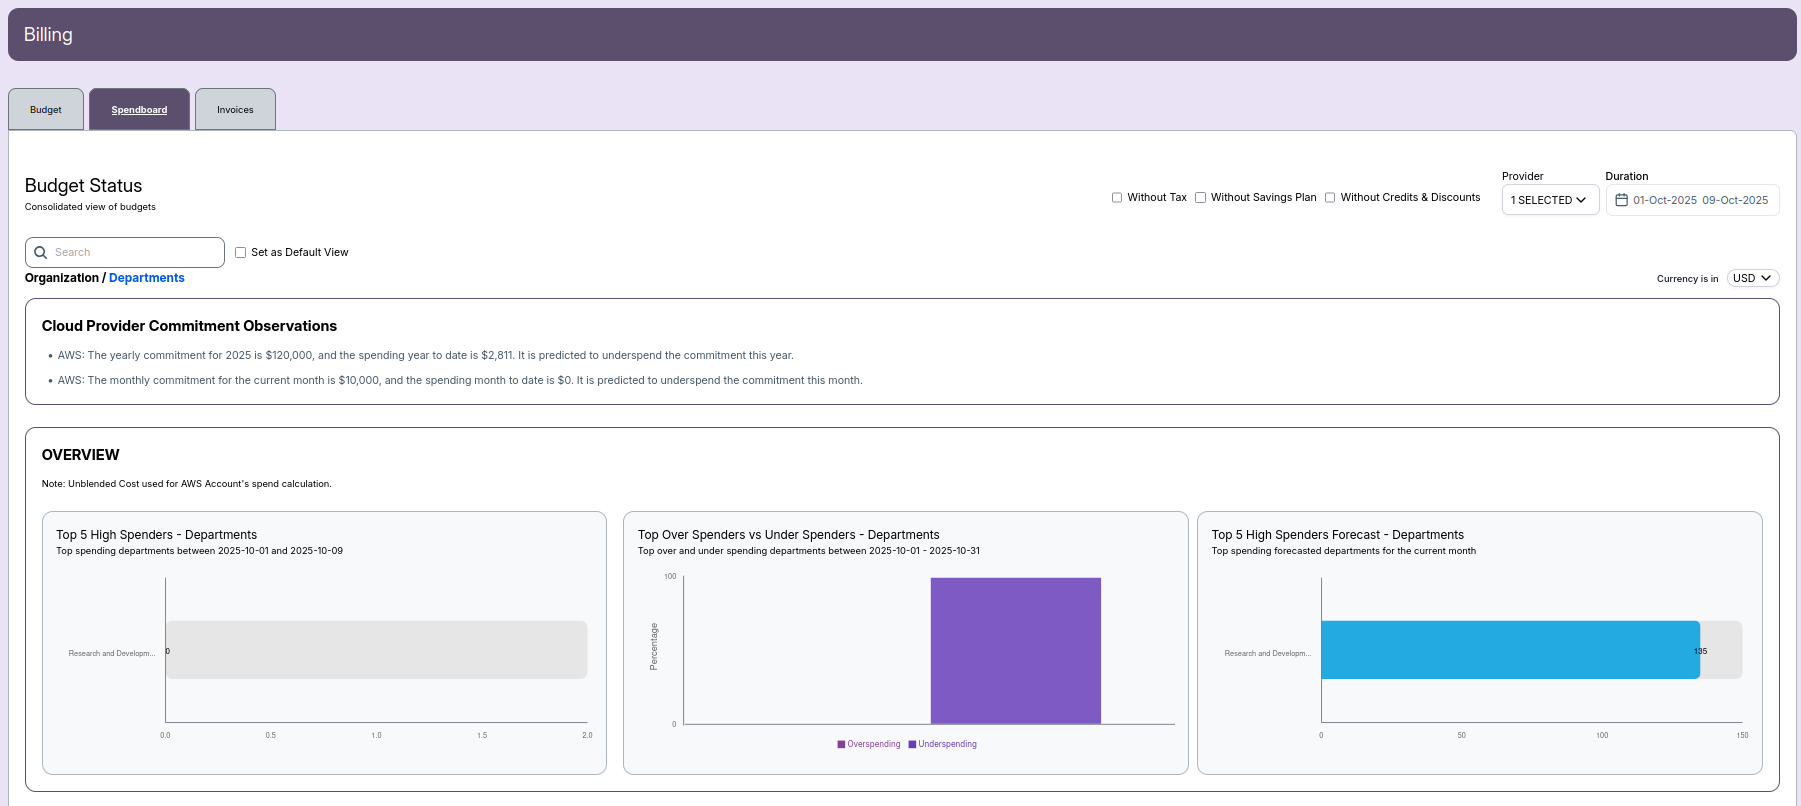
4. Spendboard Insights
The Spendboard tab provides real-time visualization of cloud spending trends.
- View initiative-wise and department-wise spending through charts and graphs.
- Compare Monthly Spend vs Commitment.
- Review YTD (Year-to-Date) and MTD (Month-to-Date) summaries.
- Identify Top 5 High Spenders, over/under-spending trends, and spending forecasts.
 ➡️ For detailed insights and analytics, see:
Billing – Spendboard
5. Cloud Provider Commitment and Credit Summary
At the top of all Billing screens, a summary section titled CLOUD PROVIDER COMMITMENT / CREDIT is displayed.
It provides a quick overview of yearly financial allocations:
| Field | Description |
|---|---|
| AWS Commitment (YYYY) | Total committed budget for AWS for the selected year. |
| AWS Credit (YYYY) | Total AWS credits available for that year. |
| Allocated | Portion of the commitment or credit already used. |
| Available | Remaining amount after allocation. |
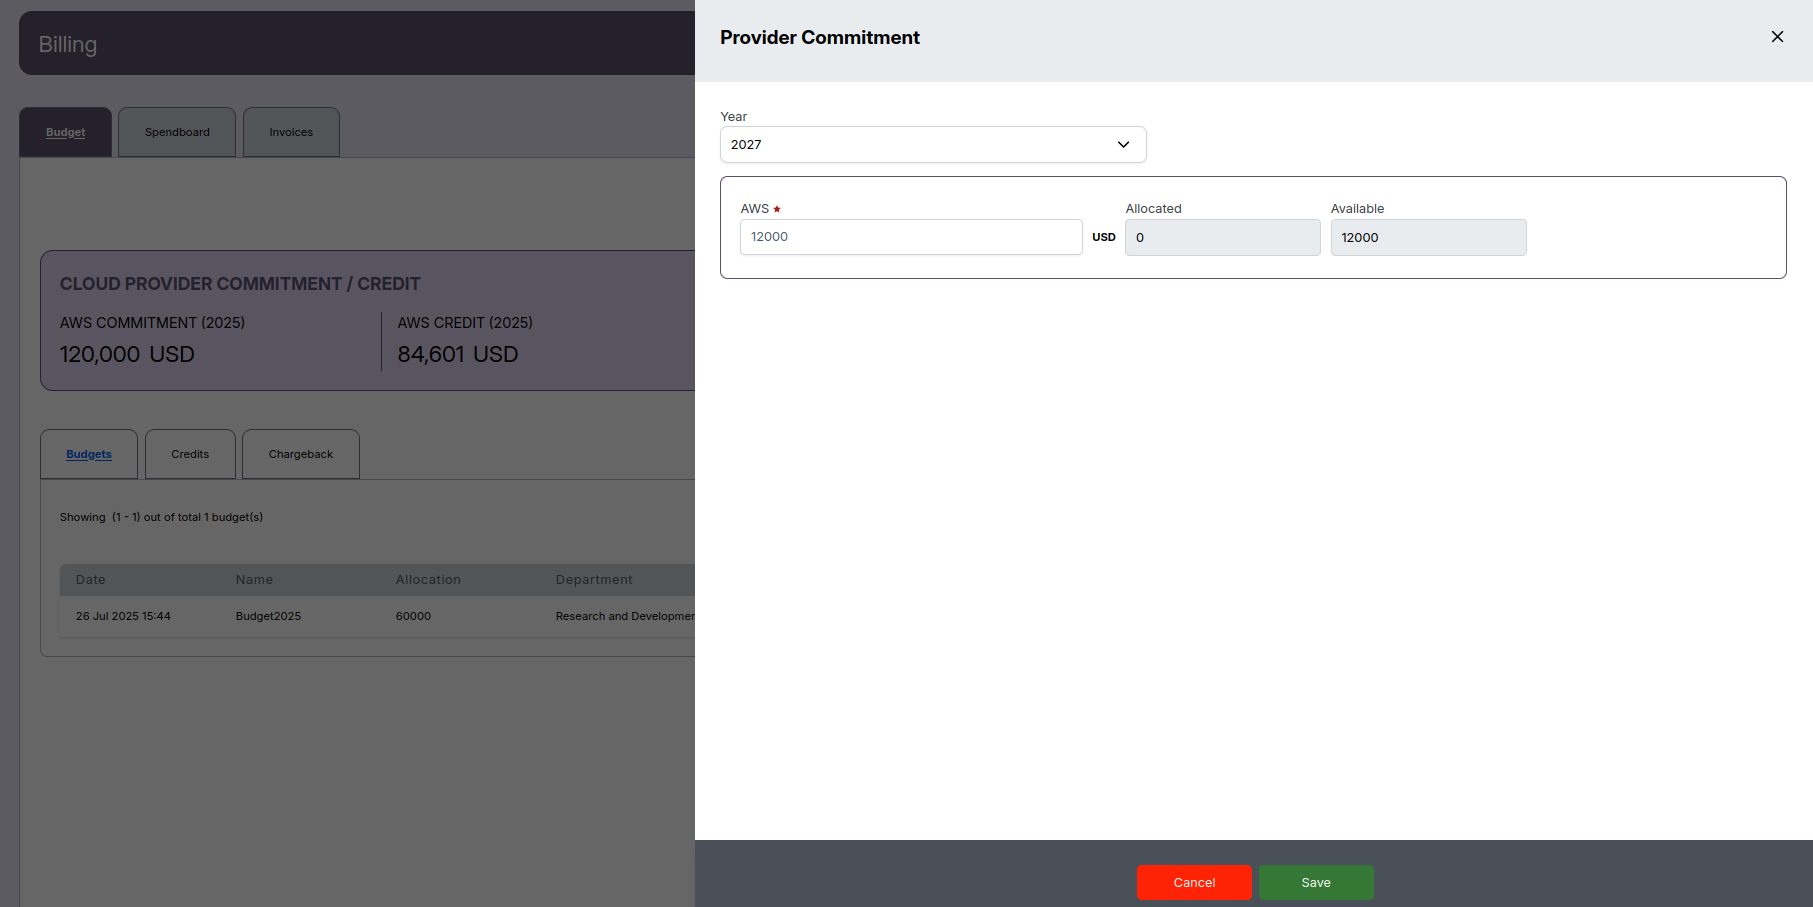
To modify these details, click Provider Budget.
6. Automation and Scheduling
The Billing module automates several financial workflows:
- Chargeback Schedule – Defines when cost reports and invoices are generated.
Example: 1st–5th of every month. - Invoice Delivery – Automatically sends invoices to the Department Manager.
- Currency Management – All values are displayed in USD by default, but you can change the currency using the top-right dropdown.
7. Key Benefits
- Centralized management of budgets, credits, and commitments.
- Automated cost recovery and invoice generation.
- Transparent tracking of department-wise spending.
- Visual analytics for real-time decision-making.
- Supports forecasting and variance analysis.
Related Links
- Always check that your Chargeback schedule is configured properly — invoice generation depends on it.
- Use the currency selector (top-right) to switch from USD if needed.
- Use internal links between pages to help users jump to related topics (as shown above).
-
☑️ Master Entry Point
-
That’s your master entry point into the Billing documentation.
From here, readers can branch off to the detailed feature pages, maintaining a Camunda-like “guides” navigation experience.