Batch Jobs
The Batch module allows you to view, monitor, and manage all batch jobs in the system. You can also re-run, cancel, and view detailed information about each job.
Viewing Batch Jobs
- Navigate to the Batch menu from the top navigation bar.
- The Batch Job List page will display all available batch jobs with the following columns:
- Name – The name of the batch job.
- Status – Current status (e.g., COMPLETED, RUNNING, FAILED).
- Cluster – The cluster where the job ran.
- User – The user who created the job.
- Elapsed Time – The total execution time of the job.
- Start Time – The job start time.
- End Time – The job end time.
- Action – A menu with available actions for the selected job.

Batch Job Actions
From the Action menu (three-dot button) for each job, you can:
- Details – View full batch job details.
- Re-run – Clone the batch job to create a new one with the same configuration.
- Cancel – Stop a running batch job at any point in time.

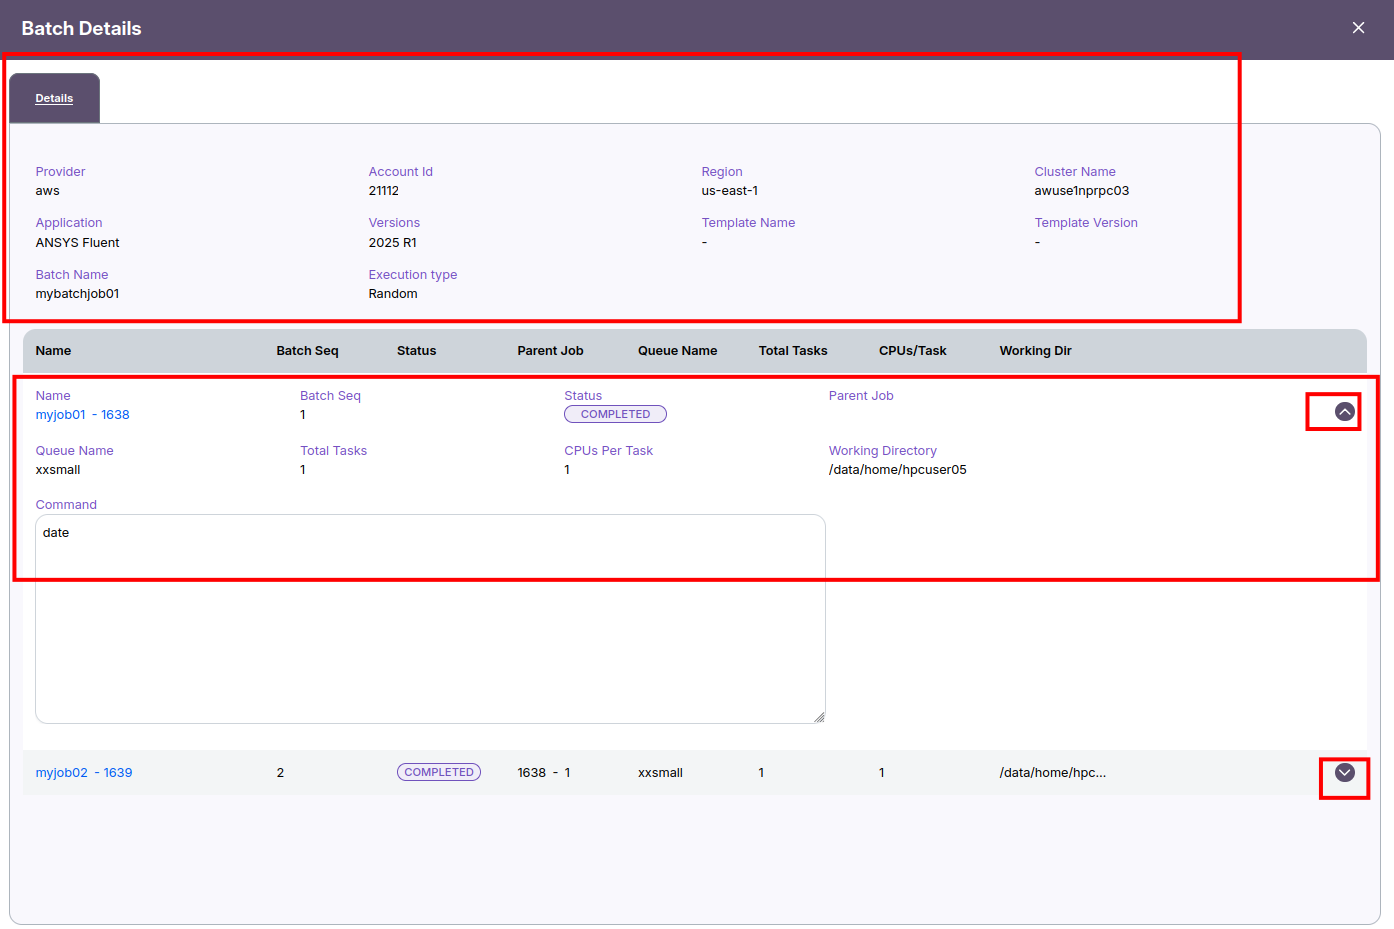
Viewing Batch Job Details
- Click Details from the Action menu.
- The Batch Details window will open, showing:
- Provider, Account ID, Region, Cluster Name
- Application and Version
- Batch Name and Execution Type
-
Template Name and Version (if applicable)
-
Below this section, you will see the list of jobs in the batch with:
- Name
- Batch Sequence
- Status
- Parent Job
- Queue Name
- Total Tasks
- CPUs per Task
- Working Directory
-
Command
-
To view additional job parameters, click the down arrow next to the job. This will expand the row and show detailed parameters.
- Click the up arrow to collapse the details.
Re-running a Batch Job
- From the Action menu, select Re-run.
- The system will open the job creation form pre-filled with all parameters from the original batch job.
- You can modify any parameter as needed before submitting the new job.
Canceling a Batch Job
- From the Action menu, select Cancel.
- The batch job will stop immediately, regardless of its current stage.
Creating a Batch Job
The Job module allows you to create and configure multiple jobs as part of a batch execution. You can run these jobs either in sequence or independently.
Steps to Create a Batch Job
Navigate to the Job Module
Open the Create Job form.
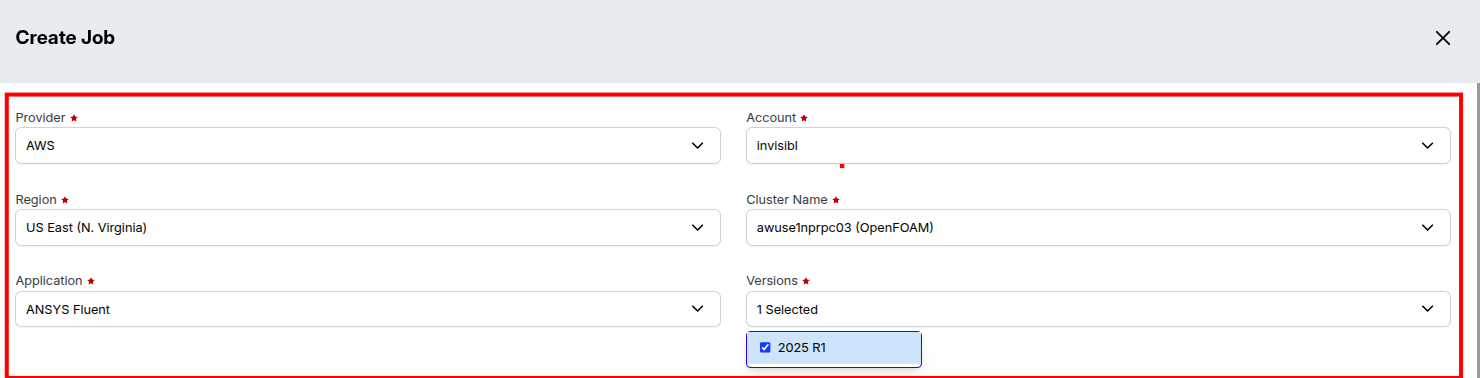
Fill in General Job Details
1. Provider: Select your cloud provider (e.g., AWS)
2. Account: Choose the account where the job will run
3. Region: Select the desired region
4. Cluster Name: Pick the target cluster
5. Application: Choose the application to run
6. Version: Select the version of the application
Select Batch Job Option
1. Choose Batch Job instead of Single Job
2. Enter a Batch Name

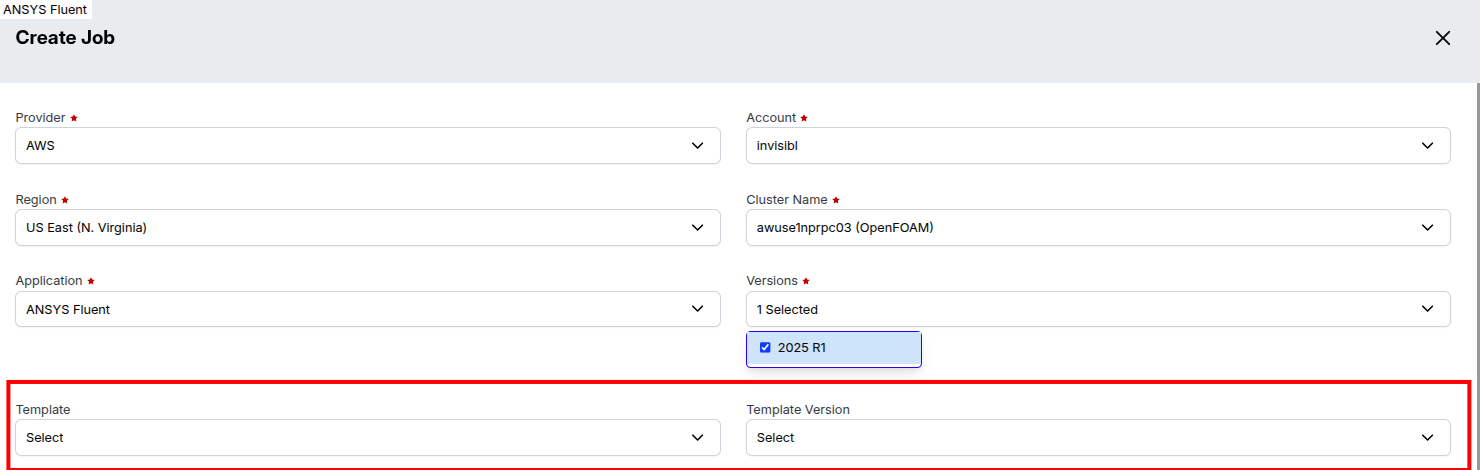
Using a Predefined Template (Optional)
1. You can also create a batch job by selecting a predefined Template and Template Version.
2. This will automatically pre-fill all the necessary job parameters, significantly reducing creation time.
3. You can still modify any of the pre-filled parameters as needed before submitting.
4. This option also allows you to create multiple batch jobs quickly with consistent settings.
Execute in Sequence (Optional)
1. Enabled: Jobs will execute one after another in the order listed.
2. Disabled: Jobs will execute independently, without waiting for the previous job to complete.

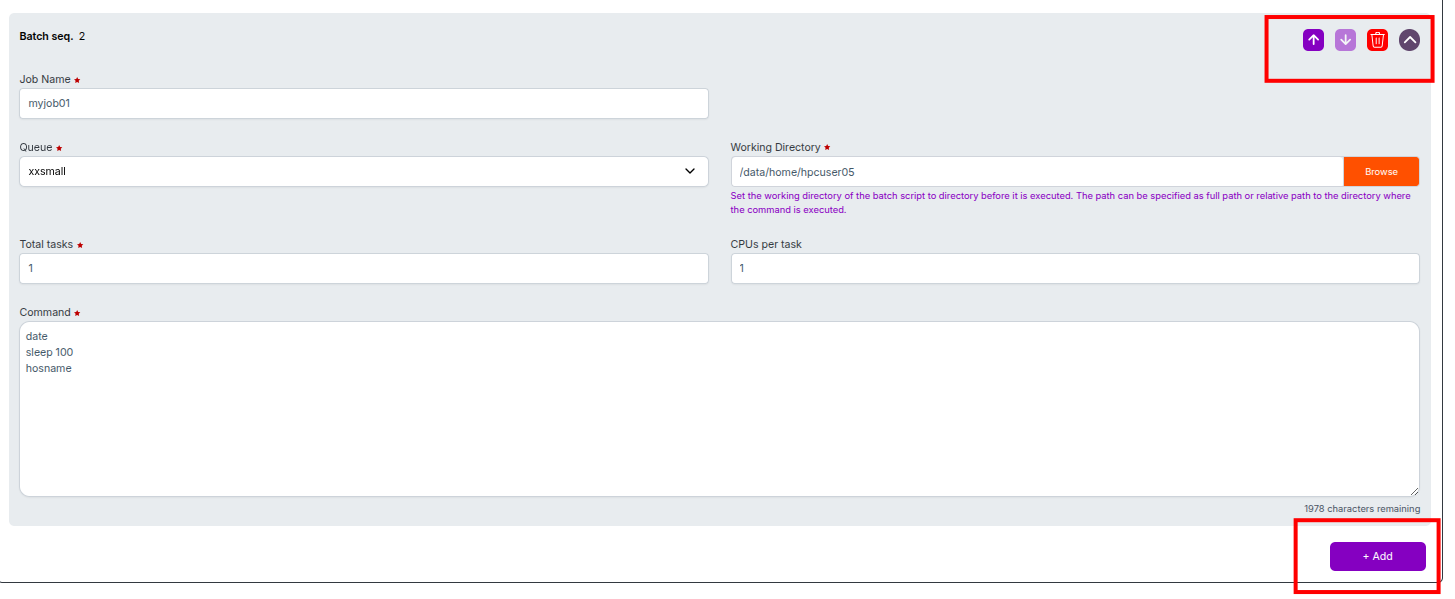
Configure Each Job in the Batch
For each job:
1. Job Name: Provide a unique name
2. Queue: Select the job queue
3. Total Tasks: Enter the number of tasks to run
4. Working Directory: Specify the working directory path
5. CPUs per Task: Enter the number of CPUs per task
6. Command: Enter the script or commands to execute
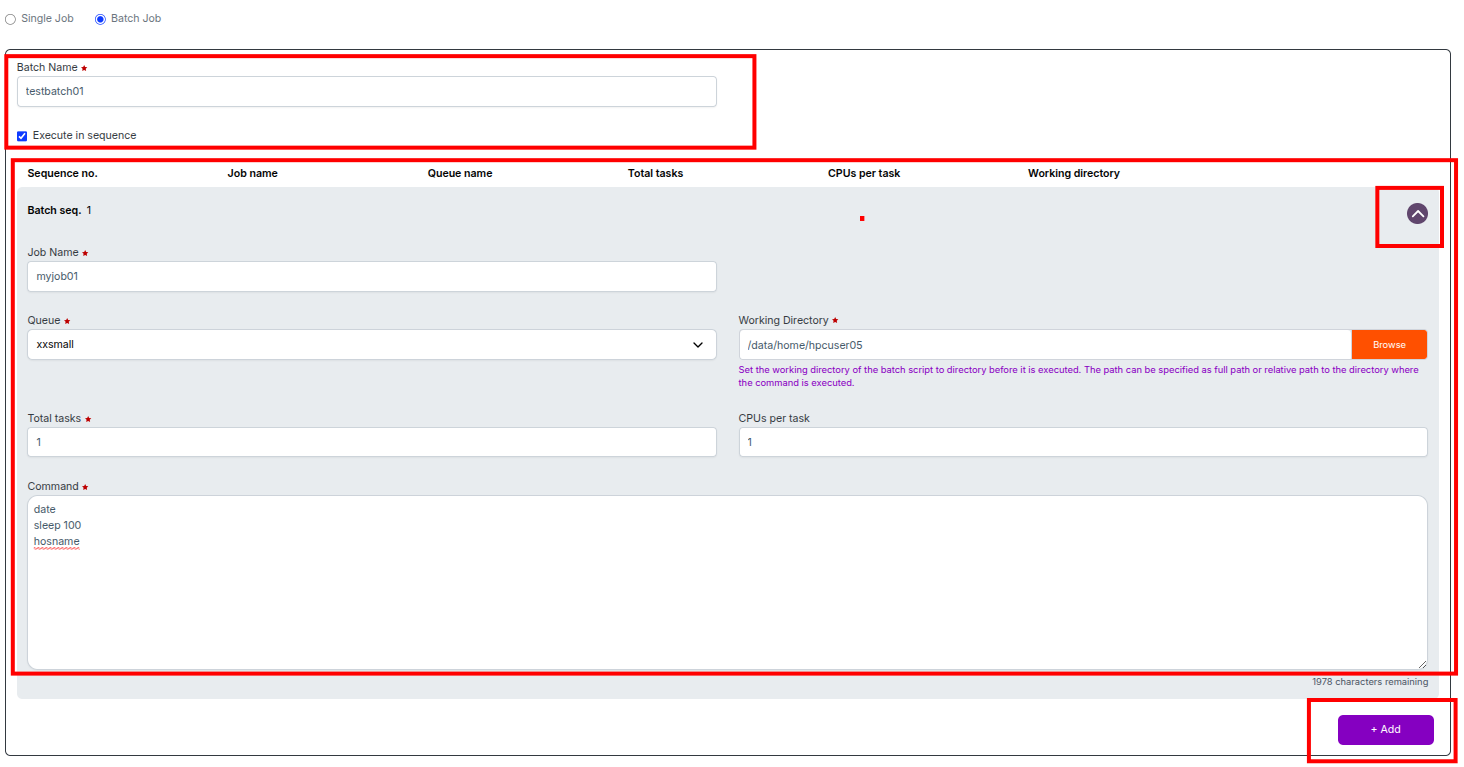
Adding More Jobs
1. Click Add to create a new job within the batch
2. The new job will be cloned from the previously filled job (Job 01), allowing you to edit only the fields you need to change
3. You can repeat this step to add any number of jobs as required
Run the Batch Job
1. Choose to run the job Immediately or At a specific time
2. Click Continue to proceed and submit the batch job

- After clicking Continue, the system will display the budget details for the job, including:
- Budget Type (e.g., Queue)
- Total Budget
- Used Budget
- Available Budget
- Estimated Job Cost
- Total Licenses, Used Licenses, and Available Licenses

Review the budget information carefully. Once confirmed, click the Submit button to proceed with running the job.
-
📌 General Notes
- If you encounter any UI issues or have questions about job submissions or status, please contact the Admin for support.