Lifecycle Settings
Lifecycle policies define workstation availability schedules and scheduled termination settings.
This page explains how to review and update an existing workstation lifecycle policy and temporarily disable its scheduling.
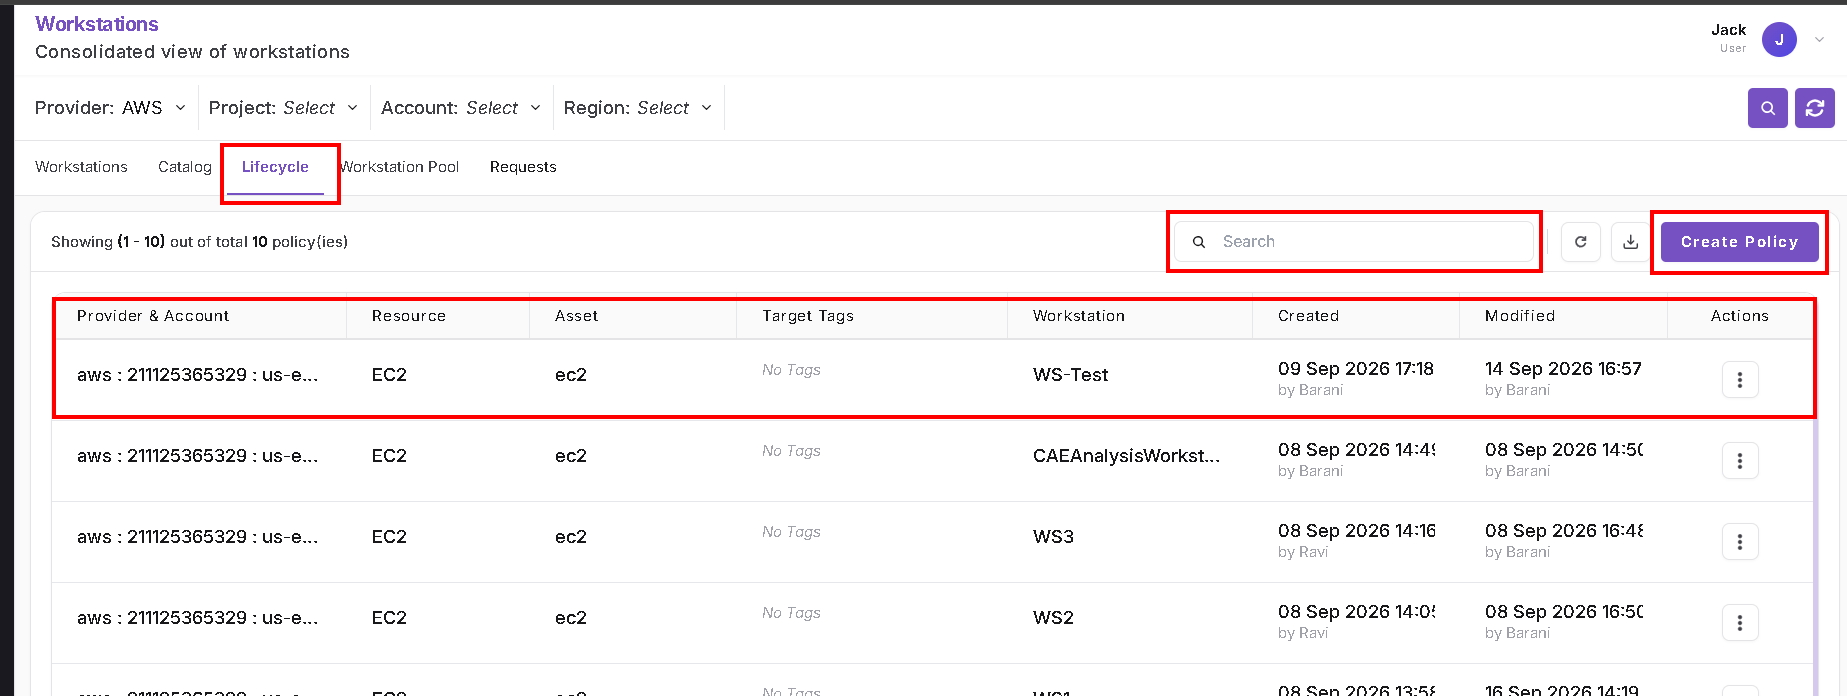
Open Lifecycle Policies
- Open Workstations from the navigation menu.
- Select the Lifecycle tab.
- Locate the policy for the workstation you want to configure. Use the Search field if needed.
The policy list displays:
- Provider & Account
- Resource
- Asset
- Target Tags
- Workstation
- Created
- Modified
- Actions
The page also provides a Create Policy button.
Edit an Existing Policy
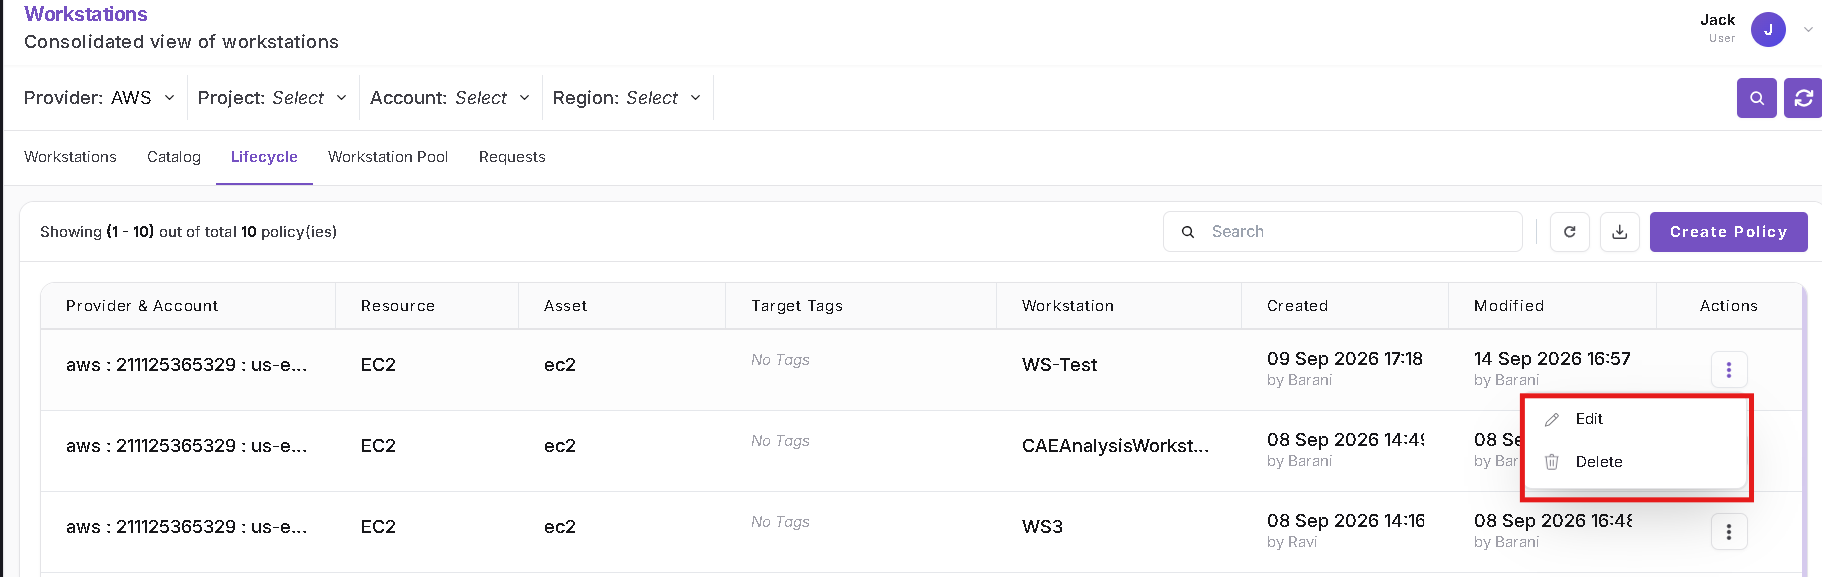
- Locate the required workstation in the policy list.
- Open its three-dot menu in the Actions column.
- Select Edit.
The Edit Lifecycle Policy form opens.
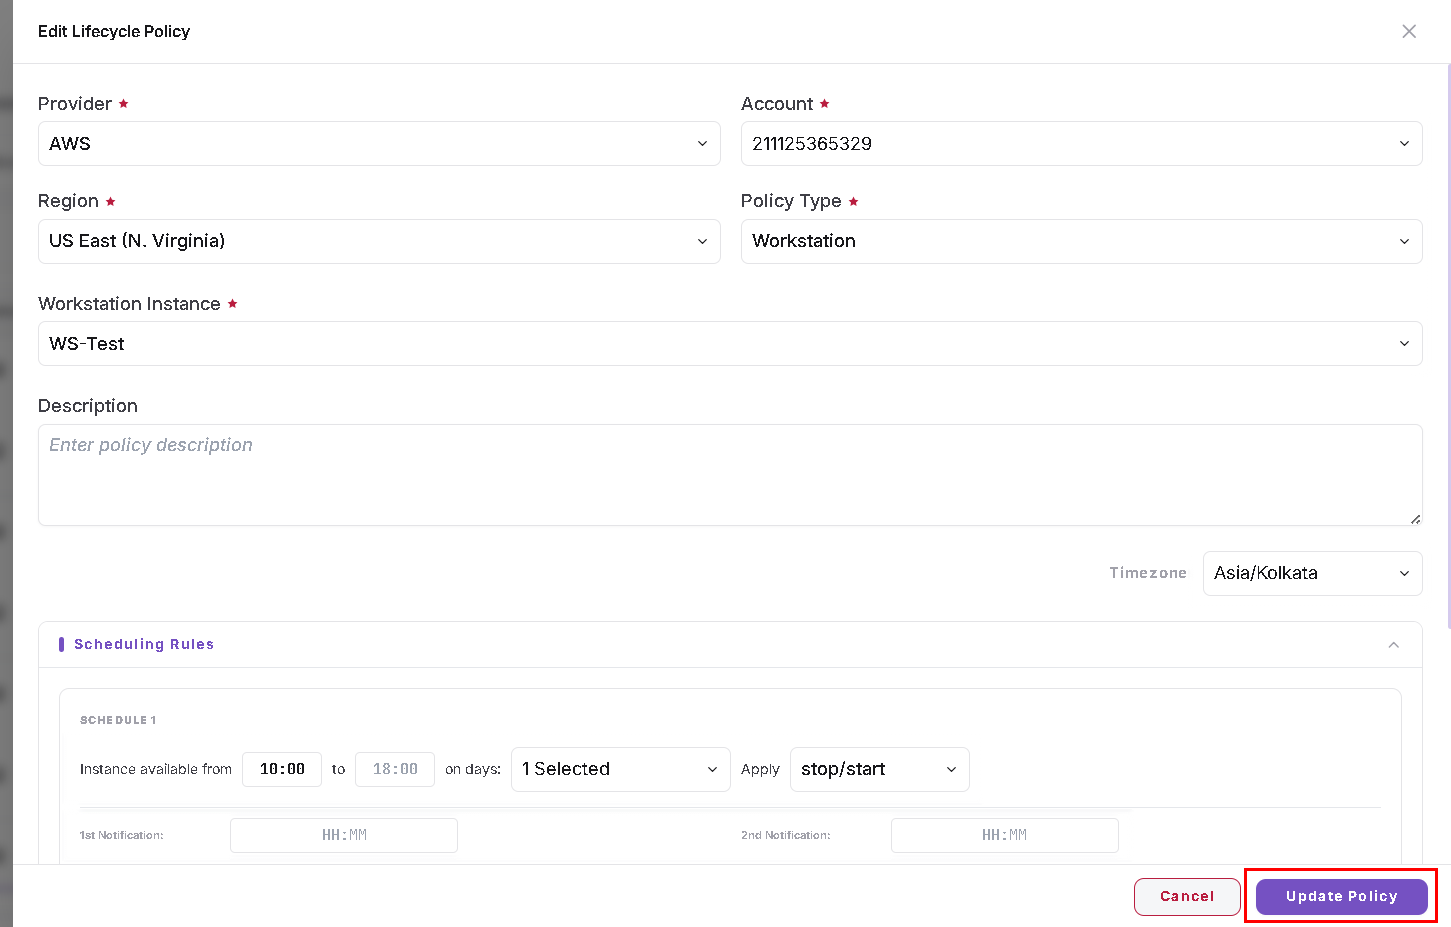
Review the Policy Details
Check the following fields before updating the schedule:
| Field | Description |
|---|---|
| Provider | Cloud provider associated with the policy |
| Account | Cloud account associated with the policy |
| Region | Region containing the workstation |
| Policy Type | The example uses Workstation |
| Workstation Instance | Workstation associated with the policy |
| Description | Description of the policy |
| Timezone | Timezone used for the scheduling settings |
The form marks Provider, Account, Region, Policy Type, and Workstation Instance as required.
Review the Timezone before entering schedule times. The example below uses Asia/Kolkata.
Configure Scheduling Rules
Under Scheduling Rules, review or update the schedule:
- Set the availability start time in Instance available from.
- Set the availability end time in the to field.
- Use on days to select the days on which the schedule applies.
- Review the lifecycle action in Apply. The example shows stop/start.
- Configure 1st Notification and 2nd Notification times as needed, using the displayed HH:MM format.
The times and selections in the screenshot are examples. Choose values appropriate for your workstation's required availability.
Review Idle Protection Thresholds
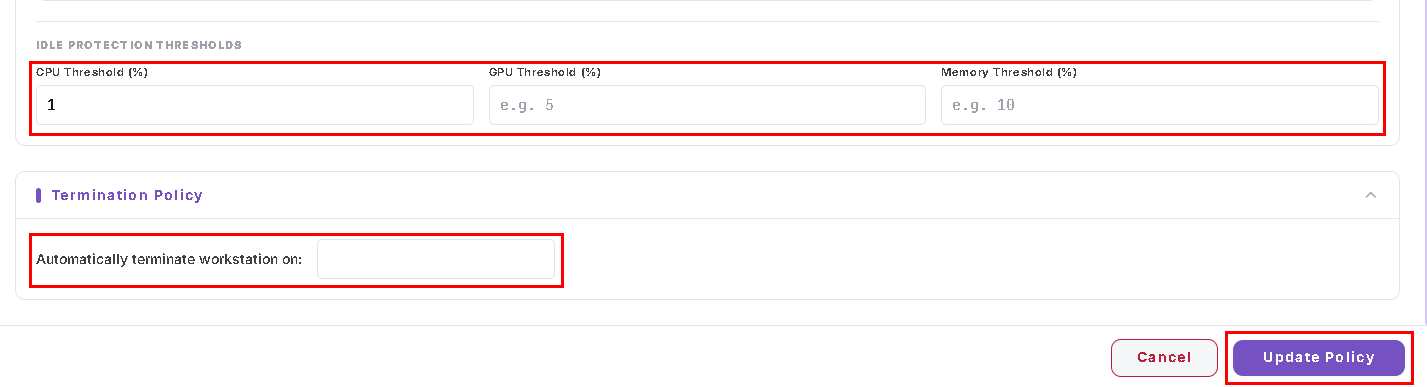
Scroll down to Idle Protection Thresholds.
The form provides these percentage fields:
- CPU Threshold (%)
- GPU Threshold (%)
- Memory Threshold (%)
Review or update the thresholds according to your environment's lifecycle requirements. Contact your administrator if you are unsure which values to use.
Configure Scheduled Termination
Under Termination Policy, use Automatically terminate workstation on when a scheduled termination is required.
Review this setting carefully before saving: it configures termination of the workstation, which is different from a scheduled stop/start.
Save the Policy
- Review the selected workstation, timezone, schedule, notification times, thresholds, and any termination setting.
- Click Update Policy to save your changes.
- Return to the policy list and reopen the policy to verify the saved values.
Click Cancel to leave the form without saving your changes.
General Notes
- Verify that you are updating the intended workstation's policy.
- Review the selected timezone when setting schedule and notification times.
- Screenshot values are examples, not recommended defaults.
- Contact your administrator if a lifecycle update fails or the workstation does not follow the expected schedule.
Temporarily Disable the Lifecycle Policy
You can temporarily disable a workstation's scheduling policy for a specified number of hours.
Open the Workstation Lifecycle Settings
- Open Workstations and select the Workstations tab.
- Locate the required workstation and click Details.
- In the workstation details panel, select Lifecycle.
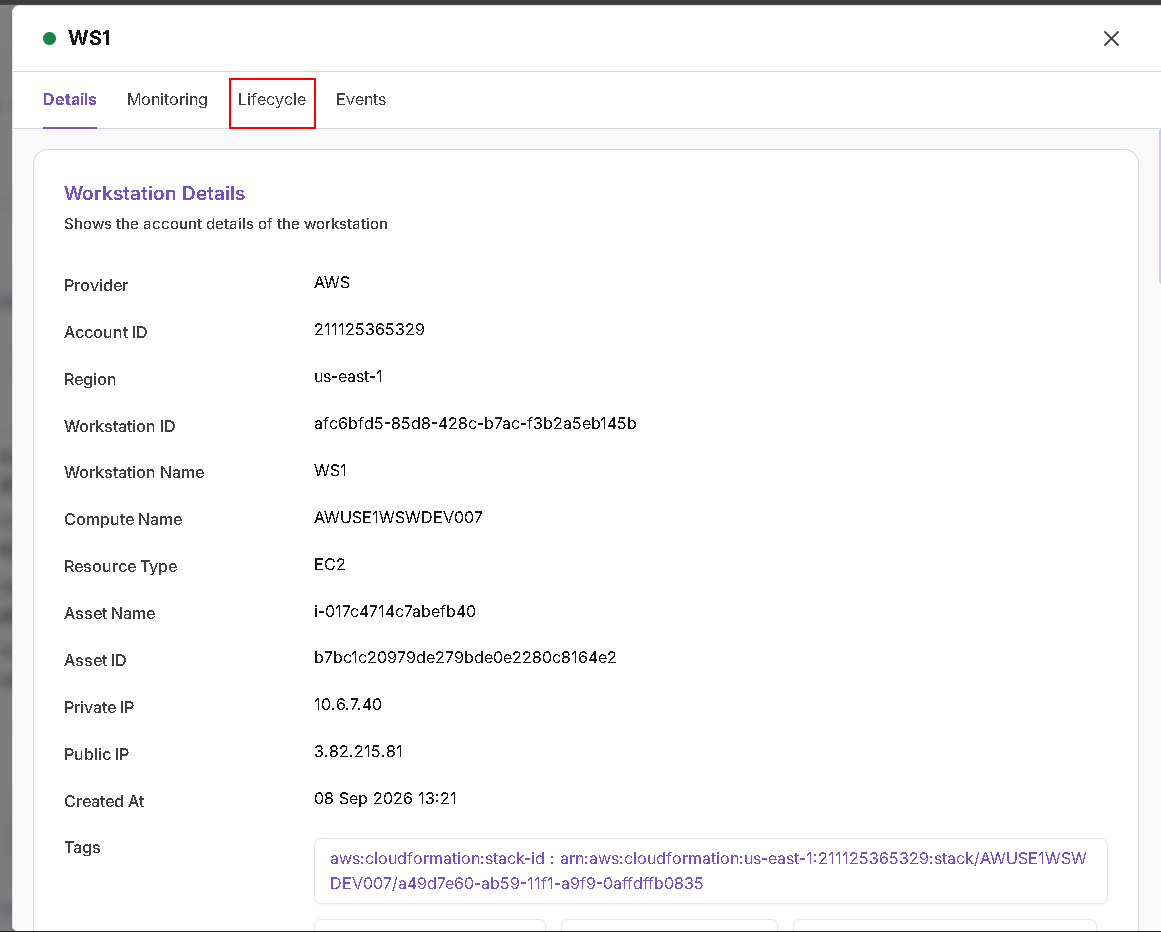
The Lifecycle tab displays the workstation's scheduling rules, timezone, idle protection thresholds, and termination settings.
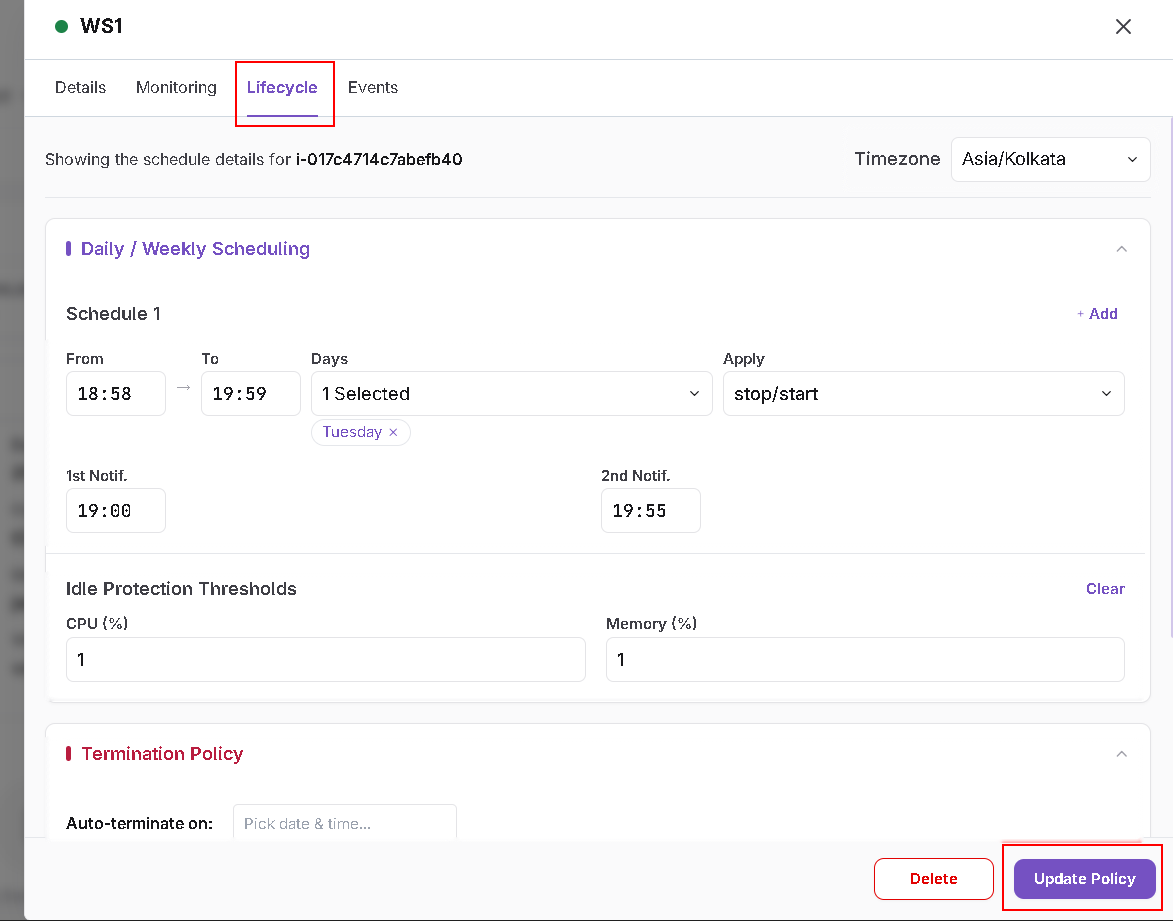
Set the Disable Duration
- Scroll down to Policy Status.
- Turn on Disable Policy.
- Enter the required duration in Disable for the next. The duration is specified in Hrs.
- Review the message showing the date, time, and timezone until which the scheduling policy will be disabled.
- Click Update Policy to save.
- Reopen the settings to verify the saved policy status.
The screenshot below shows an example duration of 1 hour. Choose the duration appropriate to your requirement.
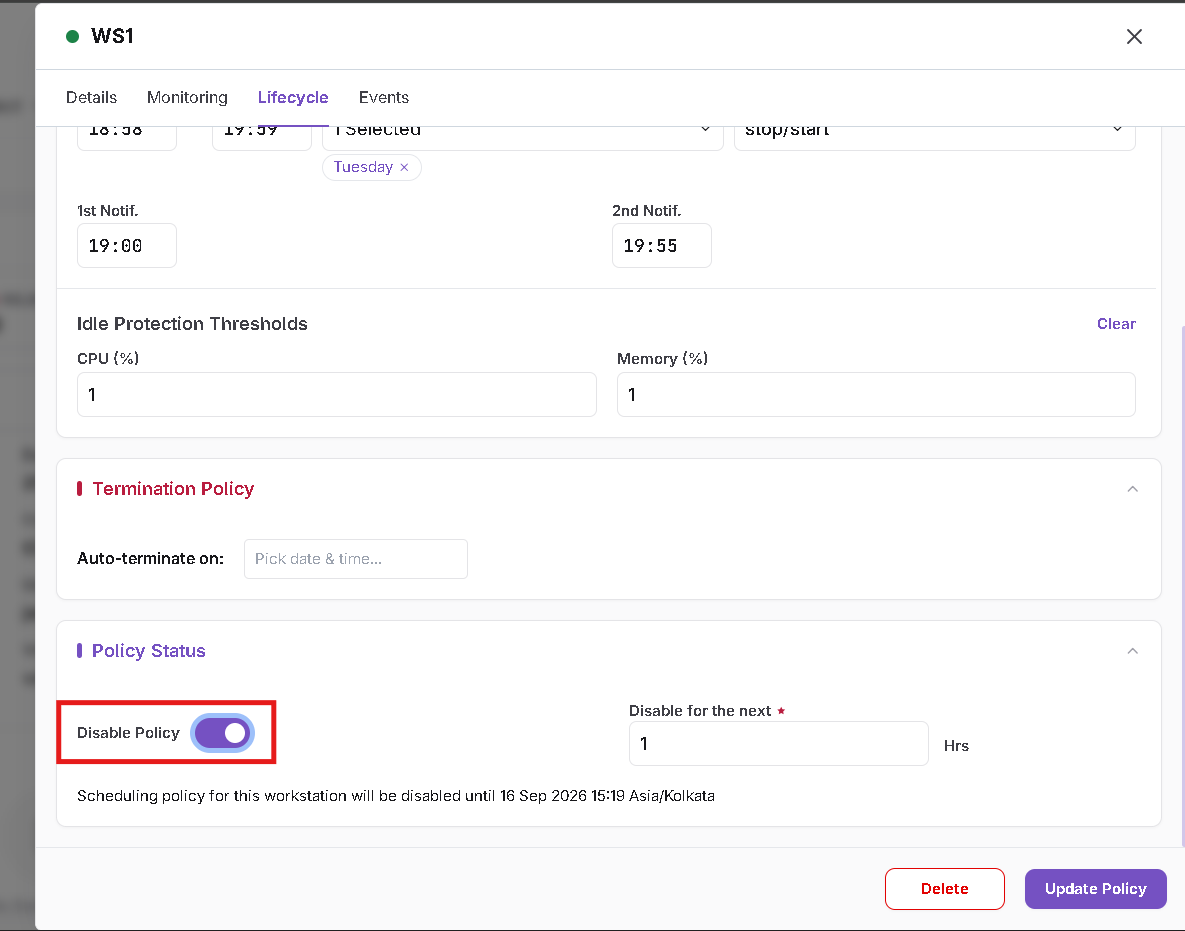
Use Disable Policy for this temporary scheduling change. The separate Delete action is not part of this workflow.