Settings
The Settings page allows administrators to configure organization-level behavior for jobs, workstations, shell access, AI Surrogate availability, notifications, and subscription seats.
Navigate to Admin → Settings. The page contains the General, Notification, and Subscription tabs.
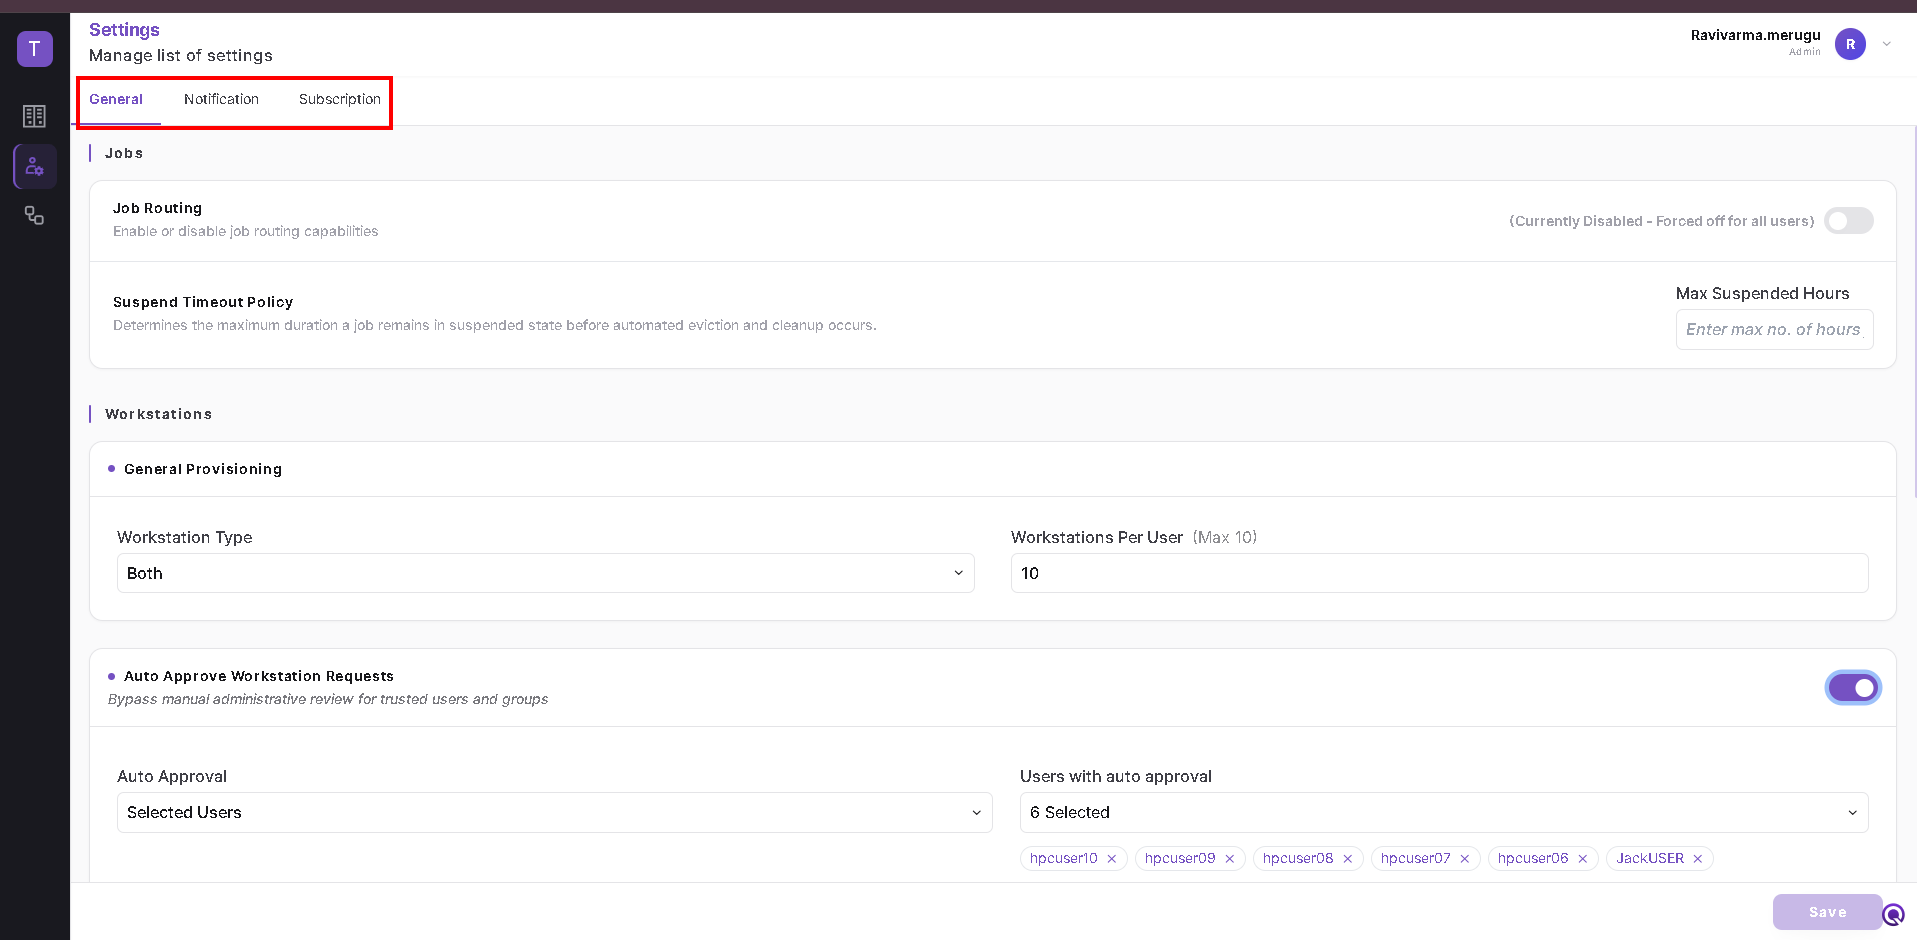
General
The General tab contains settings that control Jobs, Workstations, Data Management & Shell, and AI Surrogate functionality. After changing a setting, click Save to apply the configuration.
Jobs
Job Routing
Use the Job Routing toggle to enable or disable job-routing capabilities for users. When routing is disabled, jobs do not use the configured routing capability.
Note: This setting controls whether Job Routing is available. The complete Job Routing configuration and job-submission workflow is documented separately under the Jobs guide.
Suspend Timeout Policy
Use Max Suspended Hours to define the maximum duration that a job can remain in the suspended state before automated eviction and cleanup occurs.

Workstations
General Provisioning
Under General Provisioning, configure the workstation options available to users:
- Workstation Type – Select the permitted workstation type. The available configuration can include both supported workstation types.
- Workstations Per User – Specify the maximum number of workstations that an individual user can have. The UI supports a maximum of 10.

Auto Approve Workstation Requests
Enable Auto Approve Workstation Requests to bypass manual administrative approval for trusted users or groups.
- Turn on Auto Approve Workstation Requests.
- Select the required Auto Approval scope.
- Select the users or groups that should receive automatic approval.
- Click Save.
When Selected Users is used, the selected users are displayed under Users with auto approval.

Data Management & Shell
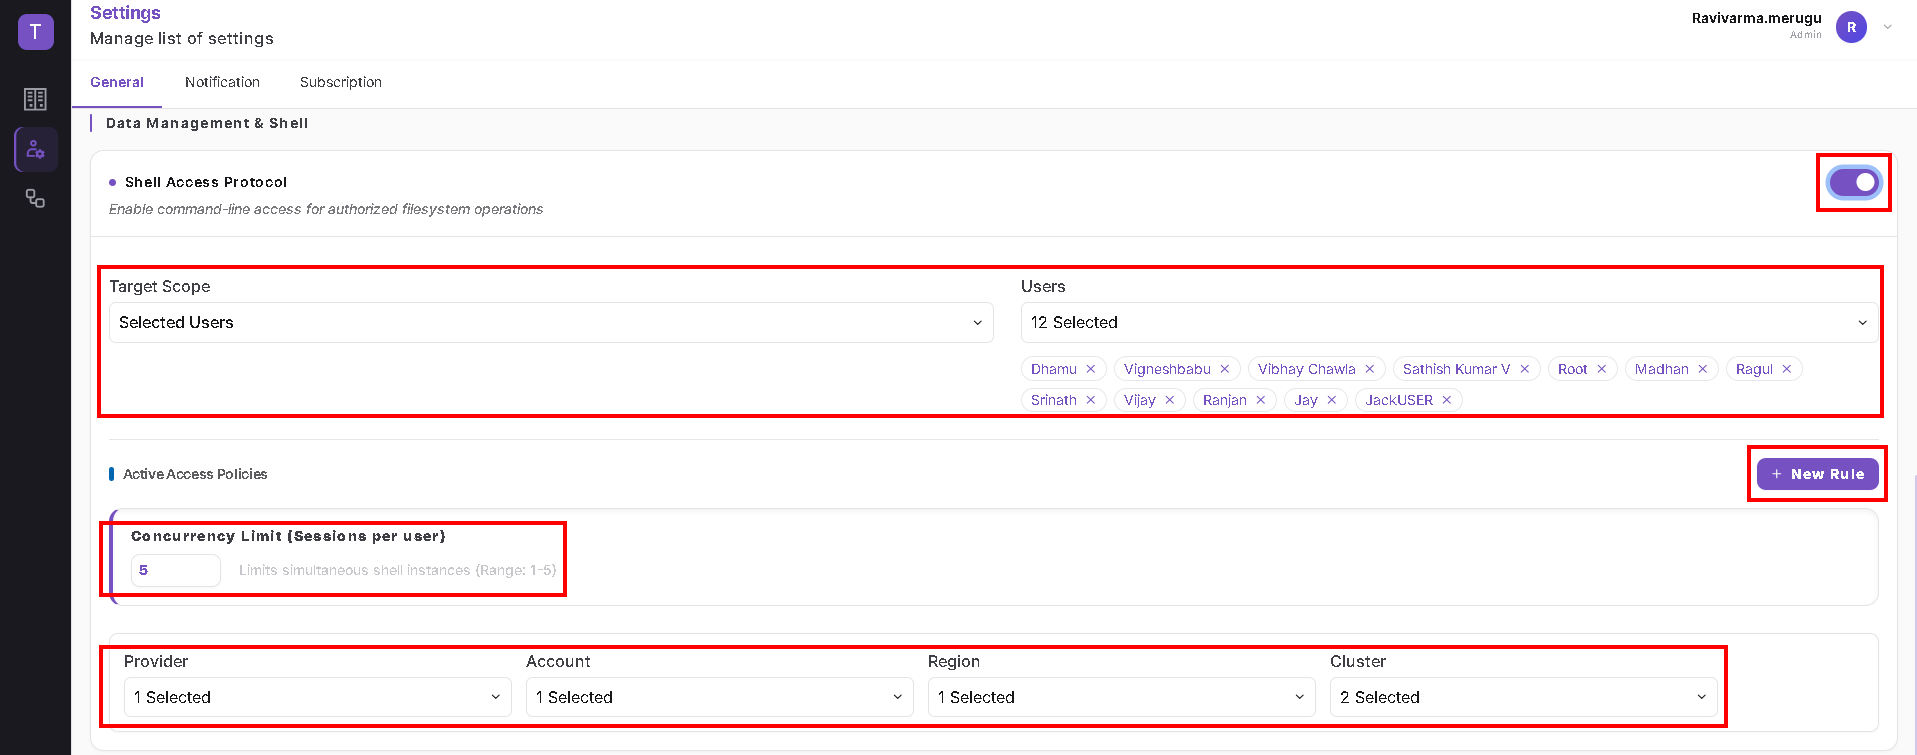
Shell Access Protocol
Enable Shell Access Protocol to allow command-line access for authorized filesystem operations.
Configure the access scope using Target Scope and select the applicable users. Administrators can also define active access policies, including:
- Concurrency Limit (Sessions per user) – Limits the number of simultaneous shell sessions for a user. The UI indicates a supported range of 1–5.
- Provider
- Account
- Region
- Cluster
Use + New Rule when an additional access policy is required, then save the configuration.
AI Surrogate
Use Enable AI Surrogate to control whether AI Surrogate functionality is enabled for the organization. Click Save after changing the setting.

Notification
The Notification tab manages notification destinations and templates. It contains Destination and Template sub-tabs.
Destination
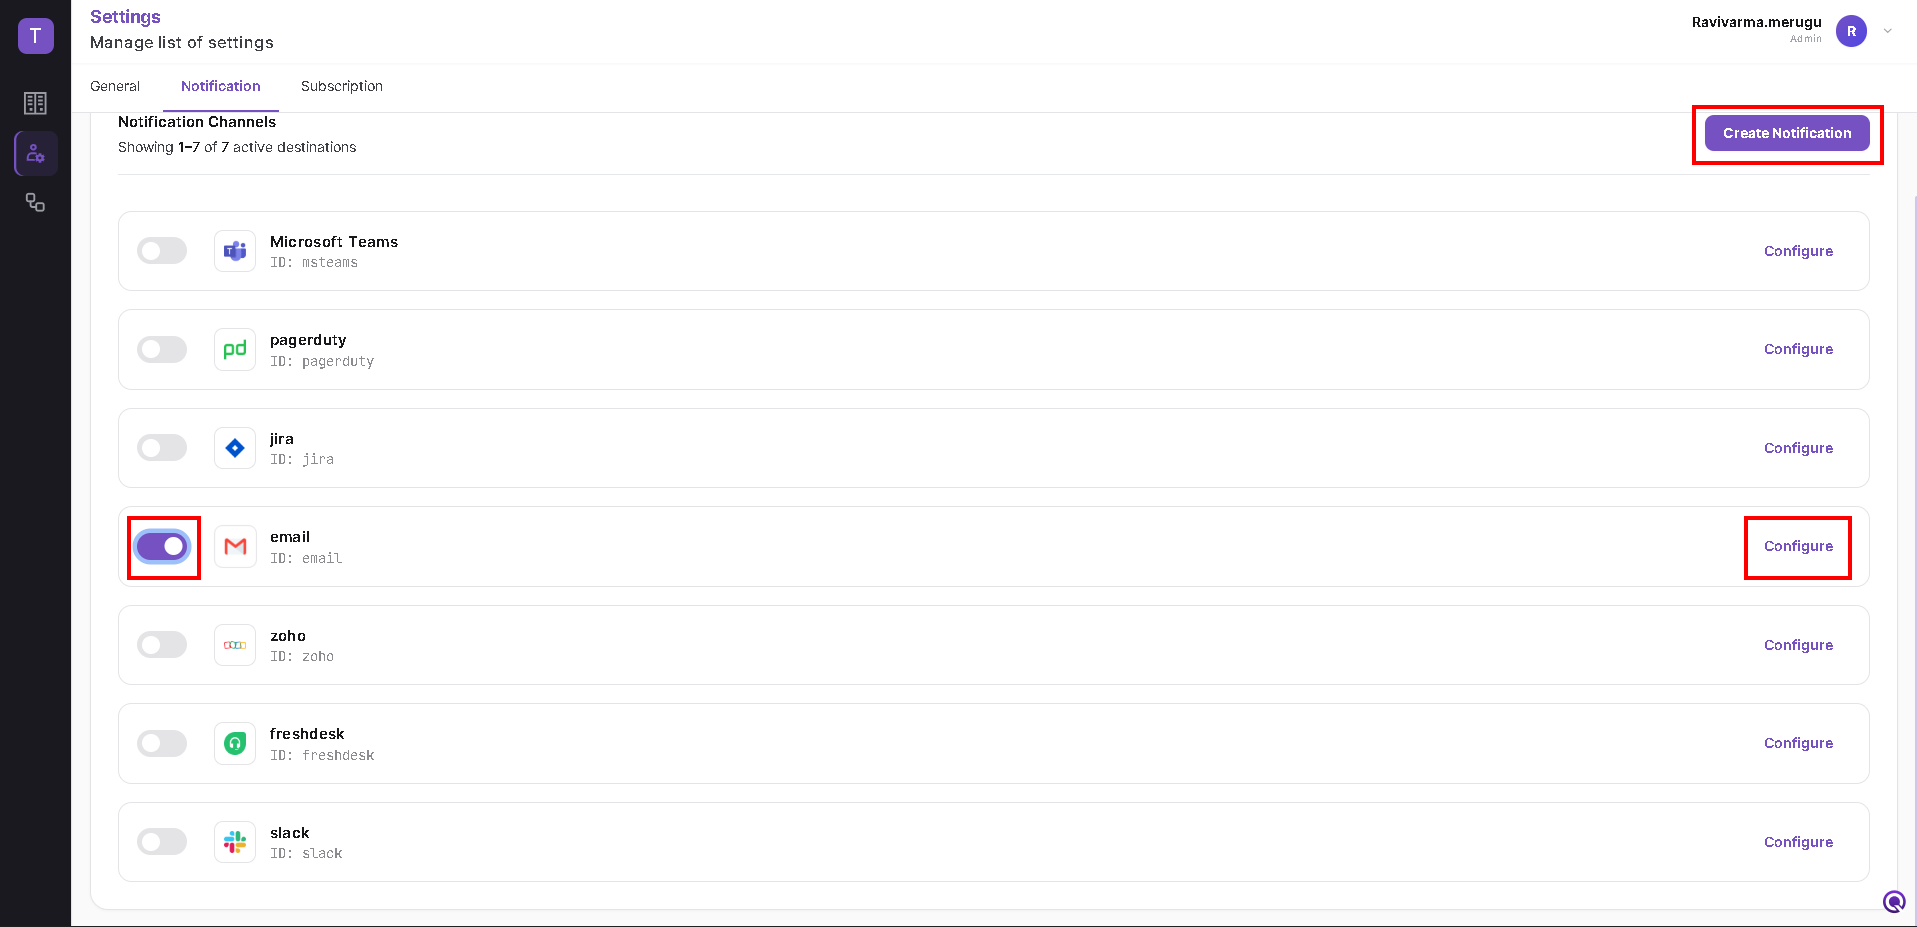
The Destination page lists the configured notification channels. The current UI supports channels such as Microsoft Teams, PagerDuty, Jira, Email, Zoho, Freshdesk, and Slack.
Each destination has an enable/disable toggle and a Configure action. Use Create Notification to add a notification destination when required.
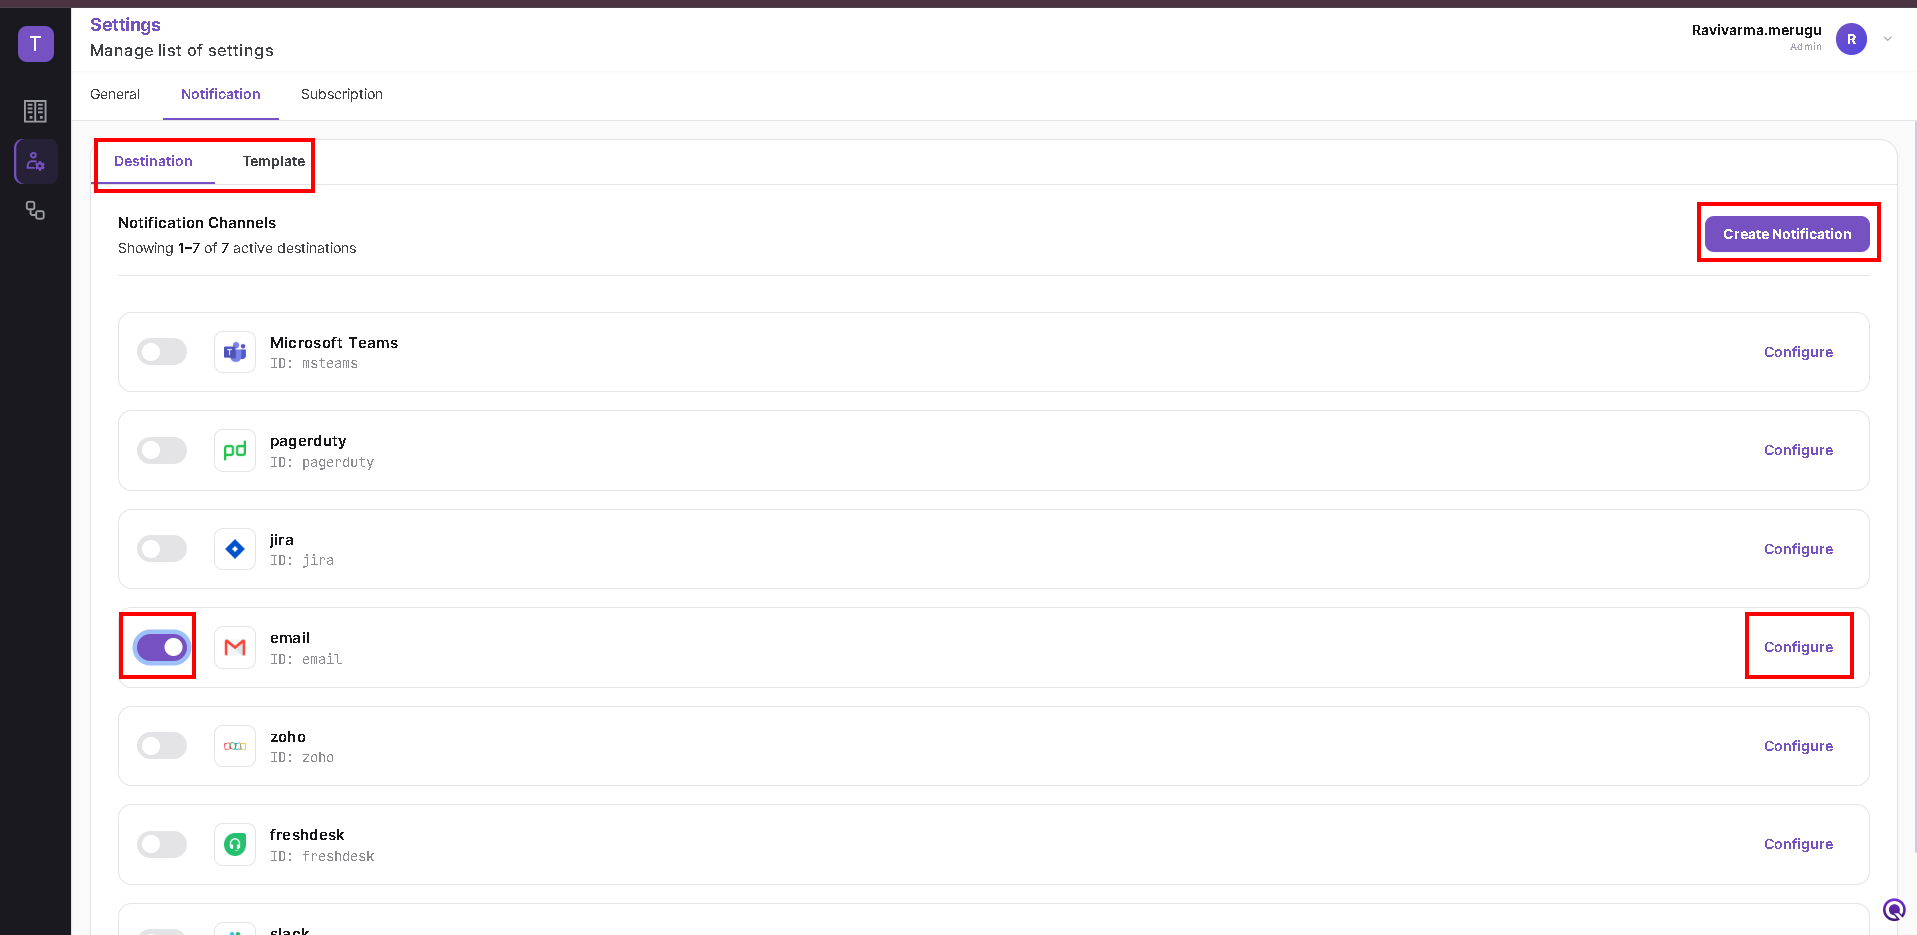
Administrators can enable the required channel and use Configure to maintain its destination-specific configuration.
Template
Use the Template sub-tab to manage notification templates. Template configuration determines the content used for supported notifications.
Note: Configure destination and template values according to the notification integration used by your organization.
Subscription
The Subscription tab provides an overview of subscription seat usage and allows administrators to manage seats assigned to users.
Subscription Summary
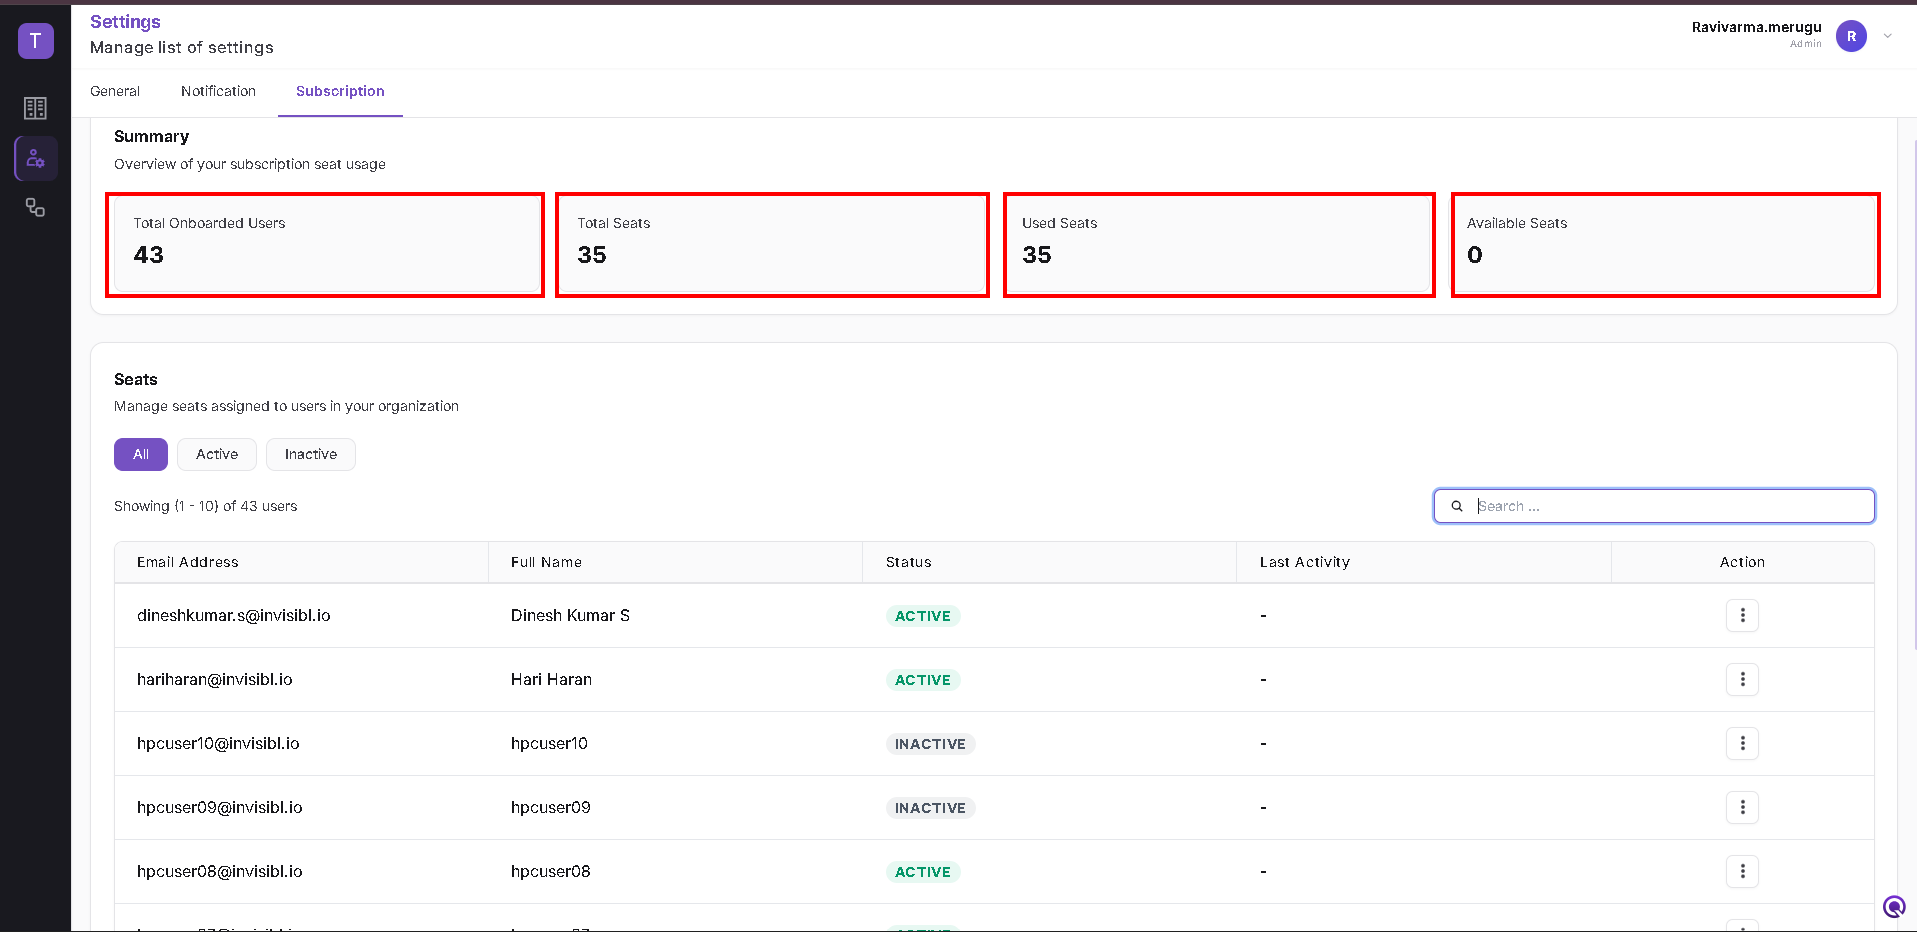
The Summary section displays:
- Total Onboarded Users
- Total Seats
- Used Seats
- Available Seats
These values provide a current overview of organization seat consumption.
Manage Seats
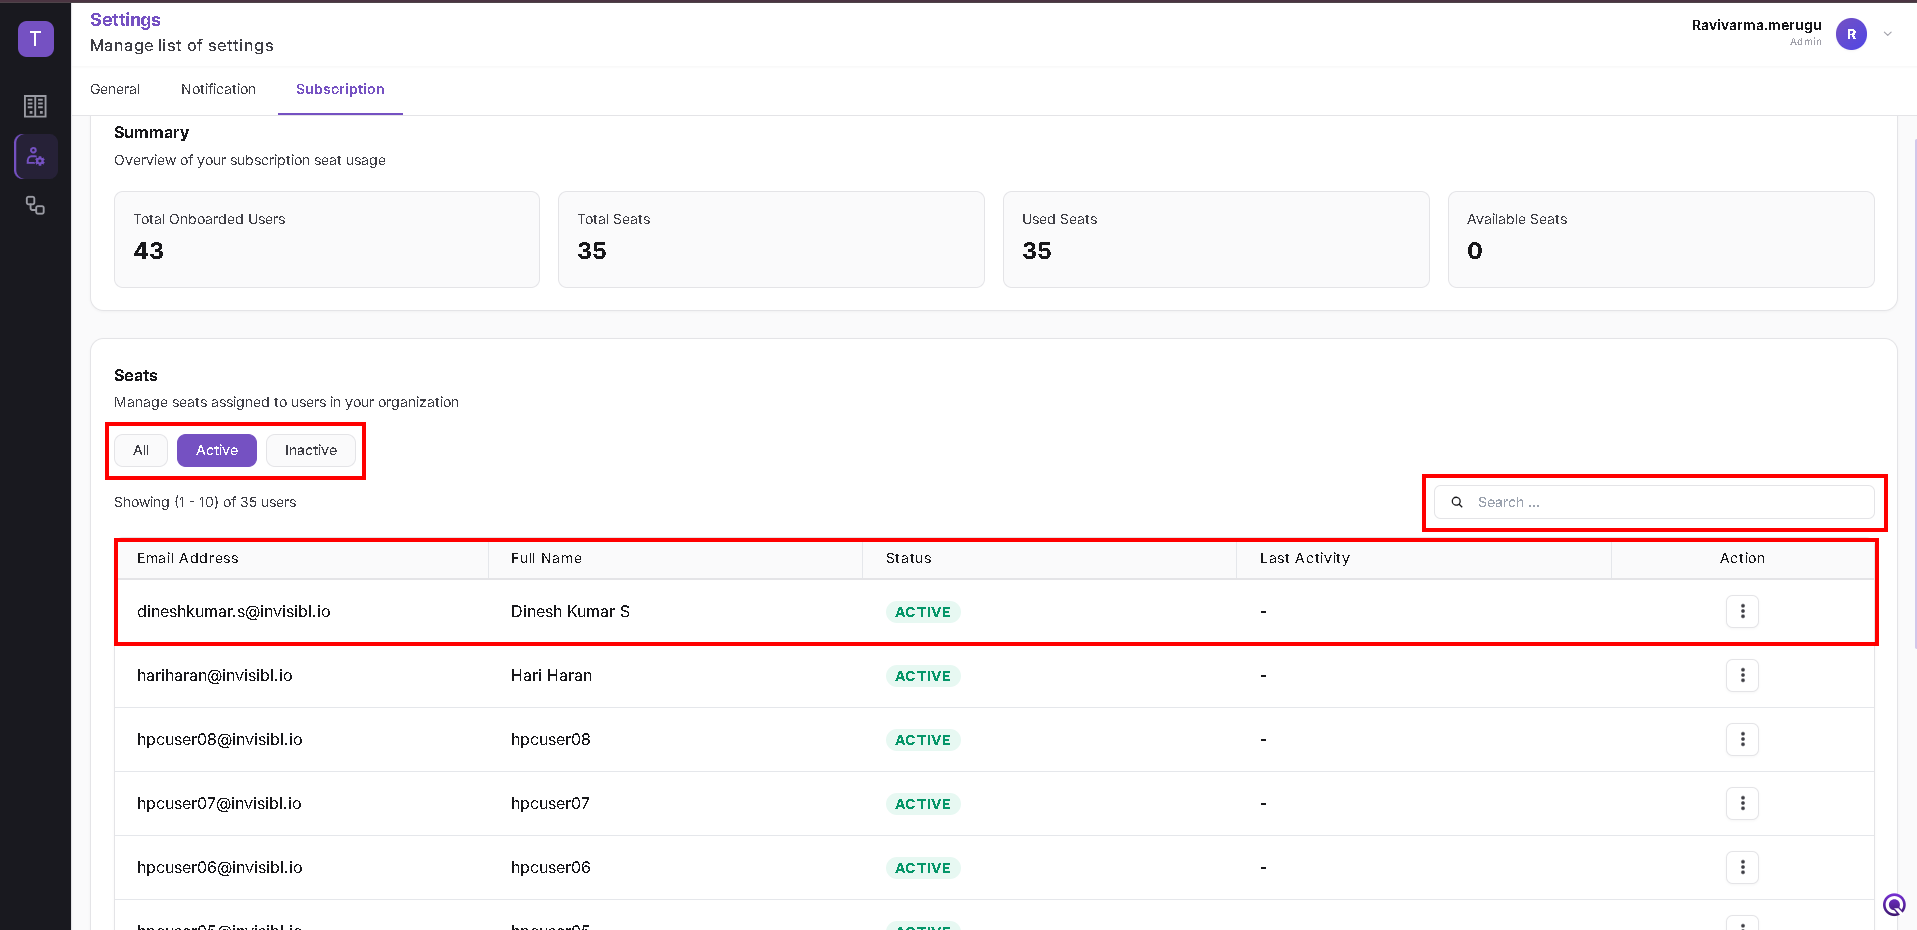
The Seats section lists users and their subscription status. Use the All, Active, and Inactive filters to view the required users, or use Search to locate a user.
The table provides the user's Email Address, Full Name, Status, Last Activity, and available Action.
Deactivate a Seat
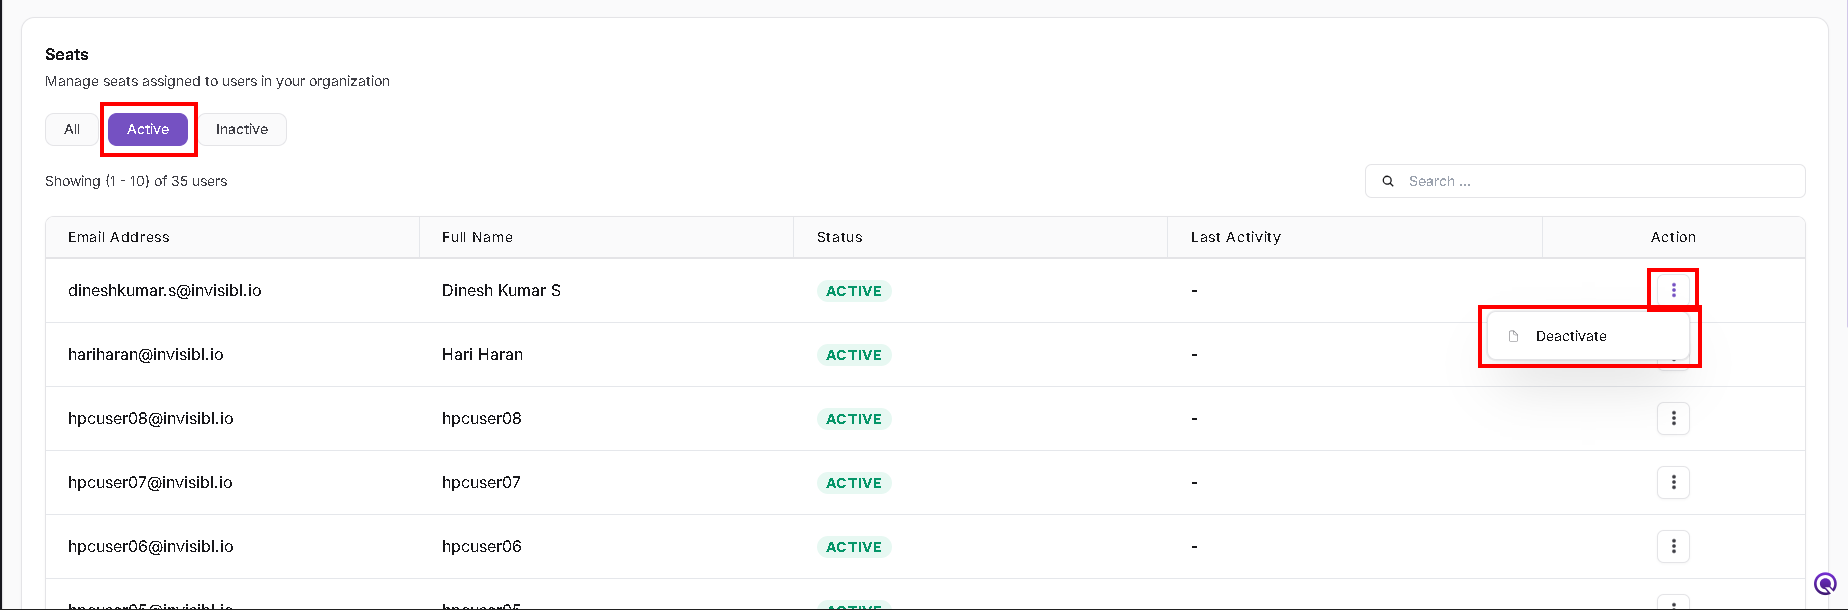
To deactivate an active user's seat:
- Select Active or locate the required active user.
- Open the three-dot Action menu.
- Select Deactivate.
Activate a Seat
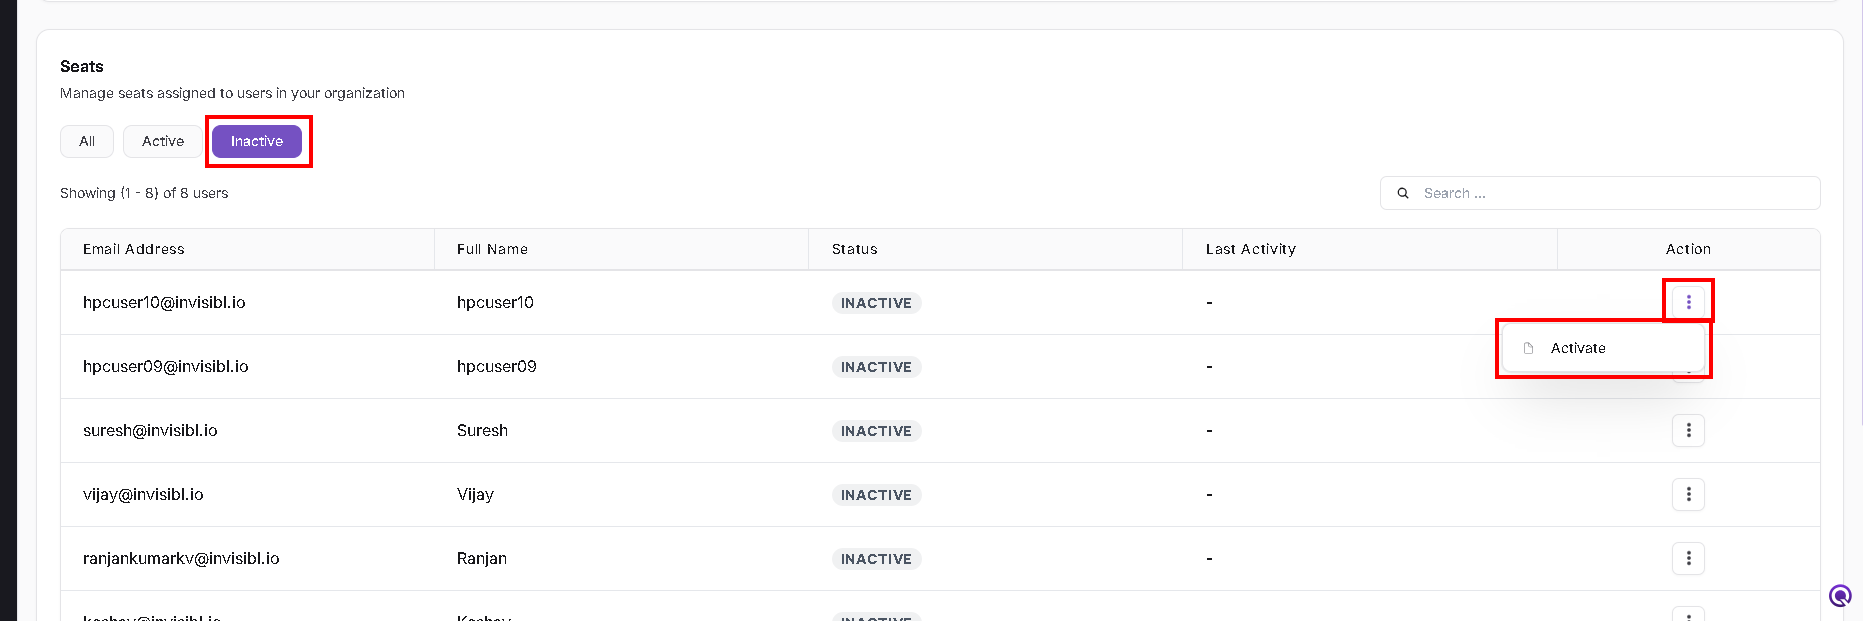
To activate an inactive user's seat:
- Select the Inactive filter or locate the required inactive user.
- Open the three-dot Action menu.
- Select Activate.
The seat summary should be reviewed after seat changes to confirm current used and available seat counts.