👥 User Group Management
User Group Management allows administrators to create and manage user groups and associate each group with a role.
User Groups are used during user onboarding to organize users and associate them with the appropriate role in Tachyon.
📋 View User Groups
Steps
- Navigate to Admin → User Groups from the left menu.
- The User Groups page displays all configured user groups.
- Review the user group details displayed in the table.
- Click Create User Group to create a new user group.
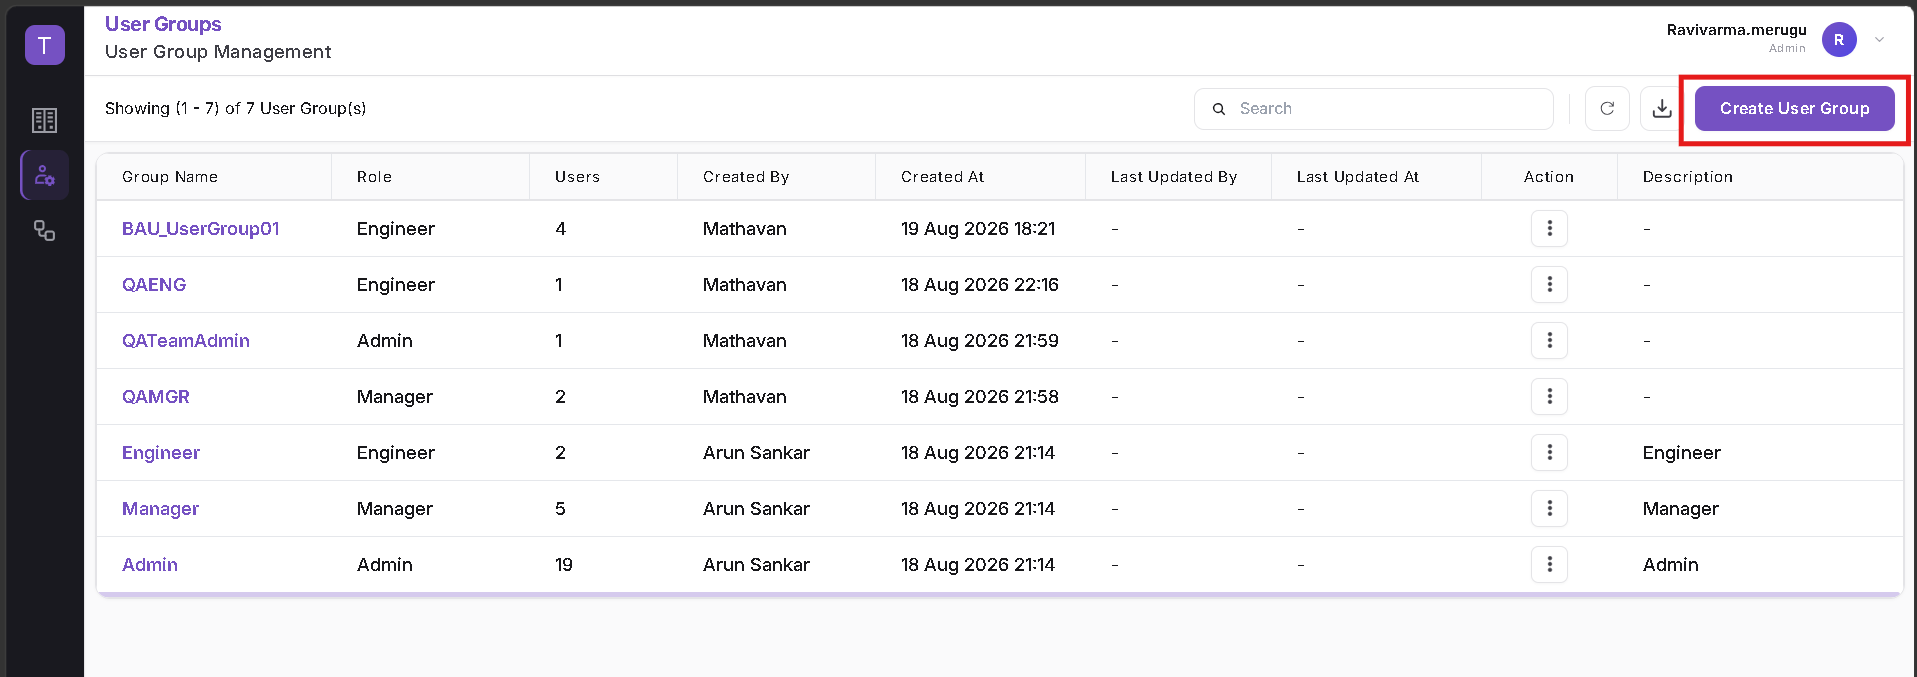
The User Groups table displays:
- Group Name – Name of the configured User Group.
- Role – Role associated with the User Group.
- Users – Number of users associated with the User Group.
- Created By – User who created the group.
- Created At – Date and time when the group was created.
- Last Updated By – User who most recently updated the group.
- Last Updated At – Date and time of the latest update.
- Action – Provides operations such as View Users, Edit, and Delete.
- Description – Description configured for the User Group.
- A User Group is associated with a Role.
- Multiple users can be associated with the same User Group.
- The Users column shows the number of users currently associated with the group.
🔍 Search User Groups
Use the search option to locate a specific User Group.
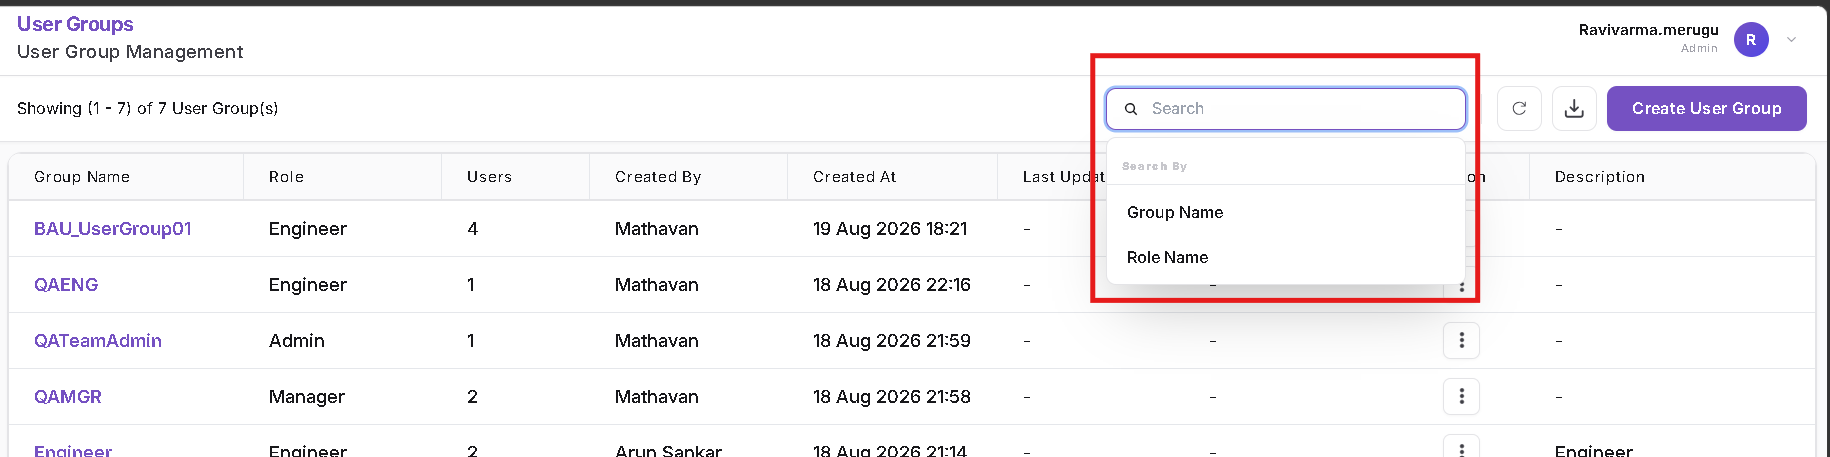
The available search criteria include:
- Group Name
- Role Name
Select the required search criterion and enter the corresponding value to filter the displayed User Groups.
➕ Create a User Group
Steps
- Navigate to Admin → User Groups.
- Click Create User Group.
- The Create User Group screen is displayed.
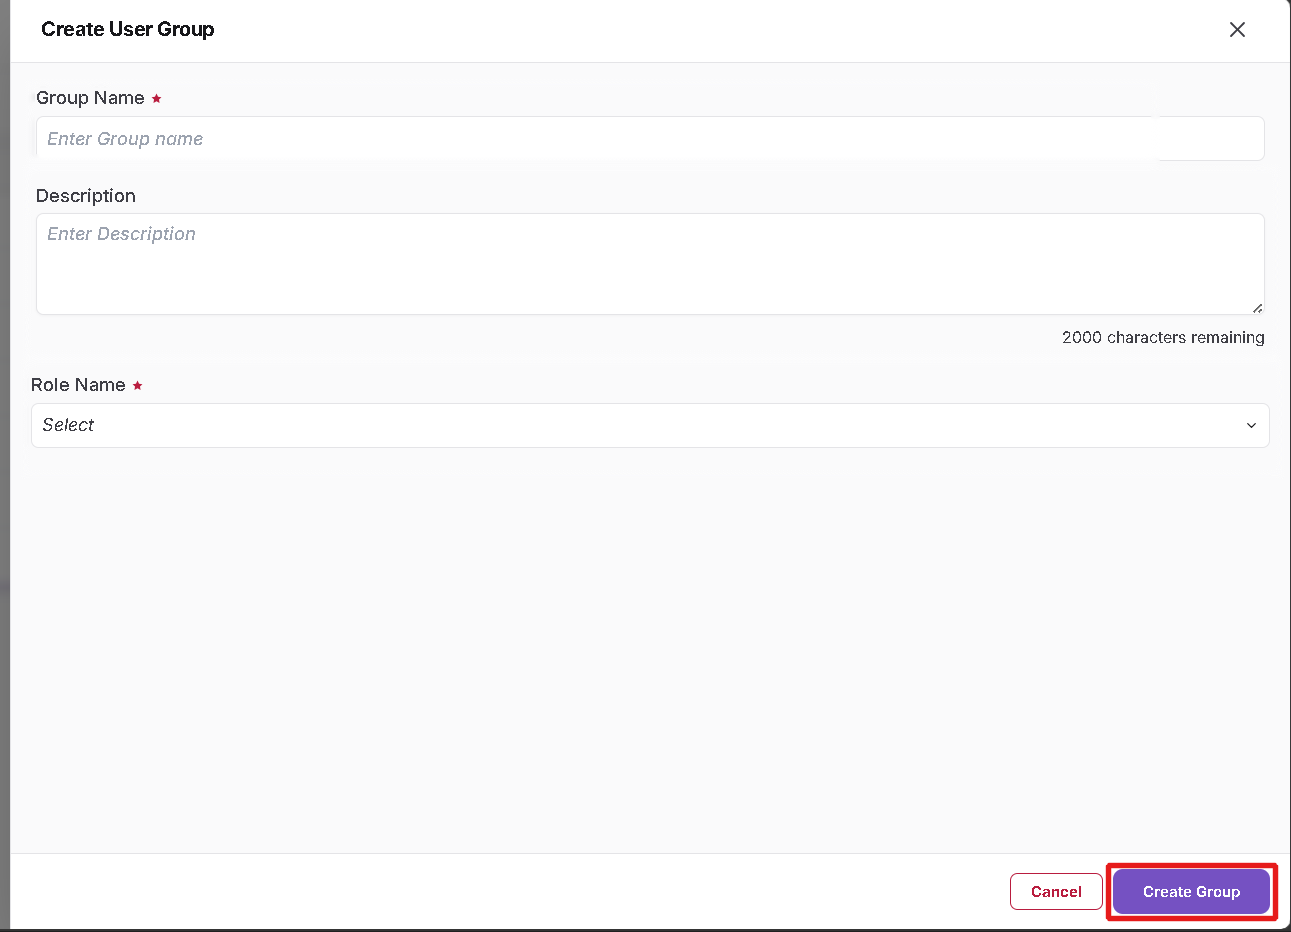
Configure the following fields:
- Group Name* – Enter a unique name for the User Group.
- Description – Enter a description explaining the purpose of the group.
- Role Name* – Select the Role to associate with the User Group.
Select a Role
Open the Role Name dropdown and select the required role.
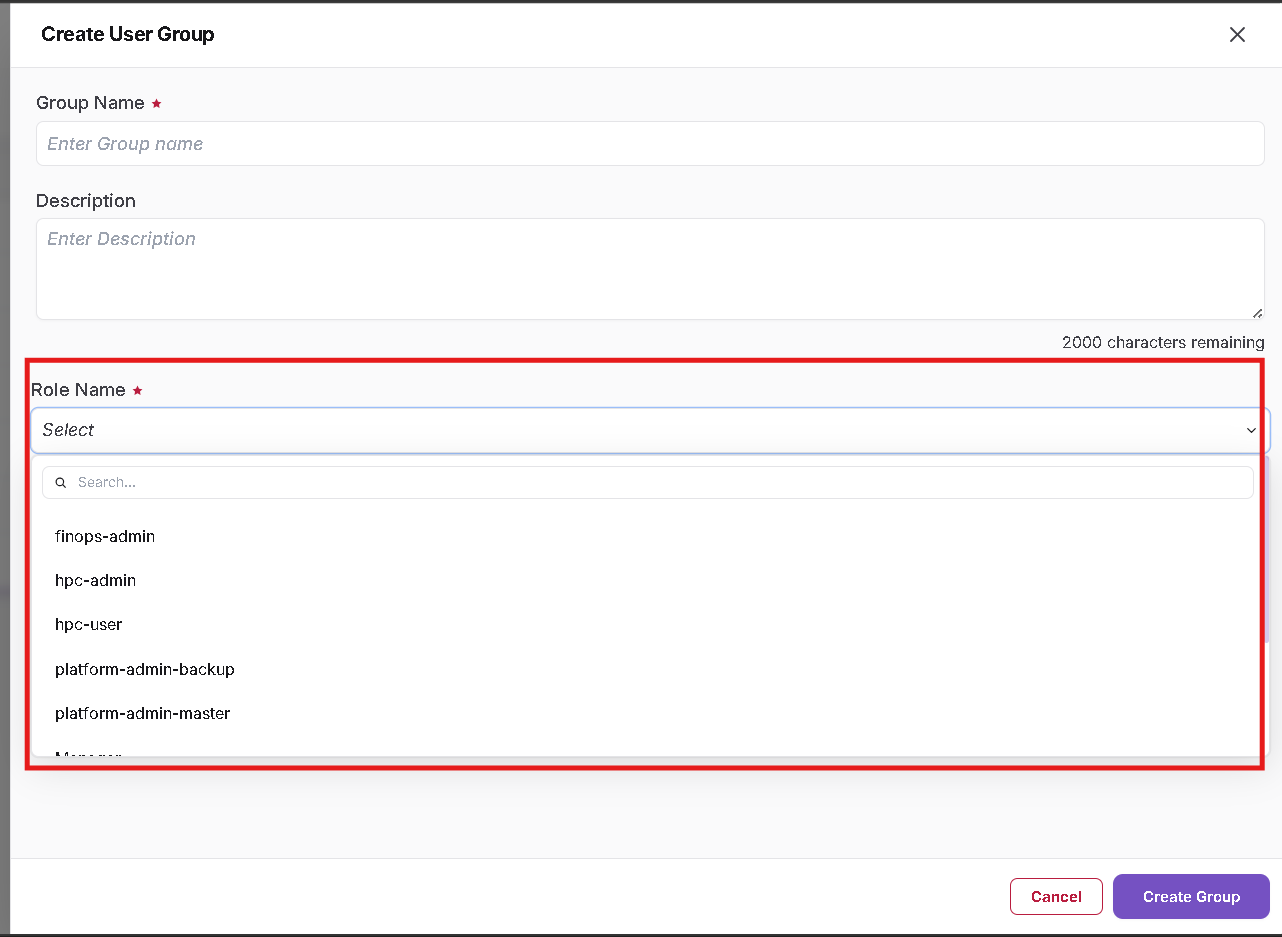
The available values depend on the Roles configured in Tachyon.
After entering the required details, click Create Group.
- Group Name and Role Name are mandatory fields.
- The selected Role determines the role associated with the User Group.
- Roles must be configured before they can be selected while creating a User Group.
- The Group Name cannot be changed after the User Group is created.
⚙️ User Group Actions
Each User Group provides an action menu.
Steps
- Locate the required User Group.
- Click the three-dot menu under the Action column.
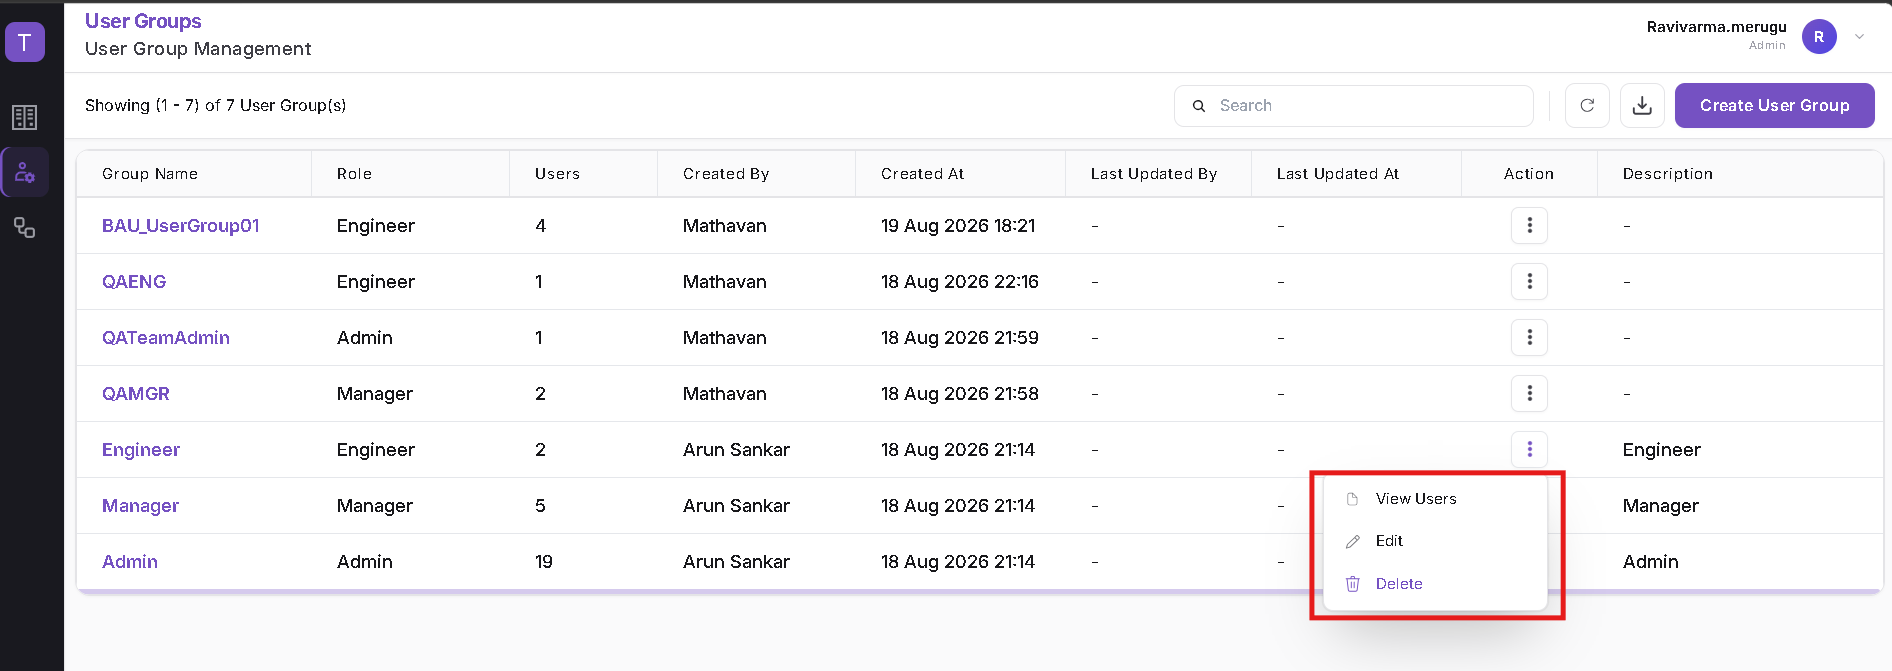
The available actions are:
- View Users
- Edit
- Delete
👤 View Users in a User Group
Steps
- Locate the required User Group.
- Open the action menu.
- Select View Users.
- The User List for the selected User Group is displayed.
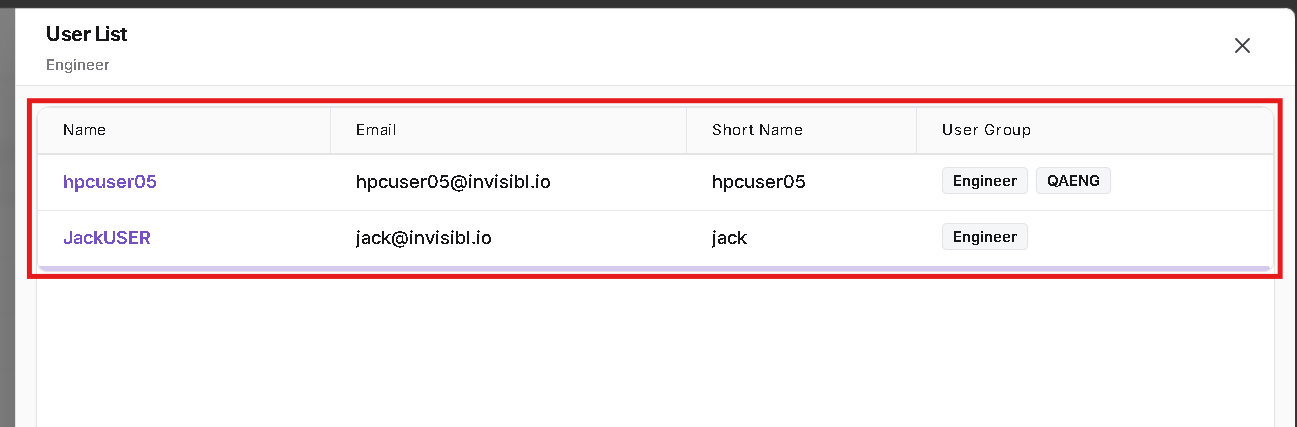
The User List displays information such as:
- Name
- Short Name
- User Group
- Use View Users to verify the users currently associated with a User Group.
- User Group associations for individual users are managed through User Management.
✏️ Edit a User Group
Steps
- Locate the required User Group.
- Open the action menu.
- Select Edit.
- The Edit User Group screen displays the existing configuration.
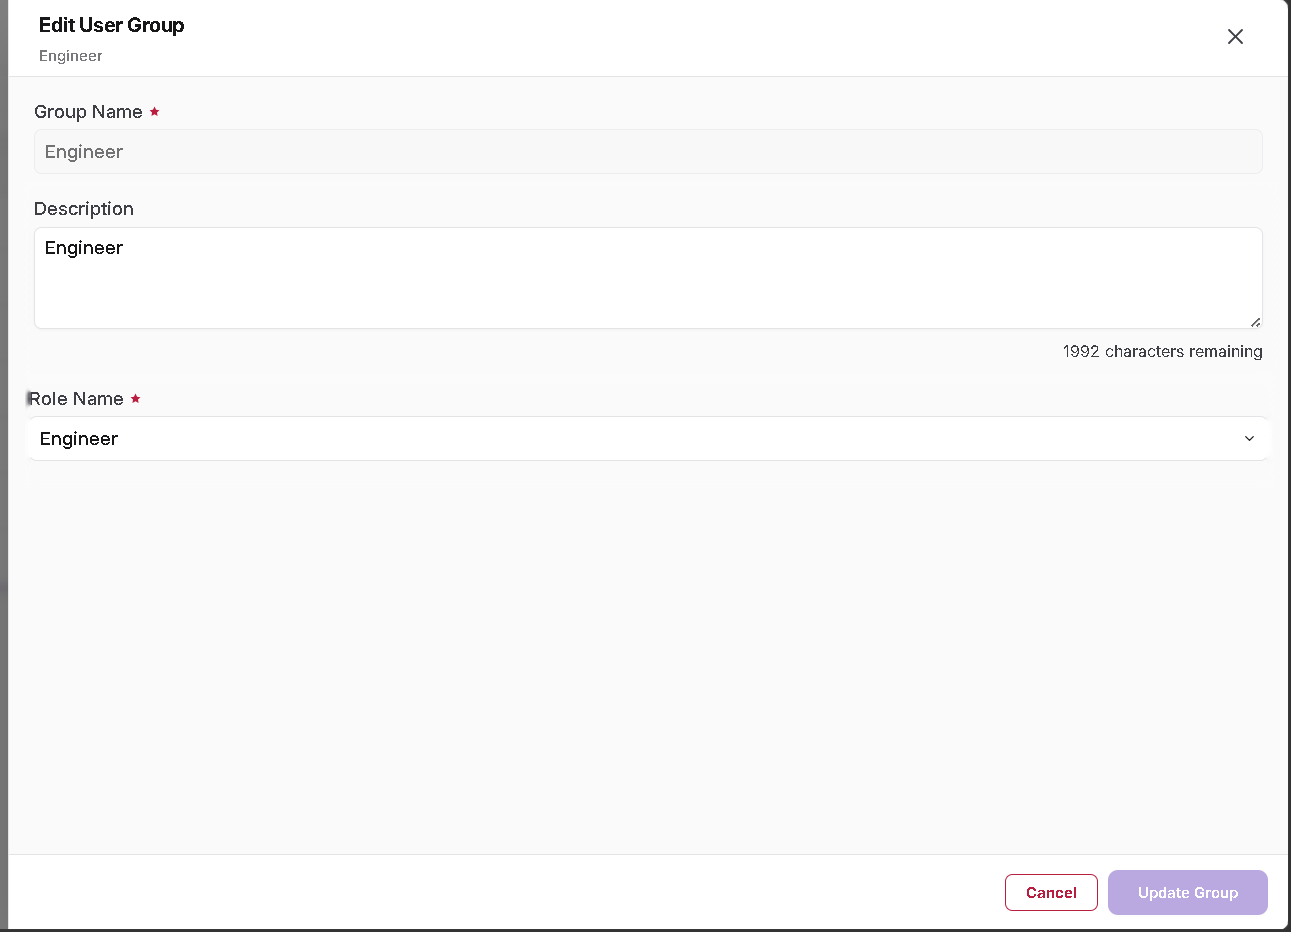
The following information is displayed:
- Group Name – Displays the existing User Group name. This field cannot be edited after the group is created.
- Description – Update the description when required.
- Role Name – Change the associated Role when required.
After making the required changes, click Update Group.
- The Group Name is fixed after creation and cannot be modified from the Edit User Group screen.
- Only the editable User Group properties, such as Description and Role Name, can be updated.
- Review the users associated with the User Group before changing its Role, because the change can affect the access associated with users in that group.
🗑️ Delete a User Group
Steps
- Locate the required User Group.
- Open the action menu.
- Select Delete.
- A confirmation dialog is displayed.
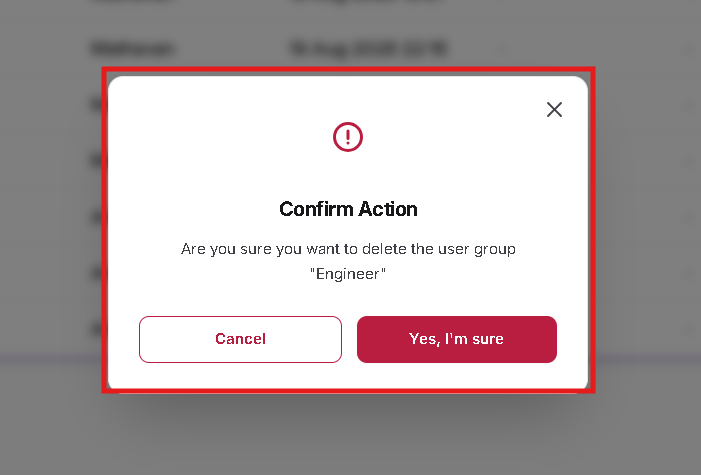
Review the User Group displayed in the confirmation dialog.
- Click Yes, I'm sure to confirm the deletion.
- Click Cancel to keep the User Group.
- Verify existing user associations before deleting a User Group.
- Do not delete a User Group that is still required by active users.
🔗 Relationship with User Management
User Groups work together with Roles and User Management.
The general relationship is:
Role → User Group → User
For example:
- A Role such as Engineer, Manager, or Admin is configured.
- A User Group is created and associated with the required Role.
- During user creation or editing, the appropriate User Group is assigned to the user.
- The User Group association connects the user with the configured Role.
Organization membership is managed separately through User Management and is used together with User Group information where organizational or cluster-based access is required.
- Roles define application-level permissions.
- User Groups associate users with the appropriate Role.
- User Group assignments for users are managed through User Management.
- Organization and User Group information can also be used while configuring Cluster Mapping and access control.