🧑💼 User Management
Provides the steps to perform user onboarding and manage user data.
The following features are covered below:
- Create a new user
- Edit and update existing user
- Remove an existing user
👤 Create a New User
Prerequisites
- Must have administrator access to the platform.
- Have the user's User Name, AD Short Name, and Email ID.
- Identify the User Group and Organization to which the user should be associated.
Steps
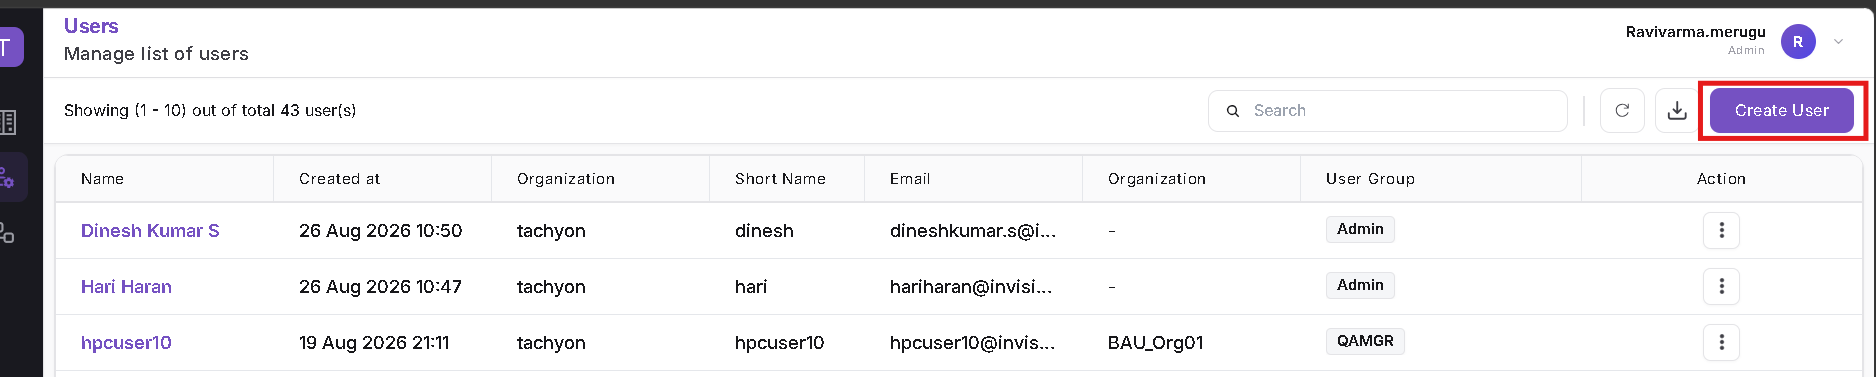
- Navigate to Admin → User from the left menu.
- Click Create User above the user list.
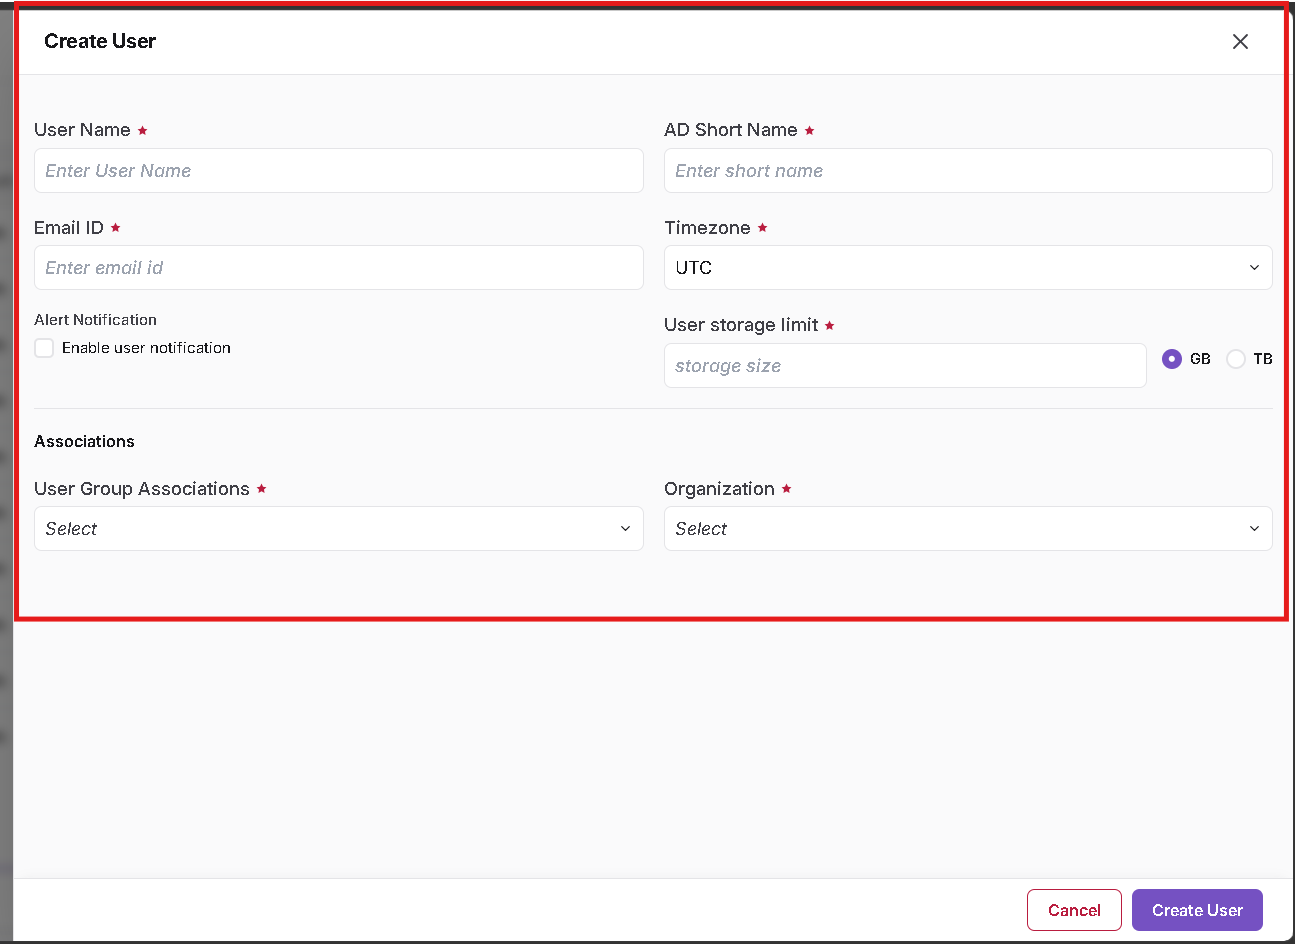
- Enter the user's User Name.
- Enter the user's AD Short Name.
- Enter the user's Email ID.
- Select the appropriate Timezone.
- Enter the required User storage limit and select GB or TB.
- Enable Alert Notification if the user should receive notifications.
👥 User Associations
Every user must be associated with a User Group and an Organization.
- Select the appropriate User Group Associations.
- Select the Organization to which the user belongs.
- Based on the selected organization and user group, the corresponding group association is displayed.
- Verify the associations before creating the user.
📌 General Notes:
- User Group Association and Organization are mandatory during user creation.
- Organization and group associations are used to determine access to resources configured for those identities.
- Cluster availability depends on the Cluster Mapping configured by the administrator for the corresponding organization or group.
- After entering all required information, click Create User.
- The system confirms successful user creation.
✏️ Edit and Update Existing User
Prerequisites
- Must have admin access to the platform.
- Know the user profile to be edited.
Steps
- Navigate to Admin in the left menu and select User to see the user list.
- Find the user you want to edit and click on the action menu (three dots) next to the user's entry.
- In the dropdown, select Edit.

- The Edit User screen will open. Make the necessary changes, such as -
Edit User screen opens with the user's existing configuration. - Update the required user details, such as User Name, AD Short Name, Email ID, Timezone, Alert Notification, or User storage limit. - Update the User Group Associations or Organization when the user's organizational access needs to change.
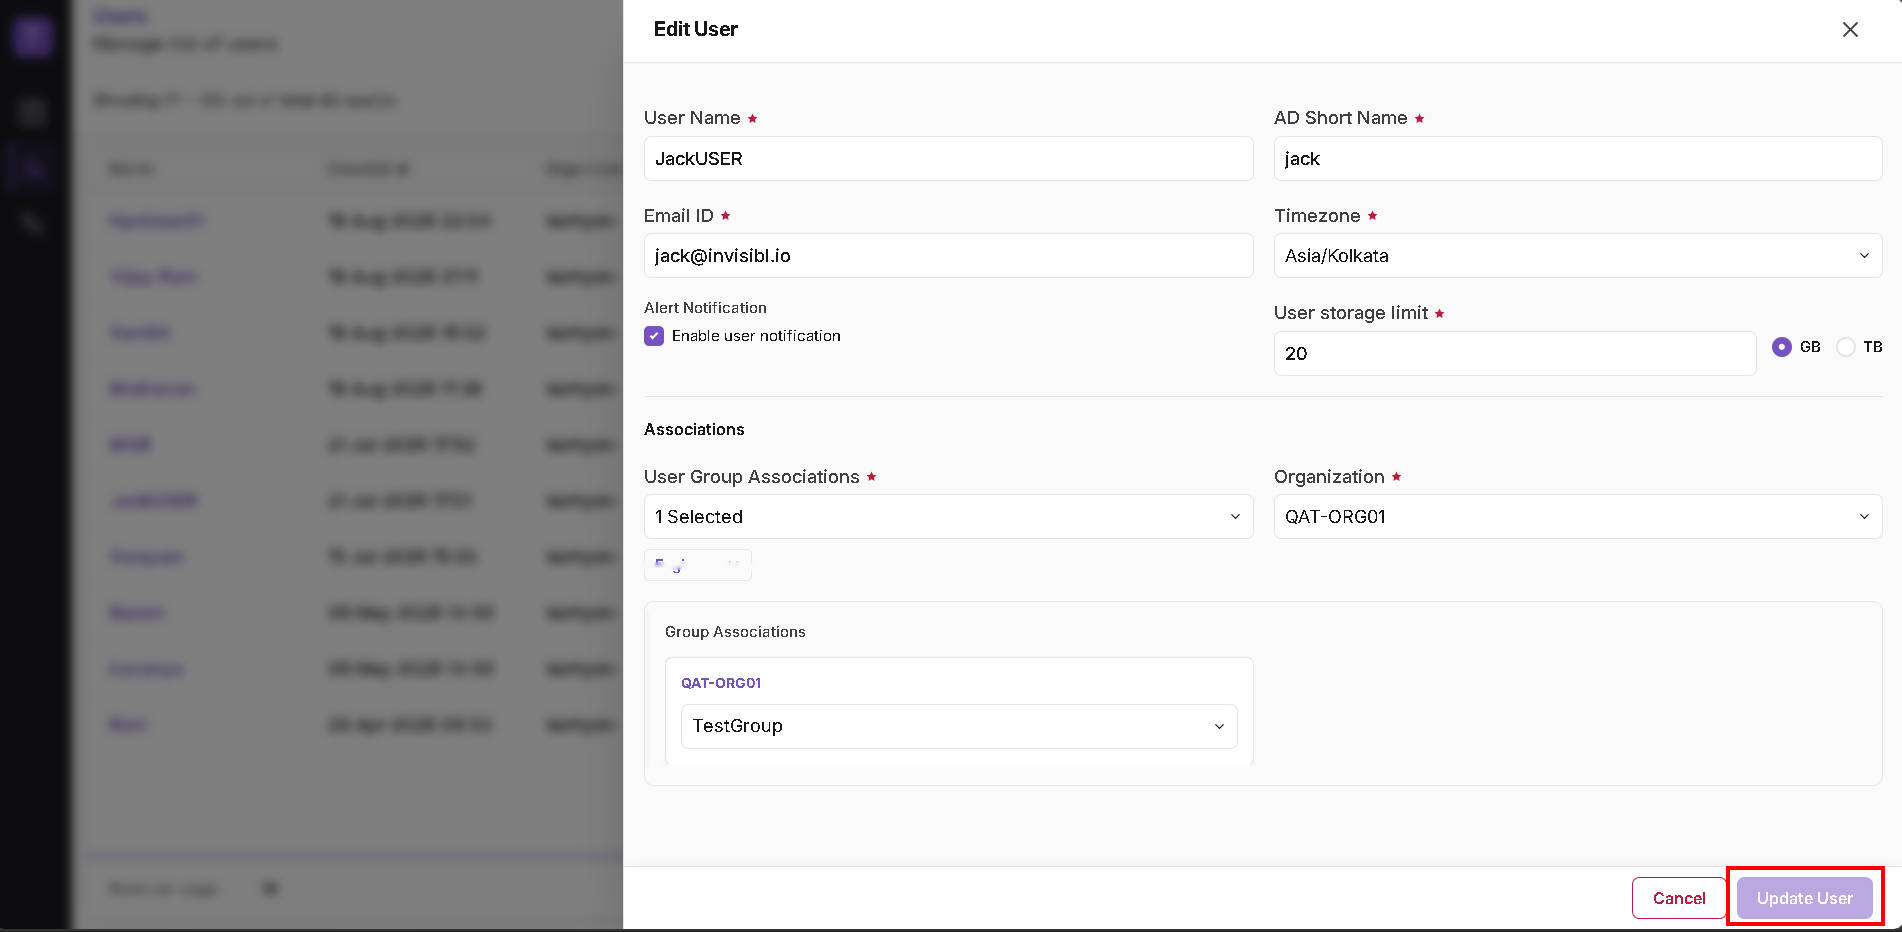
- Review the updated organization and group associations.
- Click Update User to save the changes.
-
After verifying the changes, click the Update button at the bottom.
-
A popup message will confirm “User updated successfully” once the changes are saved.
📌 General Notes:
- User Group Association and Organization are mandatory user associations.
- Changing a user's organization or group can change which mapped clusters and resources are available to that user.
- Verify the associations carefully before updating the user.
🗑️ Remove an Existing User
Prerequisites
- Must have admin access to the platform.
- Confirm which user to remove.
Steps
- From the User list in the Admin menu, locate the user to be removed.
- Click on the action menu (three dots) for that user.
- Select Remove from the dropdown.

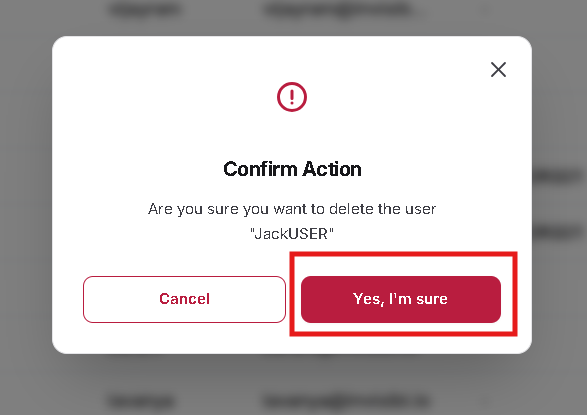
- A confirmation popup will appear; click Yes, I’m sure to confirm deletion.
- A popup message will confirm “User removed successfully” after deletion.
📌 General Notes:
- Removed users lose access to all platform resources immediately.
- This action cannot be undone; ensure that user data is backed up or transferred as needed.
- For any issues removing users, contact the platform administrator.