Roles
Use Admin > Roles to manage role definitions and their module, submodule, and action permissions. Each role also has a Primary Navigation Target.
Open Roles
- Sign in with your administrator account.
- Expand Admin in the left navigation menu.
- Select Roles to open Role Management.
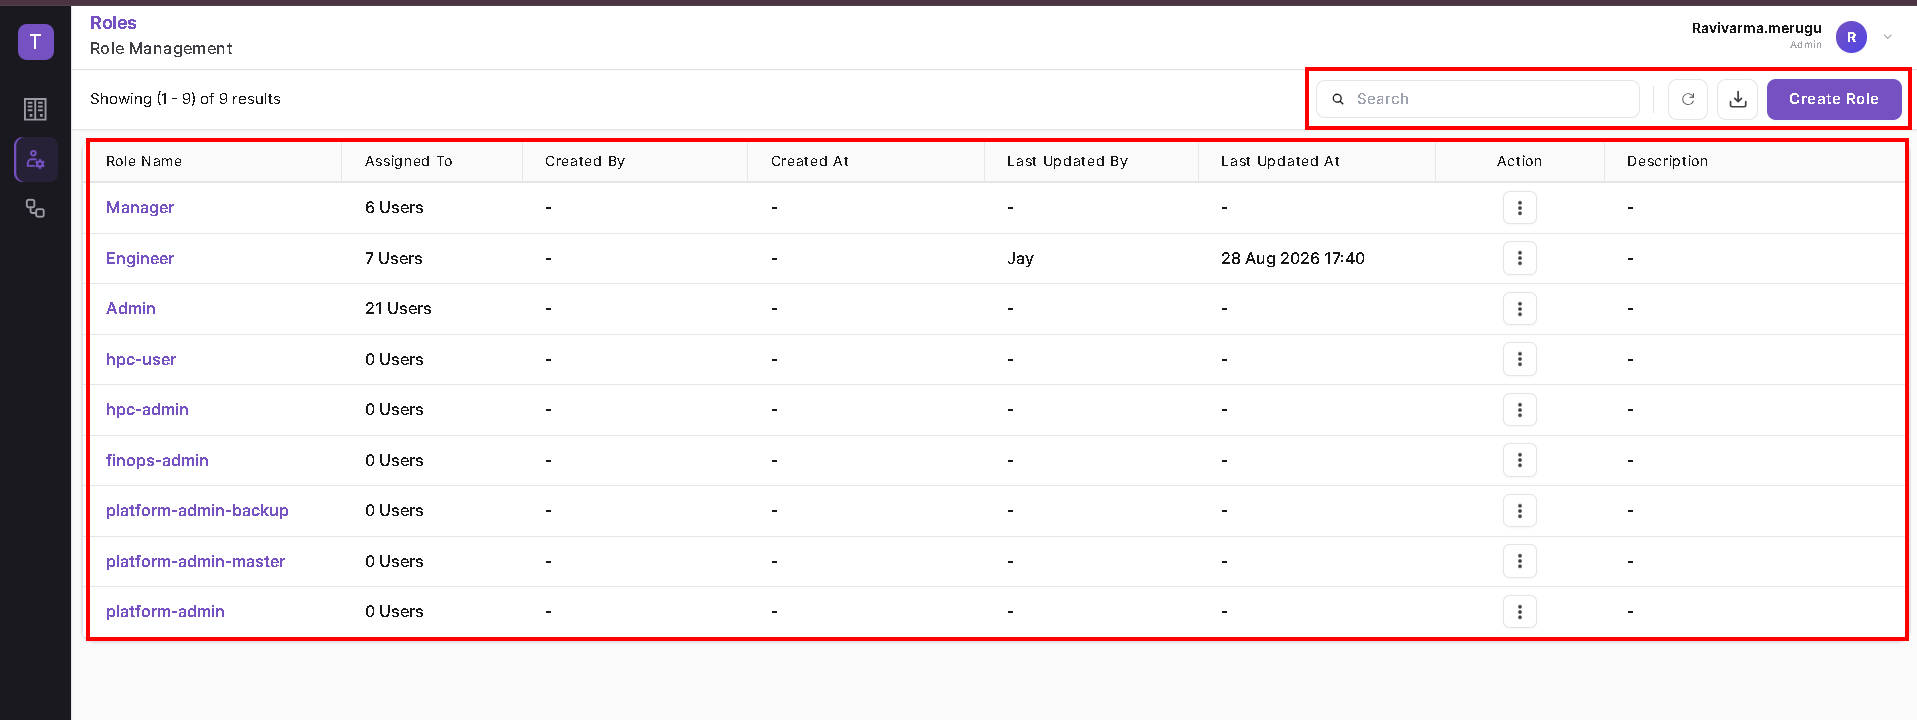
Review the Roles List
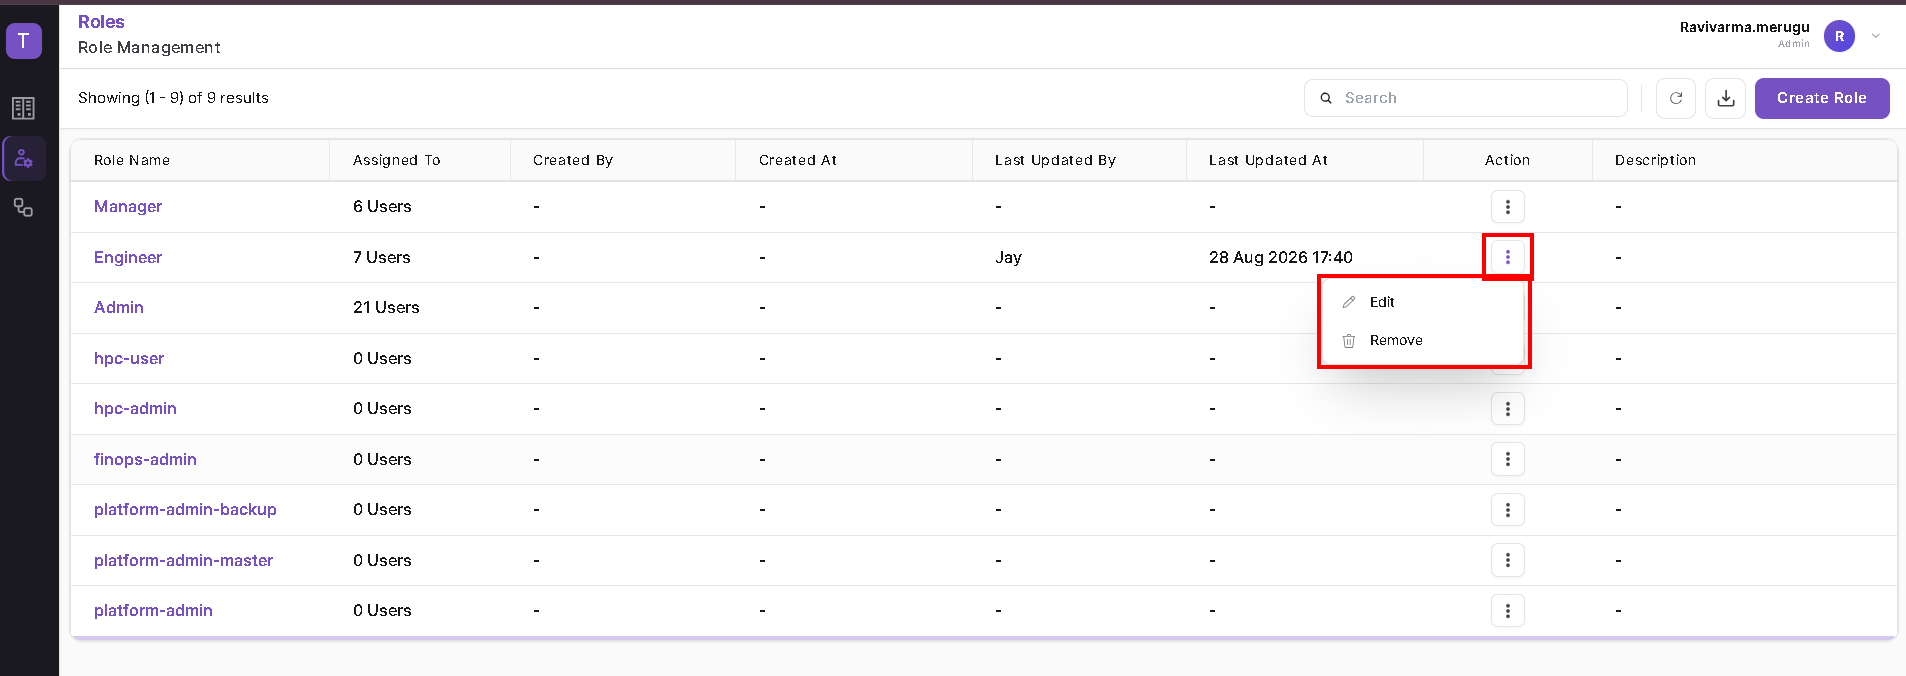
The table displays these columns:
| Column | Information shown |
|---|---|
| Role Name | Name of the role. |
| Assigned To | Number of users assigned to the role. |
| Created By | Creator, when shown. |
| Created At | Creation timestamp, when shown. |
| Last Updated By | User who last updated the role, when shown. |
| Last Updated At | Last update timestamp, when shown. |
| Action | Three-dot menu for the role's actions. |
| Description | Description, when provided. |
The count above the table shows the displayed range and total results. Role names, assigned-user counts, and timestamps in this guide are examples; a dash appears where a value is not displayed.
The toolbar includes Search, a circular-arrow Refresh button, a down-arrow Download button, and Create Role. Use Refresh to reload the list and the Download button to request a download.
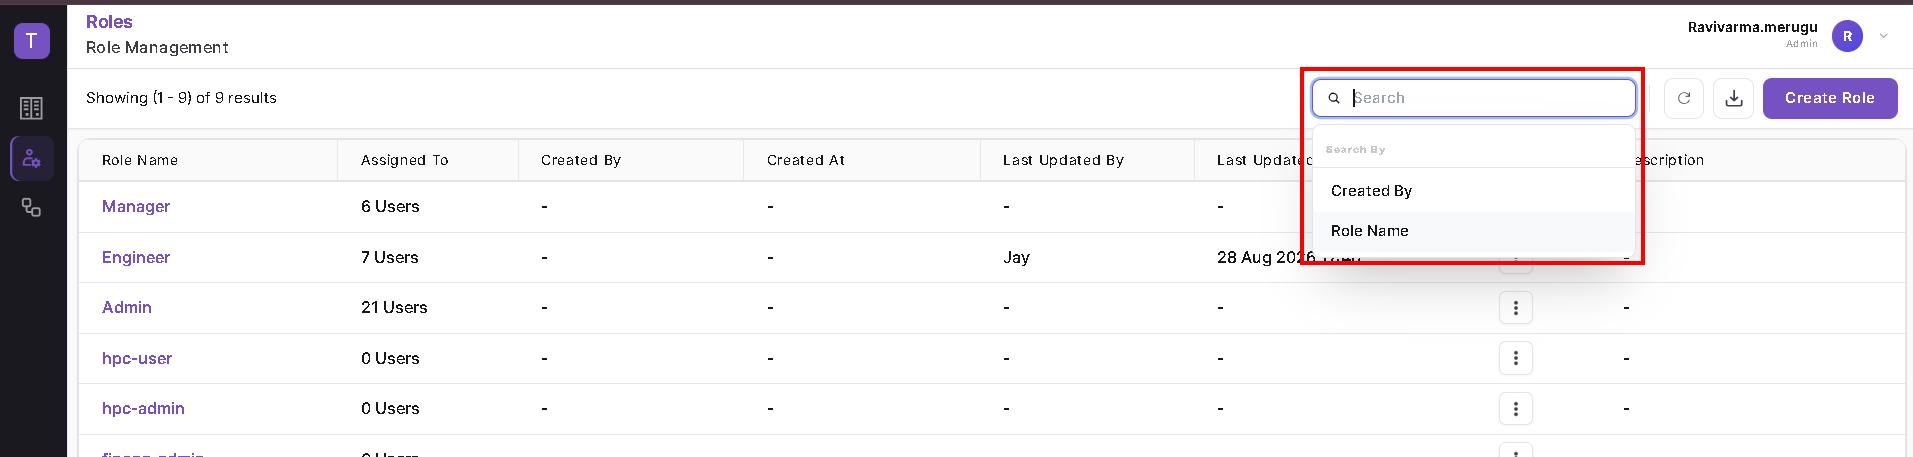
Search for a Role
- Click the Search field above the table.
- Under Search By, choose Role Name or Created By.
- Enter the value for the selected search field to find the role you need.
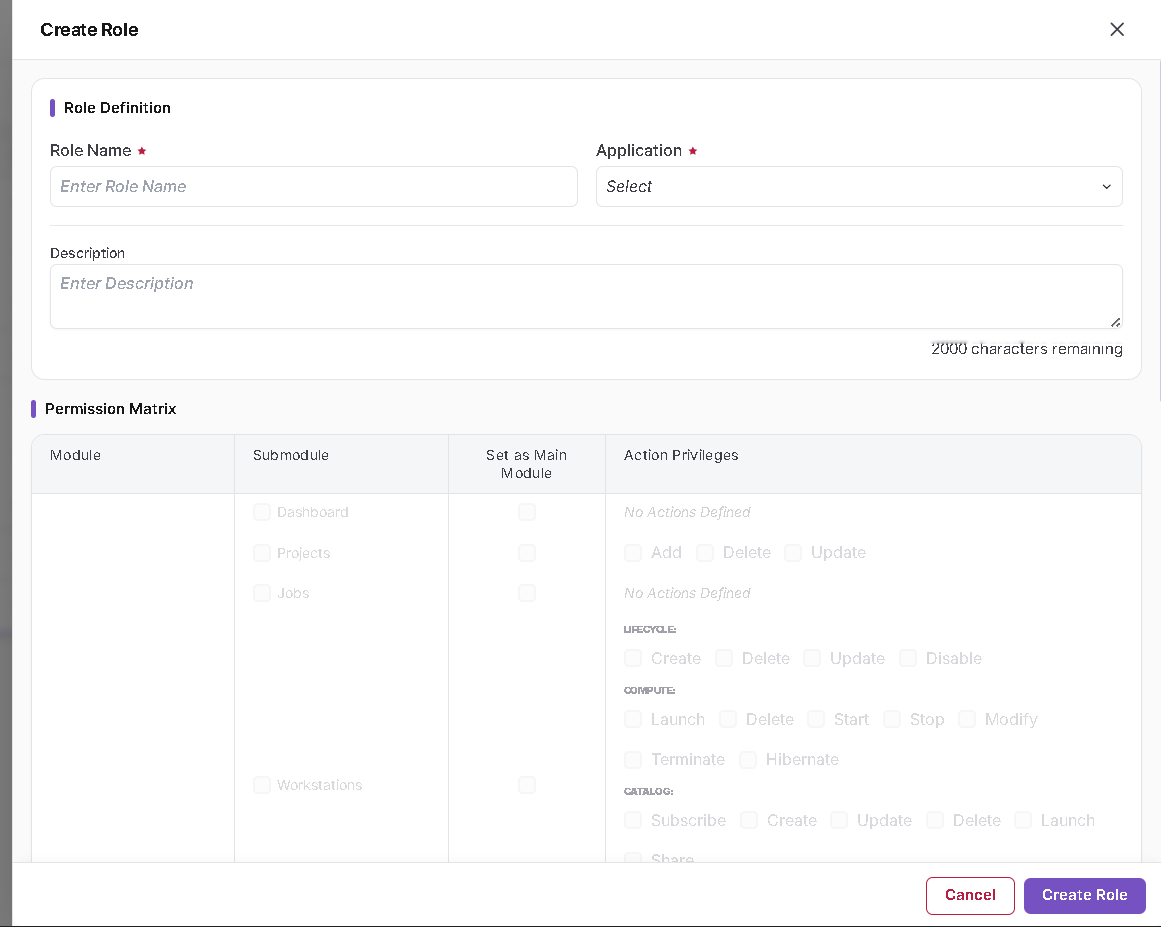
Create a Role
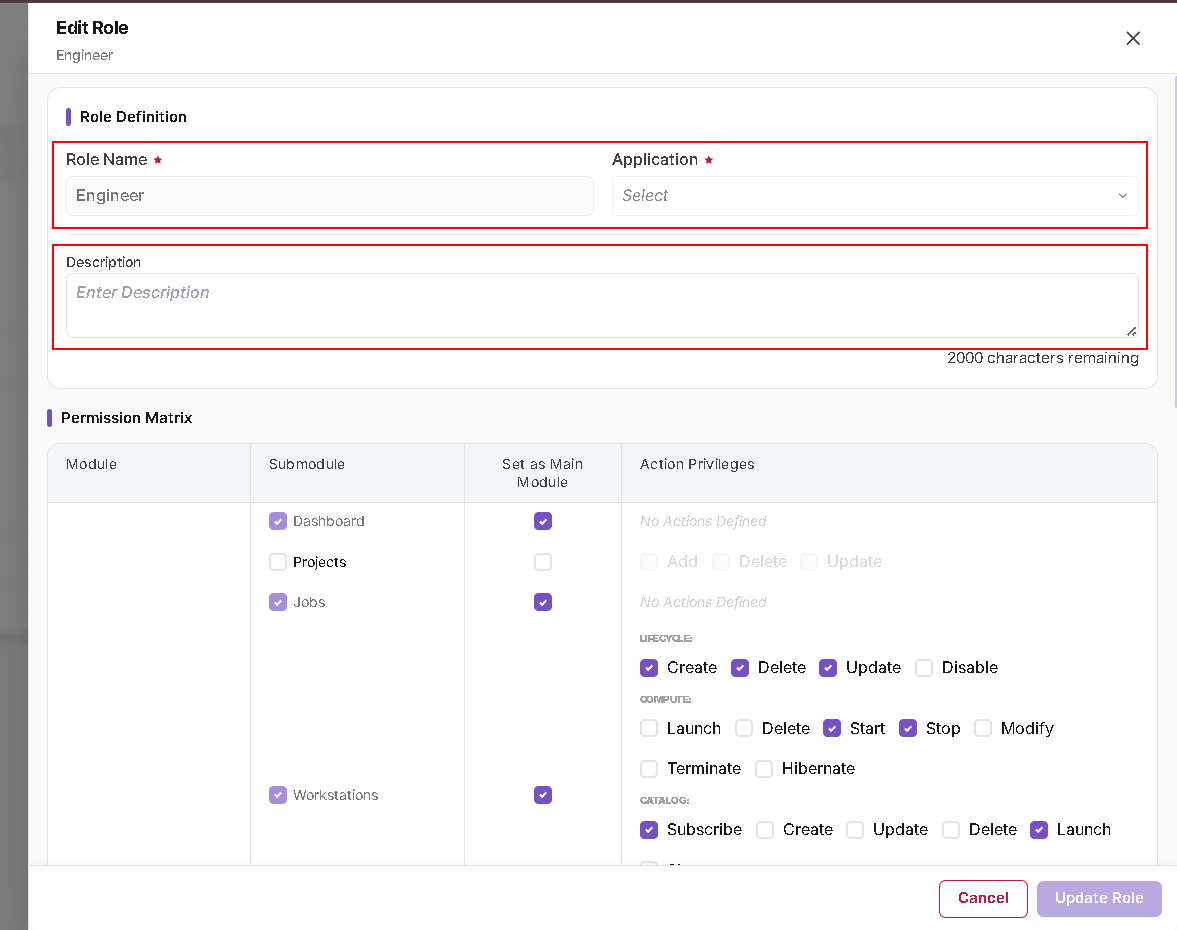
Enter the Role Definition
Click Create Role at the upper right of the list.
In Role Definition, complete the following fields:
| Field | What to enter |
|---|---|
| Role Name | Required name for the role. |
| Application | Required application selection from the dropdown. |
| Description | Optional description of the role's purpose. The field displays a remaining-character counter, starting at 2000. |
Configure the Permission Matrix
Scroll through the Permission Matrix and select the access required by the role.
| Column | How to use it |
|---|---|
| Module | Select the module group, such as HPC, Admin, or Workflows. |
| Submodule | Select the relevant pages or features within the module. |
| Set as Main Module | Set the checkbox for the relevant submodule where needed. This is a separate control from the Primary Navigation Target below the matrix. |
| Action Privileges | Select the individual actions required for the submodule. Some rows display No Actions Defined. |
Select the module and submodules before configuring their available action privileges. In the initial Create Role form, unchecked module groups have grayed-out submodule and action controls.
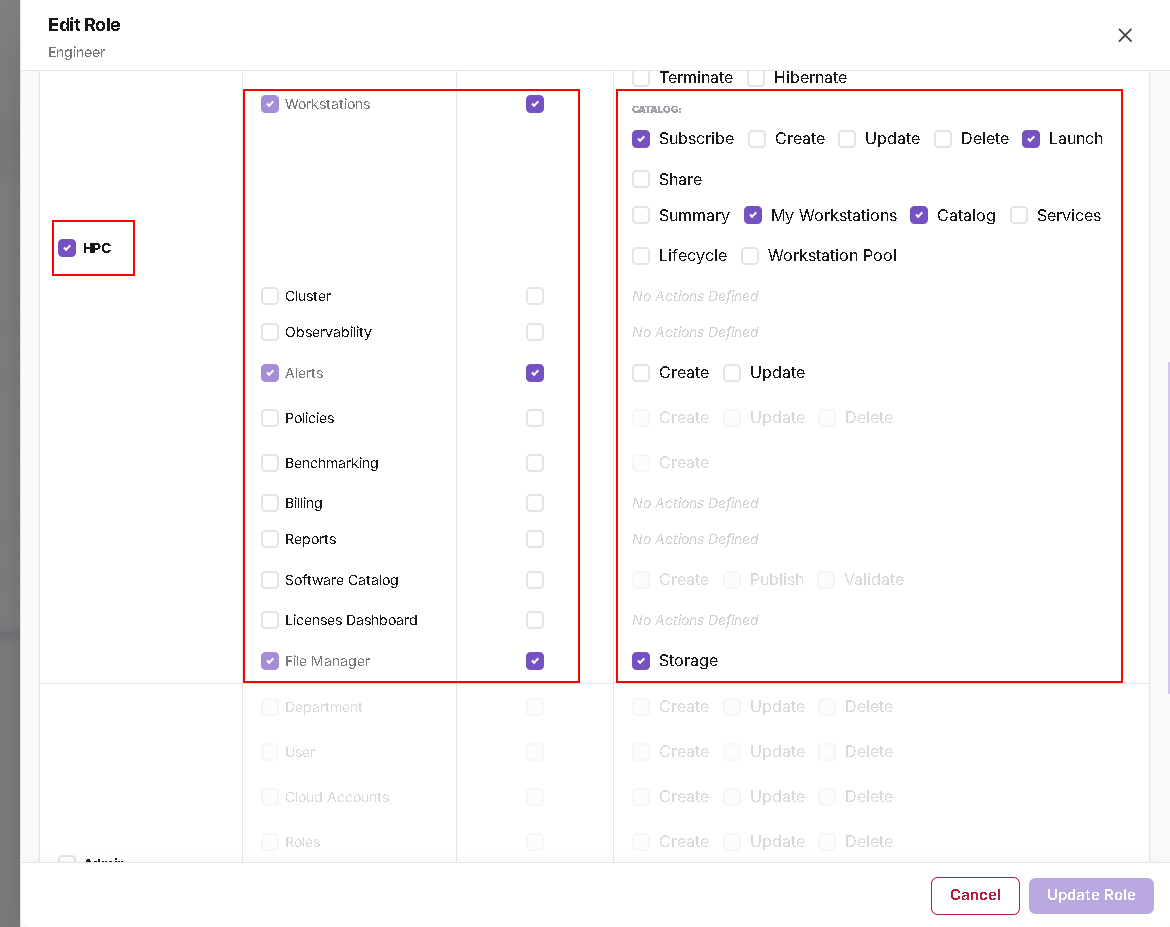
The matrix includes these groups:
| Module | Submodules shown |
|---|---|
| HPC | Dashboard, Projects, Jobs, Workstations, Cluster, Observability, Alerts, Policies, Benchmarking, Billing, Reports, Software Catalog, Licenses Dashboard, File Manager. |
| Admin | Department, User, Cloud Accounts, Roles, User Groups, Knowledge Base, License Management, Settings. |
| Workflows | Templates, Executions. |
The labels above follow the Permission Matrix, including Department and License Management.
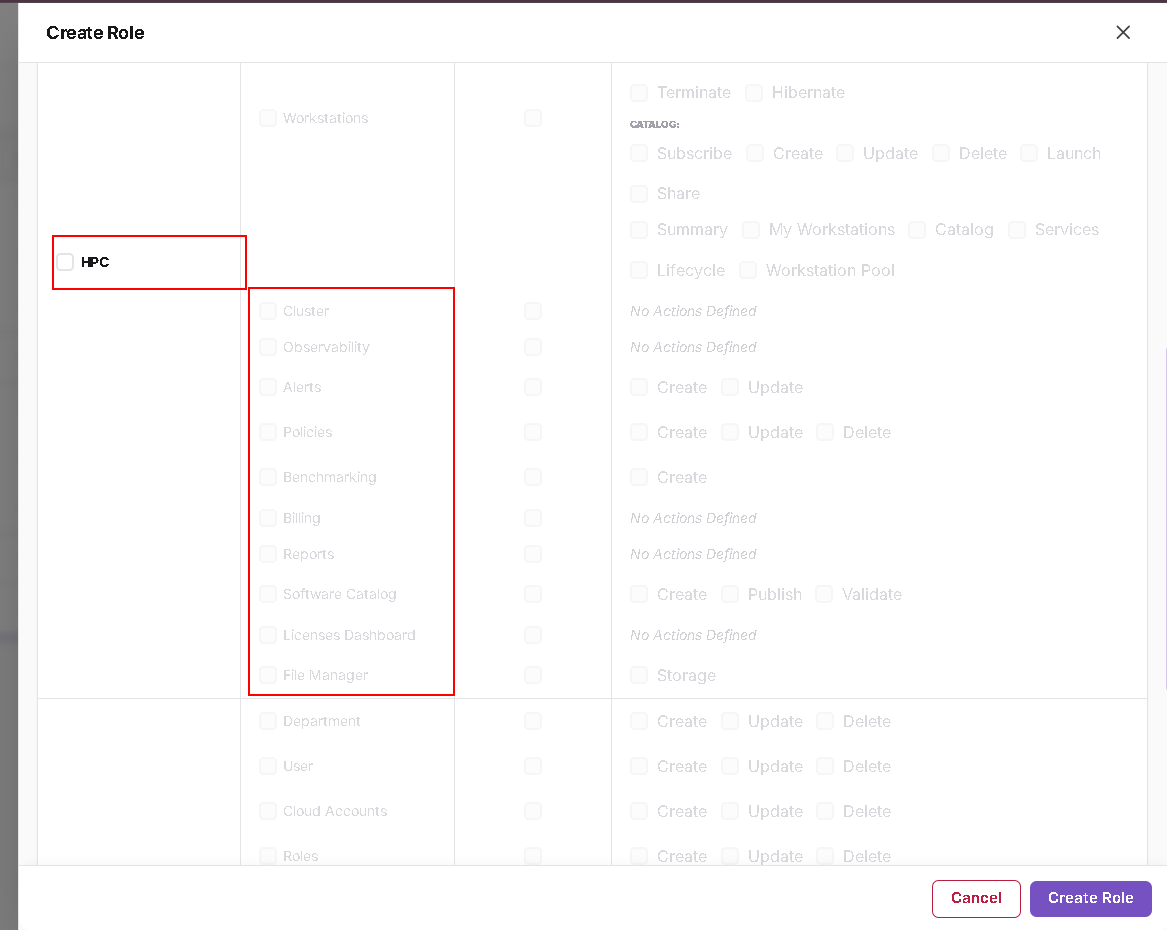
Action privileges vary by submodule. Examples shown in the form include:
| Submodule or group | Action controls shown |
|---|---|
| Projects | Add, Delete, Update. |
| Workstations - Lifecycle | Create, Delete, Update, Disable. |
| Workstations - Compute | Launch, Delete, Start, Stop, Modify, Terminate, Hibernate. |
| Workstations - Catalog | Subscribe, Create, Update, Delete, Launch, Share. |
| Workstations - additional controls | Summary, My Workstations, Catalog, Services, Lifecycle, Workstation Pool. |
| Alerts | Create, Update. |
| Policies | Create, Update, Delete. |
| Benchmarking | Create. |
| Software Catalog | Create, Publish, Validate. |
| File Manager | Storage. |
| Admin submodules and Workflows submodules | Create, Update, Delete. |
For example, Launch, Start, and Stop are separate Workstation controls. Select each action the role requires. Rows marked No Actions Defined have no individual action checkboxes in that column.
Select the Primary Navigation Target
Scroll to the bottom of the form, below the Admin and Workflows permission groups. Select the required Primary Navigation Target, which is marked as a required field. This identifies the role's primary navigation destination.
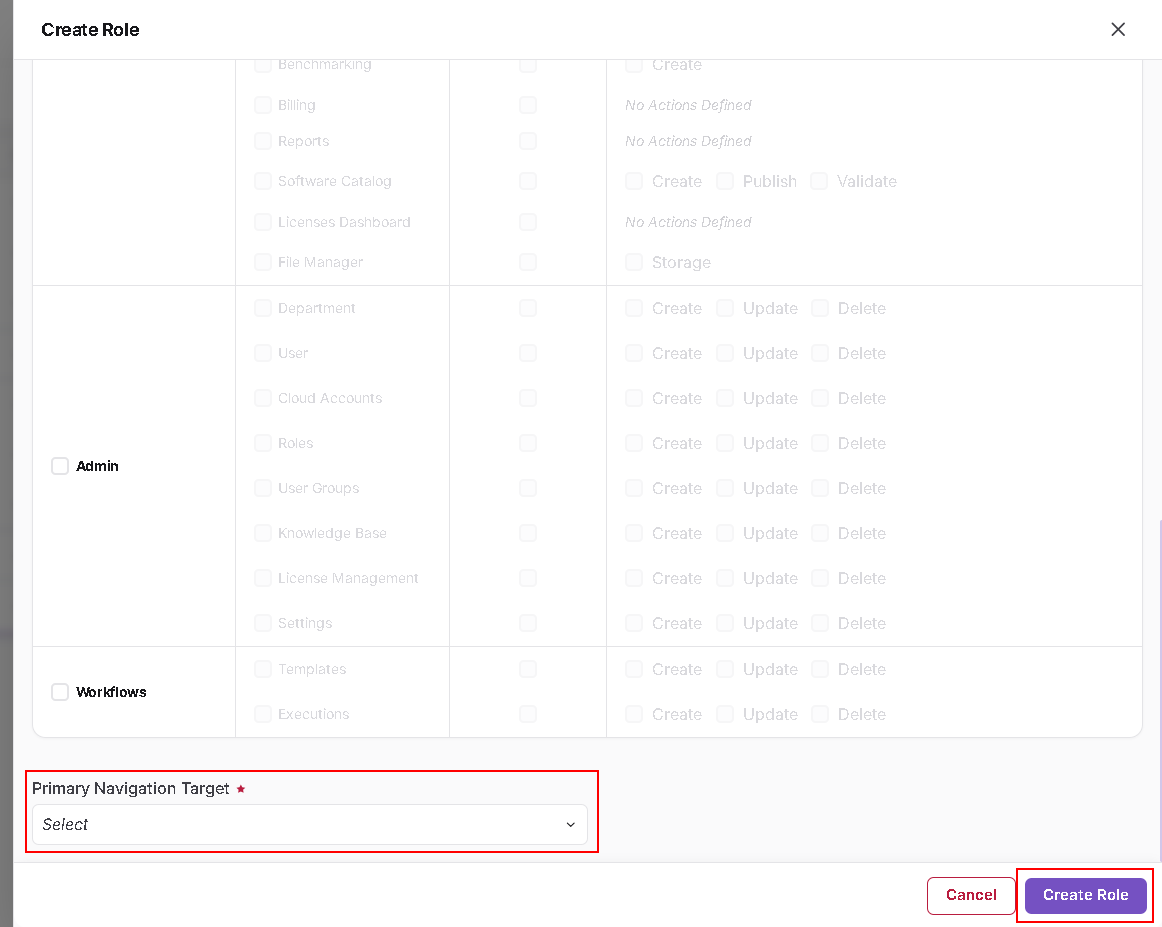
Submit the Role
- Review the role definition, module and submodule selections, action privileges, and Primary Navigation Target.
- Click Create Role at the bottom right to submit the form.
- Return to the list and search for the role to check the saved result.
Use Cancel or the X at the top right to close the form without submitting it.
Edit a Role
Open the Edit Form
- Find the required role in the table.
- Click its three-dot menu in the Action column.
- Select Edit.
Review the Definition and Permissions
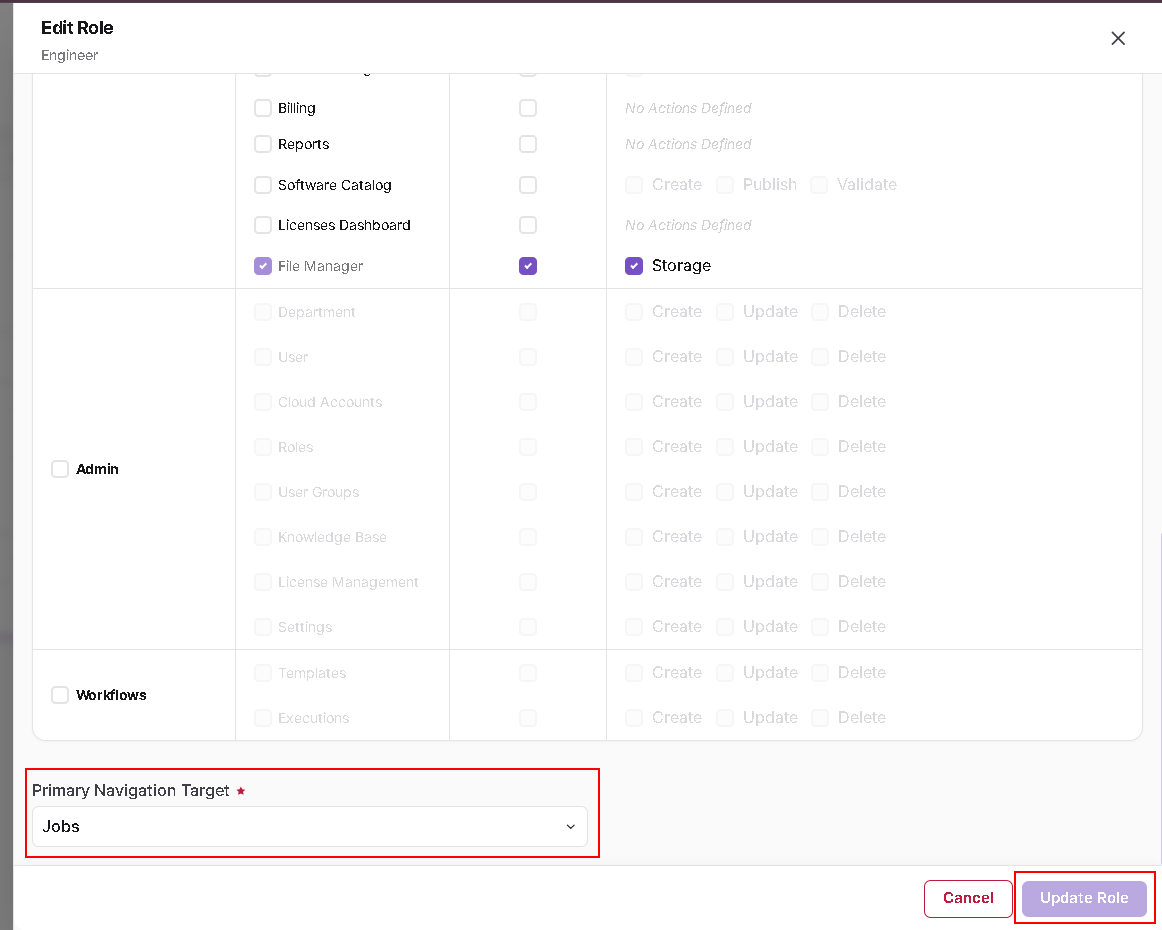
The Edit Role window identifies the selected role below its heading. The screenshots use Engineer as an example.
Review Role Name, Application, and Description, then make the required changes in the available fields.
Scroll through the Permission Matrix to review the existing module, submodule, main-module, and action selections. Update only the selections needed for this role. The checked privileges in the Engineer example illustrate an existing configuration, not defaults for every role.
Review the Navigation Target and Update
- Scroll to the bottom and review Primary Navigation Target. The example has Jobs selected.
- Review the complete form and click Update Role to submit your changes.
- Check the role in the list after saving. The Last Updated By and Last Updated At columns show update metadata when available.
Use Cancel or X to close the form without submitting changes. Review Assigned To in the list when planning permission changes for an existing role.
Remove Action
The same three-dot Action menu includes Remove. Use this entry to begin removing the selected role. Check the role name and its Assigned To count before choosing this action.
User Role Assignment
User role selection is covered in User Management. Use Admin > User for the user-management workflow.