Create a Job
This guide explains how to submit a new job using the Create Job form, including setting application parameters, configuring resources, and entering custom commands.
Step 1: Access the Create Job Form
Navigate to Jobs > Create Job in the platform's menu.

Step 2: Select Workload Type
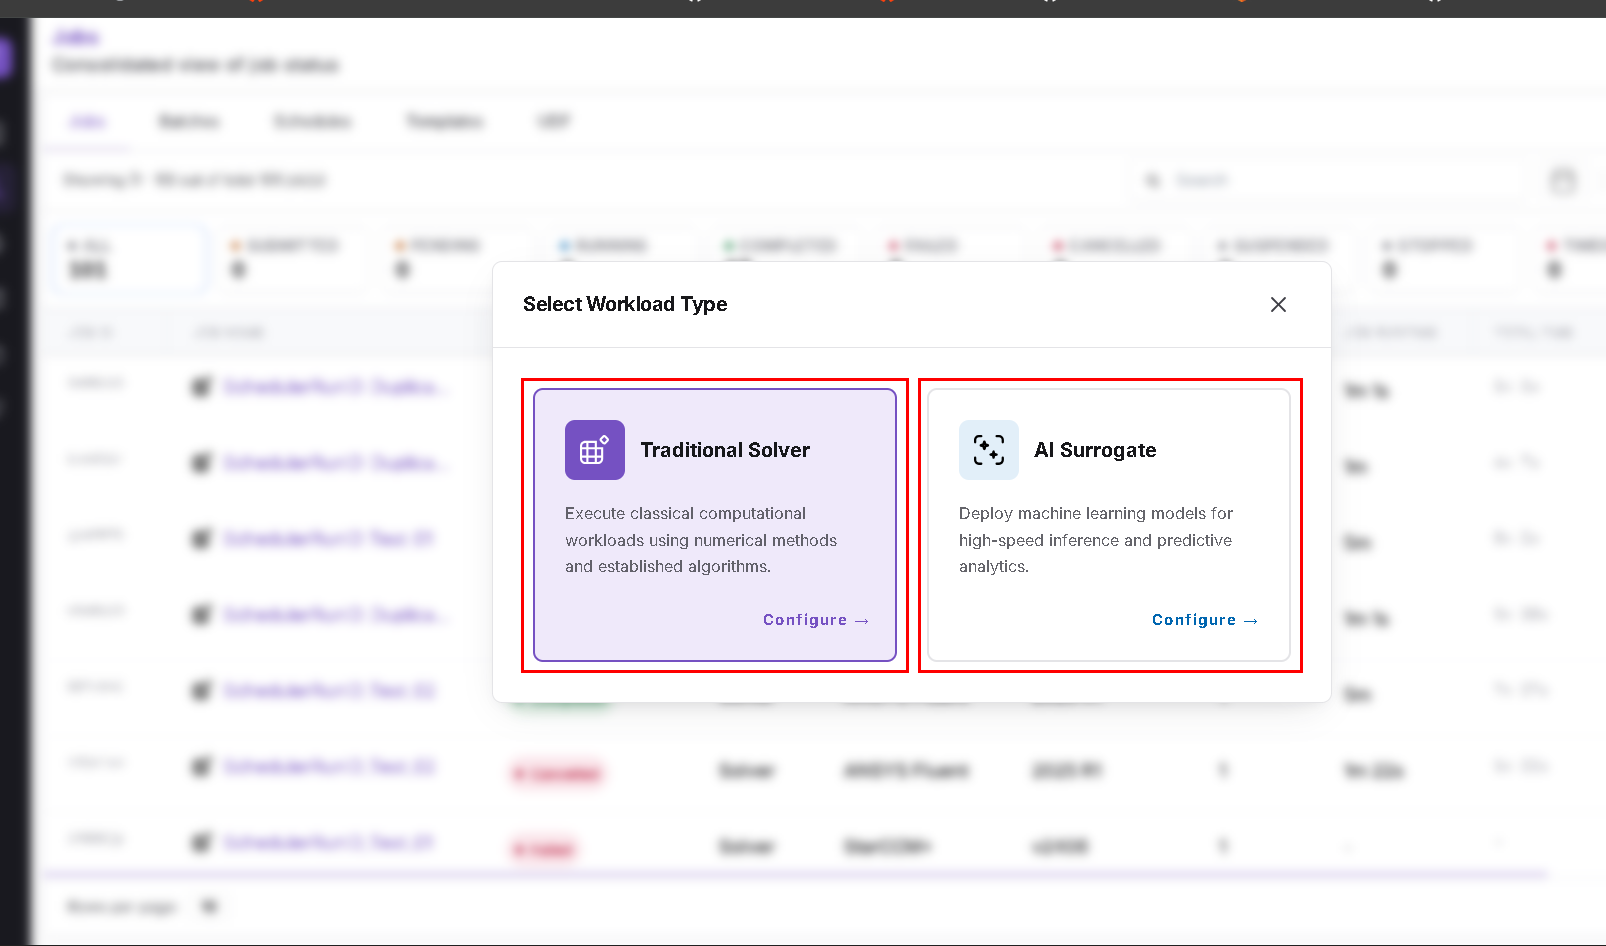
After clicking Create Job, the Select Workload Type window is displayed.
Select the required workload type:
- Traditional Solver: Used to execute classical computational workloads using numerical methods and established algorithms.
- AI Surrogate: Used to deploy machine learning models for high-speed inference and predictive analytics.
Click Configure for the required workload type to proceed with job configuration.
You will see a form similar to the image below:
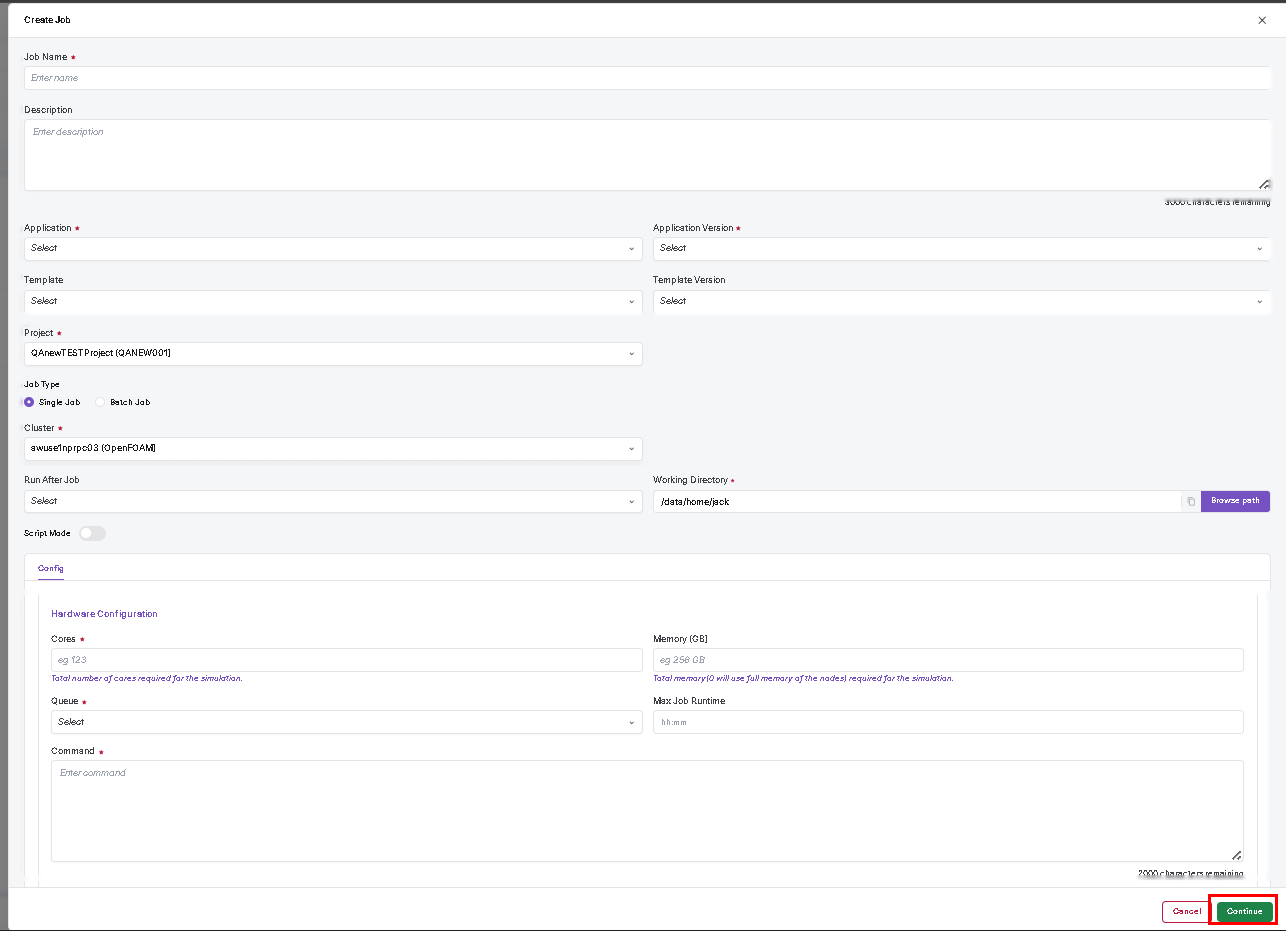
Step 3: Fill in Required Details
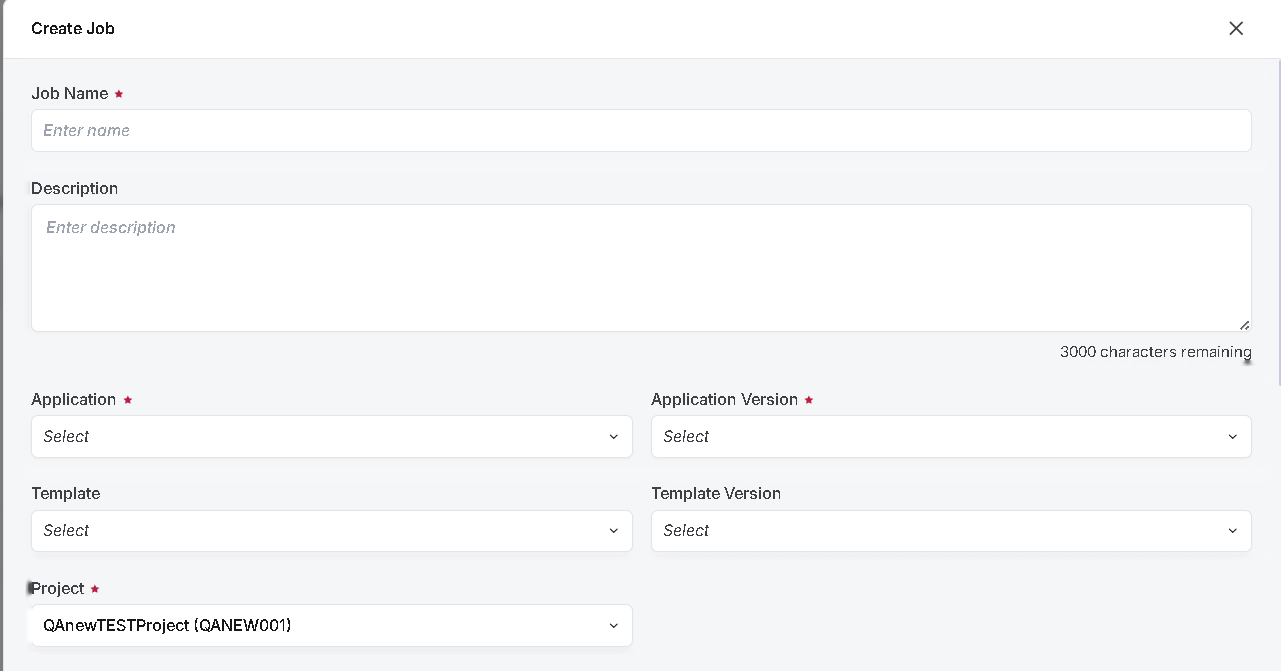
Enter the basic details required to configure the job:
- Job Name: Enter a name to identify the job.
- Description: Optionally provide a description for the job.
- Application: Select the application to run.
- Application Version: Select the required version of the application.
- Template: Select a template, if applicable.
- Template Version: Select the required template version, if applicable.
- Project: Select the project under which the job will be submitted.
Step 4: Choose Job Type
Select the required job type:
- Single Job: Select for a standalone job submission.
- Batch Job: Select for submitting multiple jobs as a batch.

To create a batch job, please follow the steps explained in the Create Batch Job guide.
Step 5: Configure Job Execution
Configure where and how the job will be executed:
- Cluster: Select the cluster on which the job should run.
- Run After Job: Optionally select an existing job if the current job should run after that job.
- Working Directory: Specify the working directory to be used for the job.
- Browse path: Click Browse path to select the working directory interactively.

Run After Job is optional. Use it when the current job needs to run after another job.
Step 6: Configure Resources and Command
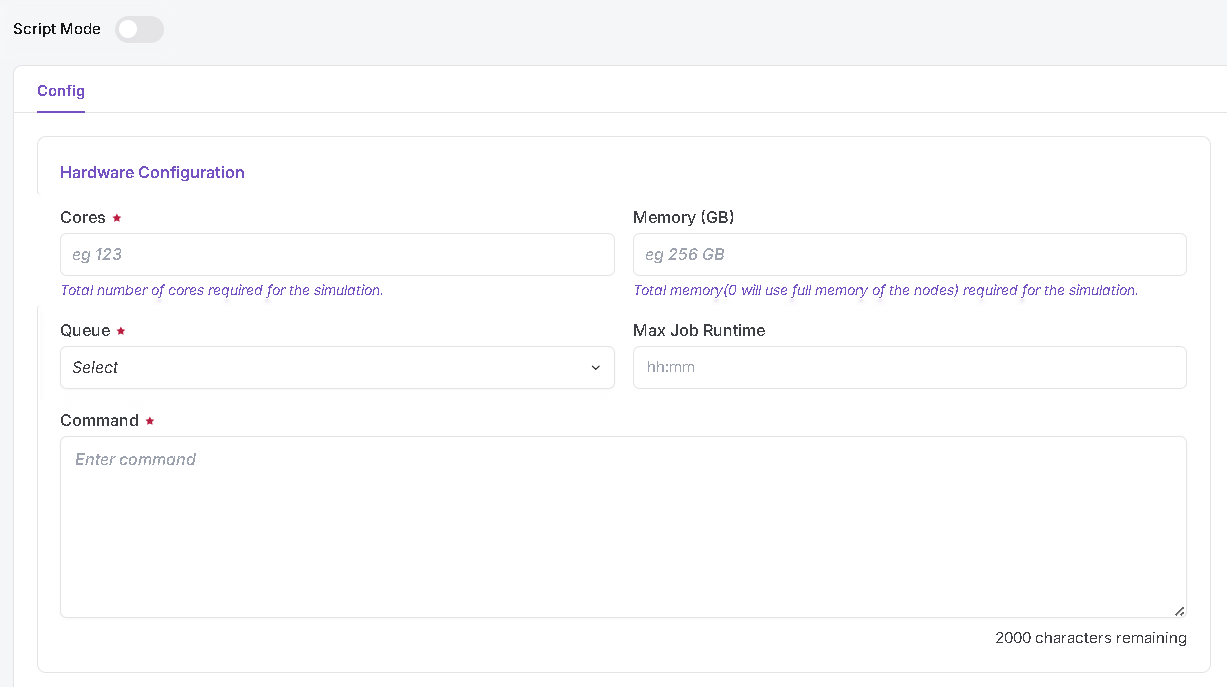
Configure the resource requirements for the job:
-
Script Mode: Enable this option to enter the job configuration using a script. Leave it disabled to configure the job using the form fields.
-
Cores: Enter the total number of CPU cores required for the job.
-
Memory (GB): Enter the memory required for the job.
-
Queue: Select the queue where the job should be scheduled.
-
Max Job Runtime: Specify the maximum runtime allowed for the job.
-
Command: Enter the command or script to be executed.
Step 7: Review and Continue
After entering the required job details and resource configuration:
- Review the entered values, especially the resource configuration and command.
- Click Continue to proceed with job validation.
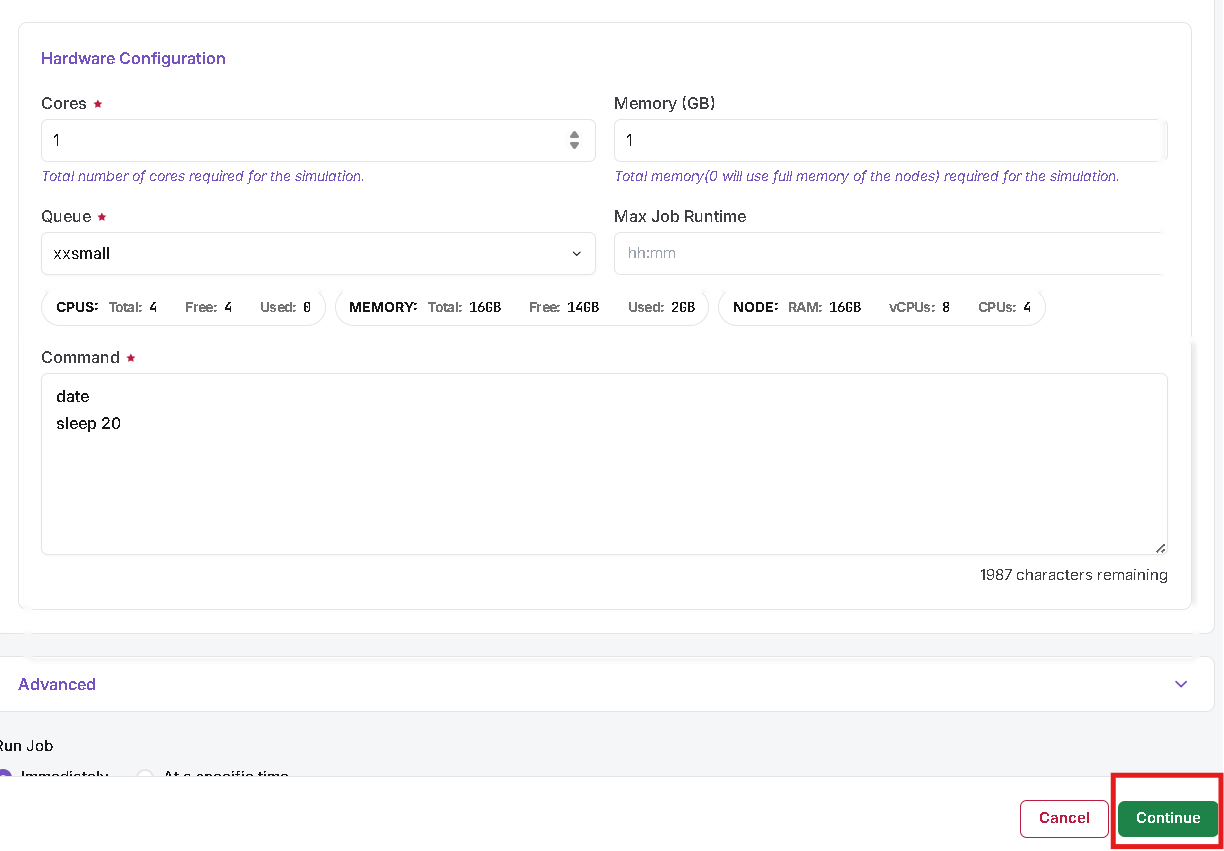
- To edit the form, click Continue, make the required changes in the field or command, and then click Continue again.
- When you edit a field, the button automatically switches from Submit to Continue.
Step 8: Budget Validation
After clicking Continue, review the job configuration and budget information before submitting the job.
The budget summary displays:
- Budget Type: Indicates the budget level used for the job.
- Total Budget: Displays the total allocated budget.
- Used Budget: Displays the amount already consumed.
- Available Budget: Displays the remaining available budget.
- Est. Job Cost: Displays the estimated cost for the current job based on the selected configuration.
Verify that sufficient budget is available before submitting the job.

Step 9: Submit the Job
After reviewing the job configuration and budget details, click Submit.
Once the job is successfully submitted:
- A success notification is displayed confirming that the job has been initiated.
- The user is redirected to the Jobs page.
- The newly submitted job appears in the Jobs list with its current status.

Step 10: Track Jobs
After submission, monitor the job from the Jobs page.
The Jobs page displays the current status of submitted jobs along with information such as Job ID, Job Name, Application, Application Version, Cores, Job Runtime, Start Time, and End Time.
Job status can change as the job progresses through its execution lifecycle.

To view detailed information about a job, click the Job Name. For more information, refer to the Job Details guide.
-
General Notes
- Use Create Job for all new job submissions.
- For workflow-based or dependent jobs, use Create Routing Job.
- If any field is unclear or the form does not submit, double-check all mandatory fields and the working directory path.
- For job failures or workflow errors, consult log files attached to each job record.
- For persistent issues, or if you need guidance on a field, reach out to the Admin for support.