Job Routing (Administrator)
Job Routing lets administrators define how eligible jobs are assigned to clusters. Jobs → Routing is an administrator-only tab. Administrators must enable routing under Admin → Settings → General → Jobs before the routing configuration affects users' job submissions. The administrator's selected rule and available resources determine which cluster and queue the platform assigns; users do not choose a cluster in the Single Job form while routing is enabled.
Step 1: Enable Job Routing
- Open Admin → Settings → General.
- Under Jobs, switch Job Routing on.
- Scroll down and click Save. A successful update confirmation indicates that the setting has been saved.

Note: The supplied screenshot shows the enabled toggle and success confirmation, but the Save button is below the captured area. Routing rules should not be assumed active merely because they exist in the list; check the saved setting.
Step 2: Open and manage routing rules
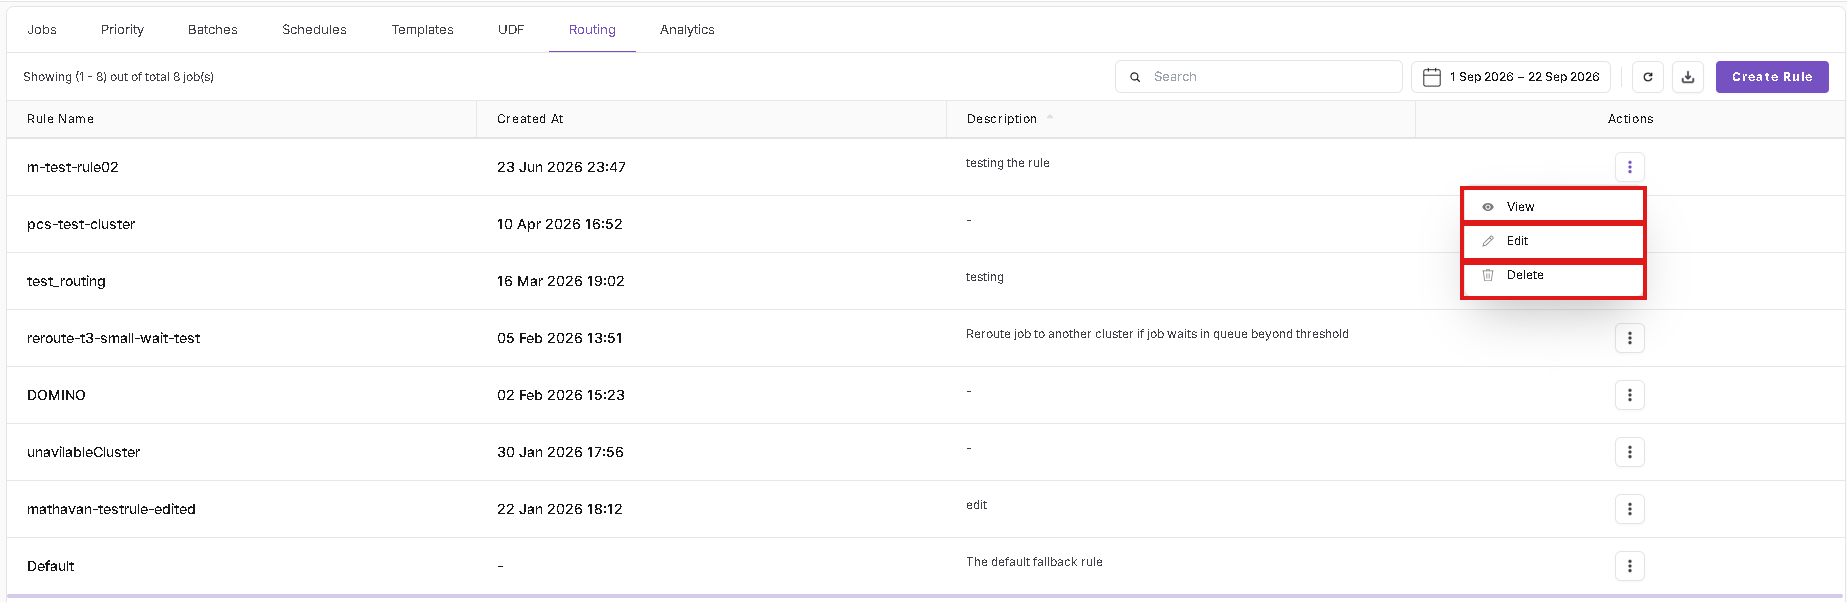
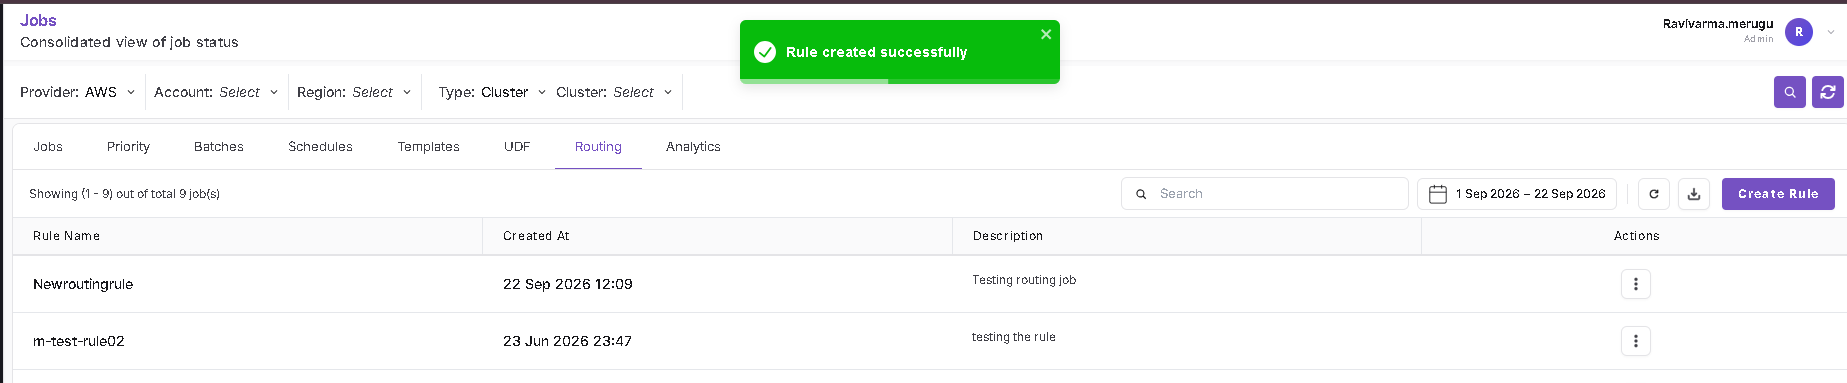
Open Jobs → Routing. The table lists the Rule Name, Created At, Description, and Actions. Use Search, the date-range selector, Refresh, or Download as needed. Click Create Rule to add a rule; the three-dot action menu provides View, Edit, and Delete for an existing rule.
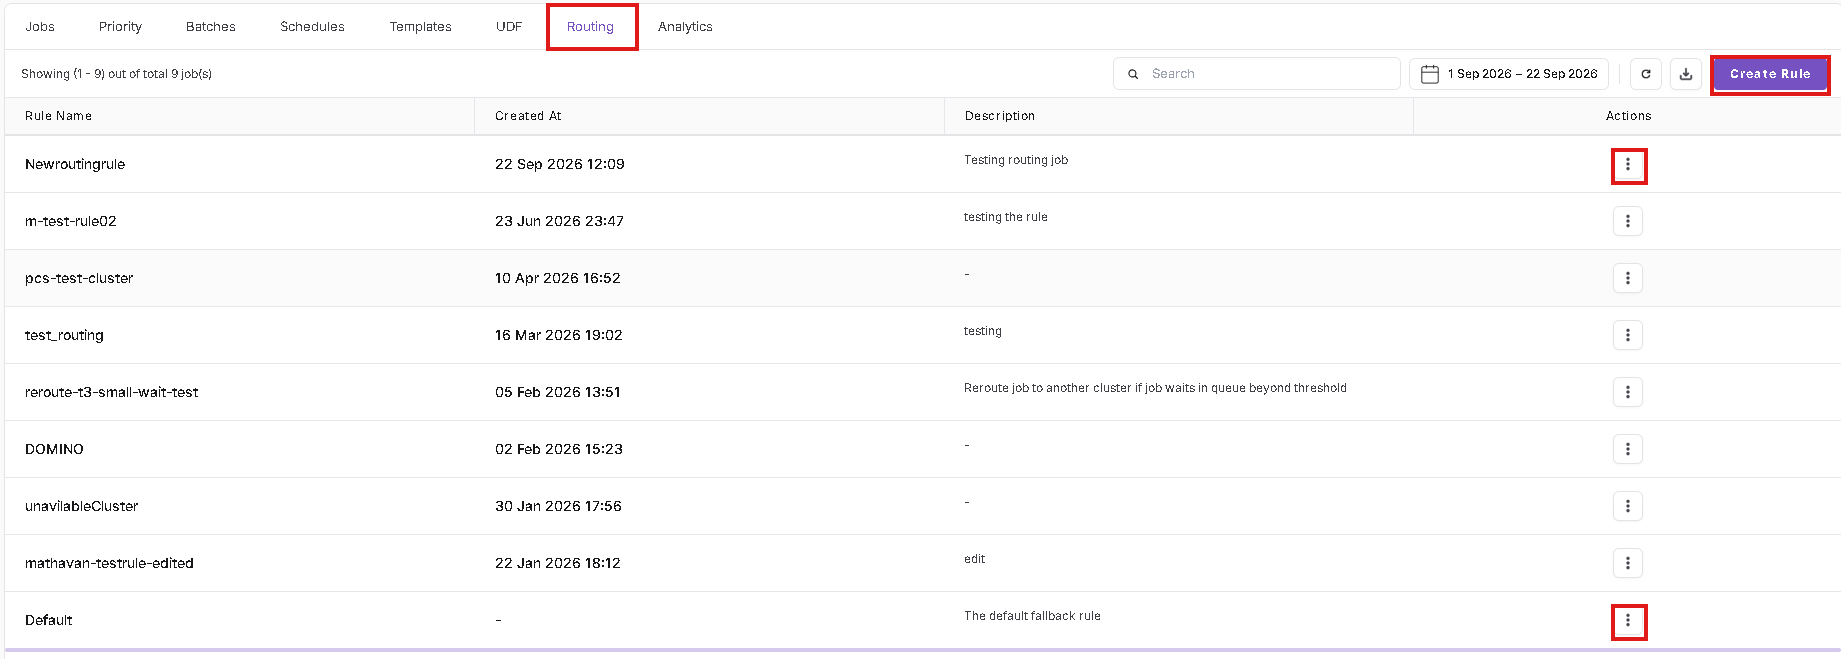
Step 3: Create a routing rule
Click Create Rule. In Rule Identity, enter a Rule Name and an optional Description. In Scope & Conditions, select the target Application and Version; use the + action if another application/version needs to be added.
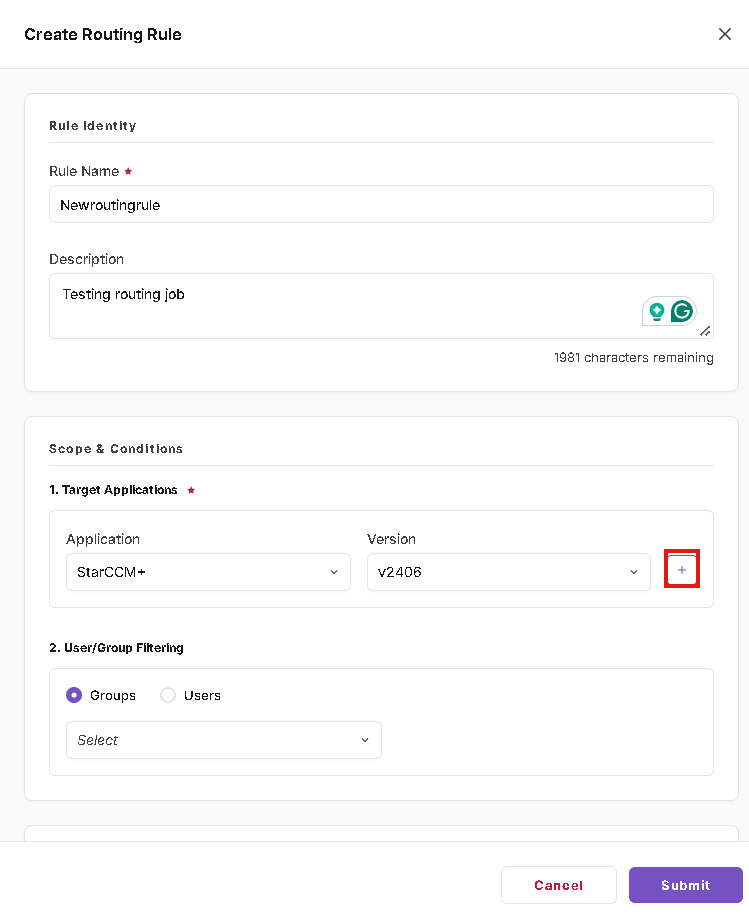
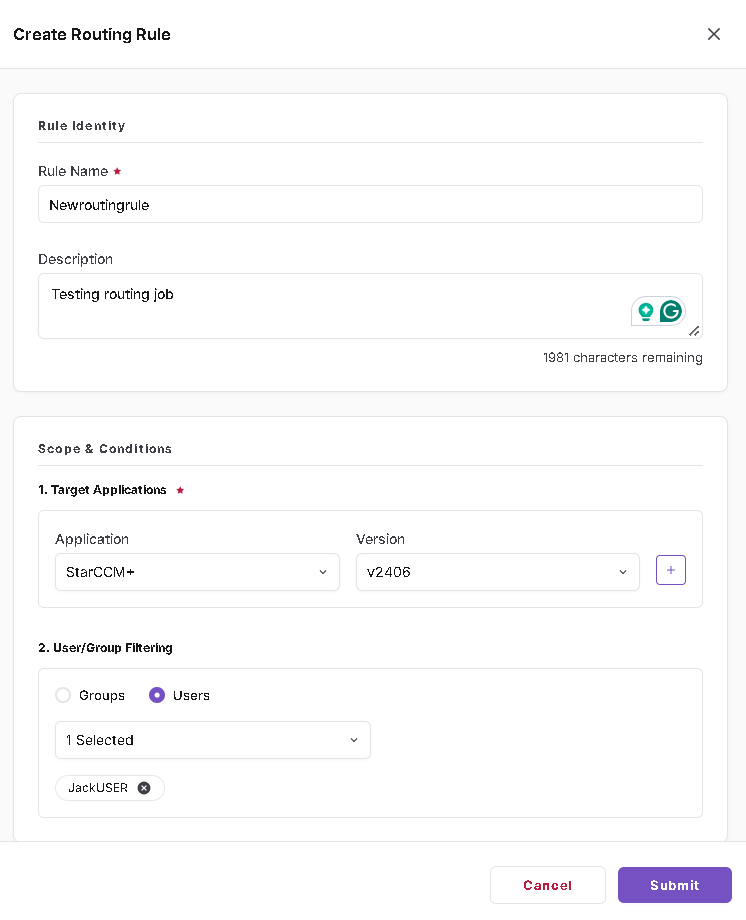
Choose Groups or Users under User/Group Filtering and select the relevant entries. In the illustrated example, the rule Newroutingrule applies to JackUSER running StarCCM+ v2406.
Step 4: Configure routing conditions and clusters
In Advanced Routing Conditions, specify whether to Re-route to a lower queue if the higher queue is full and, where required, the Maximum wait time in a queue before running (HH:MM). The example rule enables lower-queue rerouting and sets a wait value of 00:01.
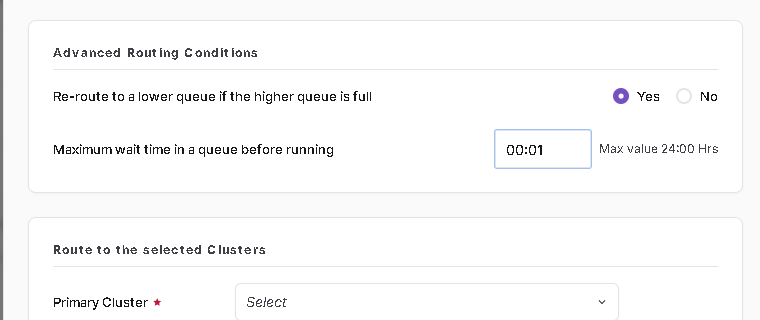
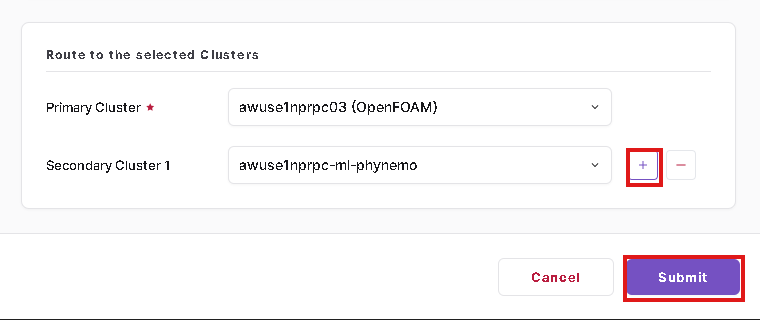
Under Route to the selected Clusters, select a mandatory Primary Cluster and an optional Secondary Cluster. The + action can add another secondary-cluster entry where supported. In this example, the primary cluster is awuse1nprpc03 (OpenFOAM) and the secondary cluster is awuse1nprpc-ml-phynemo. Click Submit to save the rule.
A success notification appears and the rule is added to the Routing list.
Validation boundary: The 00:01 wait time and secondary cluster are configured in this example; the screenshots in this guide do not establish that the one-minute wait threshold or secondary-cluster failover occurred. Those behaviors require separate verification.
Step 5: View the Default Routing Rule
The Default rule provides a fallback when no more-specific rule applies, according to the current rule configuration. Locate Default in the Routing table, open its Actions → View, and inspect the scope and cluster choices.
The captured Default rule has the description The default fallback rule, applies to All applications, and has no user/group filter selected.
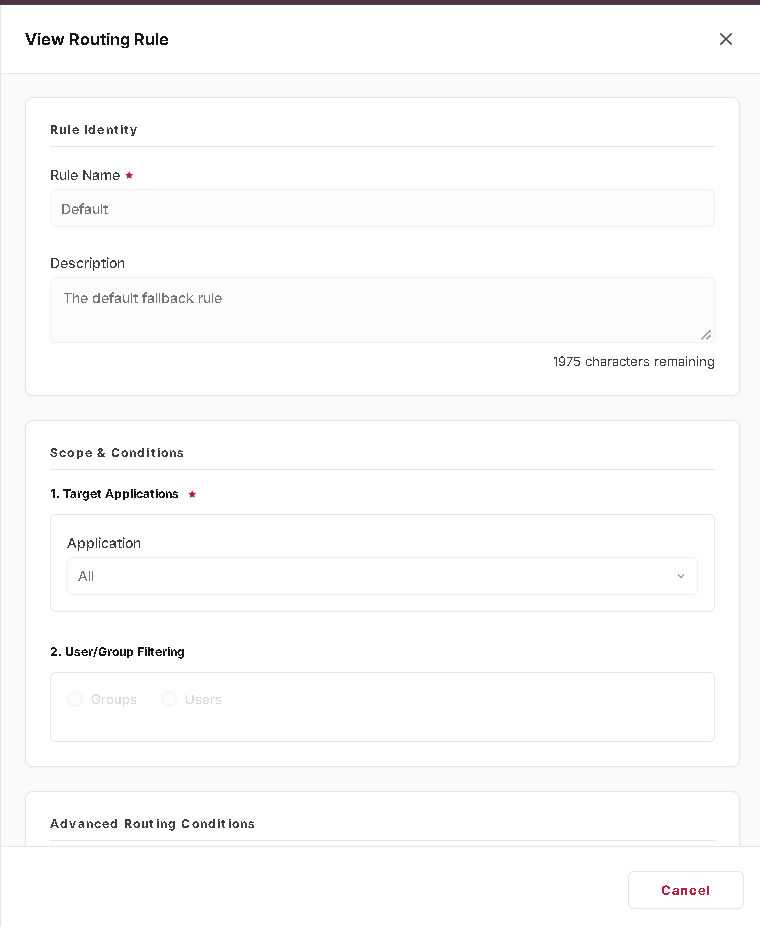
Its advanced configuration enables lower-queue rerouting; the maximum queue-wait field is blank. Its primary cluster is awuse1nprpc03 (OpenFOAM) and no secondary cluster is configured.
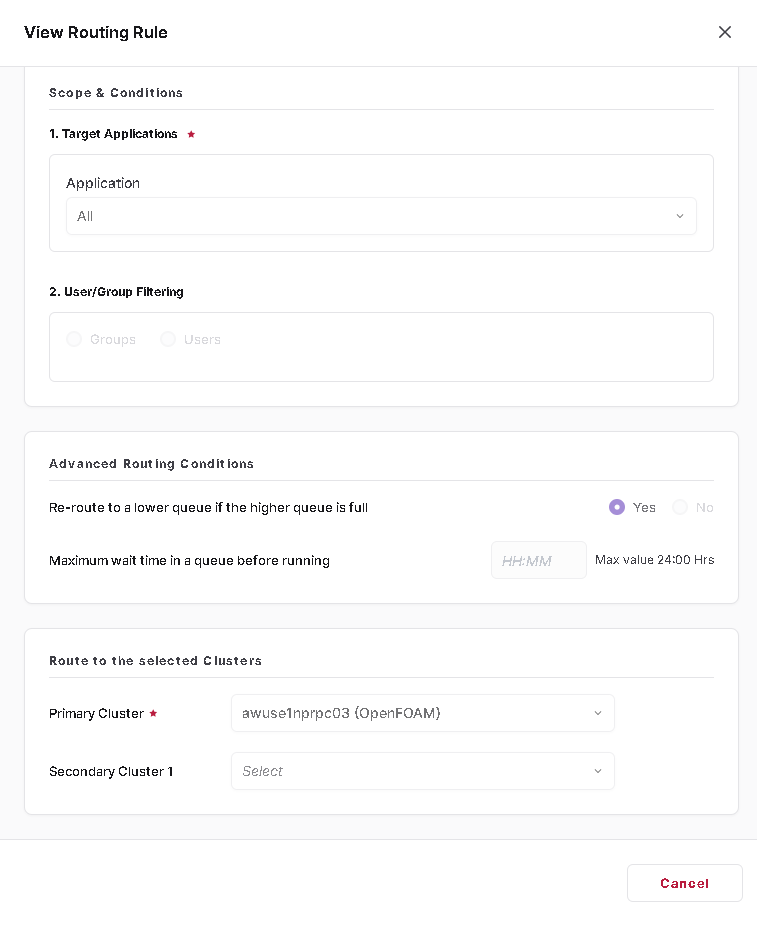
Note: The user-specific rule and the Default rule in these screenshots share the same primary cluster. Seeing that cluster in a Job Details page alone does not identify which rule matched. The Default rule itself was not independently exercised in the tests documented below.
Step 6: Update or delete a rule
Use Actions → View to inspect a rule or Actions → Edit to open the update form. After making supported changes, click Submit. To delete a rule, choose Actions → Delete and confirm the prompt only if deletion is intended.
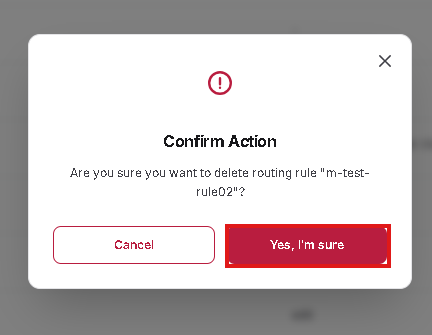
Caution: Deleting a rule is an administrative change. Check its scope and any dependent jobs before confirming.
Step 7: Automatic Job Routing for Administrators
Administrators can submit jobs using automatic routing in the same way as Engineer users.
When Job Routing is enabled under Admin → Settings, the system automatically determines the cluster and queue based on the applicable routing rule and its configured conditions.
Step 1: Create a Job
Navigate to Jobs → Jobs and click Create Job.
Enter the required details, including Job Name, Application, Application Version, Project, and Job Type.
When routing is enabled, the Cluster selection dropdown is not displayed in the Single Job submission flow.
Step 2: Configure Job Resources
Enter the required cores, memory, maximum runtime, and execution command.
Click Continue, review the budget estimation, and click Submit.
Step 3: Verify Automatic Cluster Selection
Open the submitted job from the Jobs list.
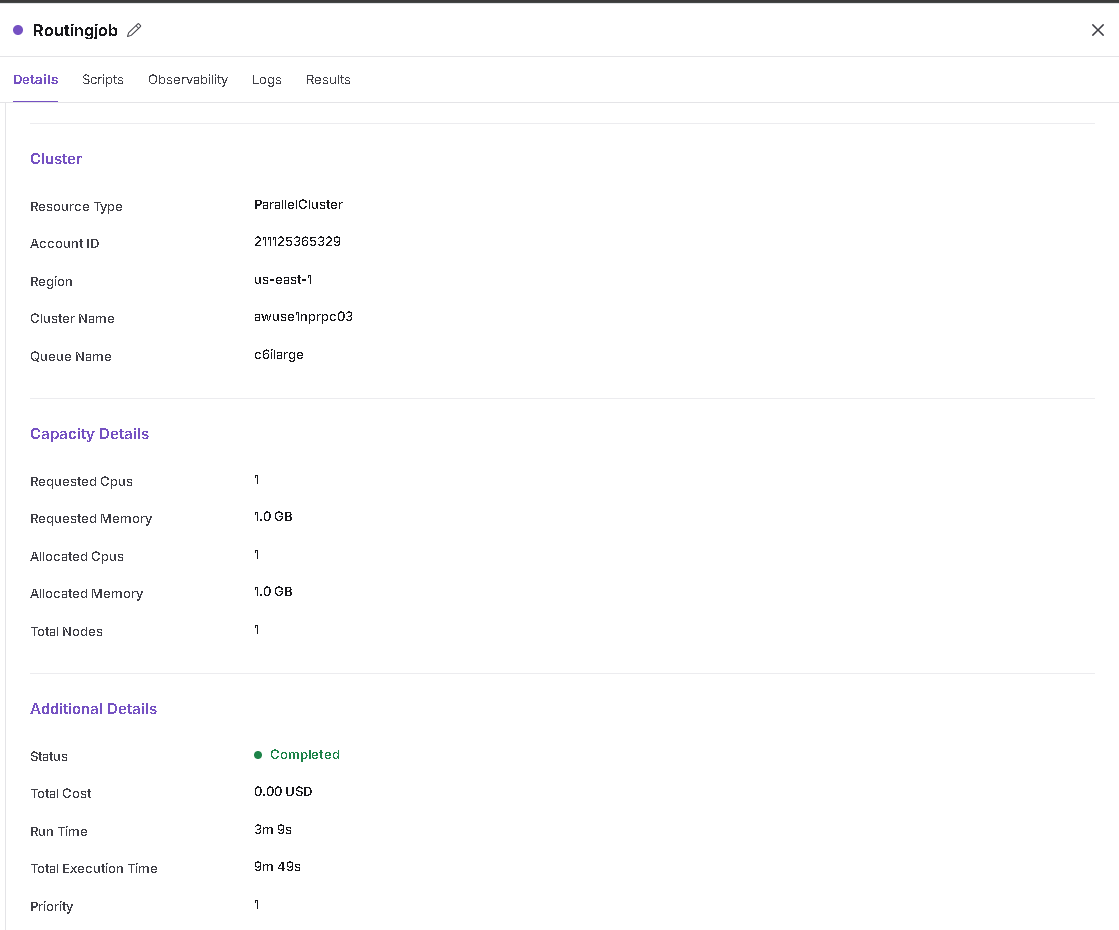
Navigate to Job Details → Details and review the Cluster section to identify the automatically selected cluster and queue.
Step 4: Verify Queue Availability
Navigate to Queue Status and select the assigned cluster and queue.
Review the available CPU cores, memory, running jobs, and pending jobs.
When the initially selected queue is fully occupied, the routing system may assign another eligible queue according to the applicable routing rule.
Step 5: Monitor Job Execution
Return to Jobs, open the submitted job, and review its execution timeline.
Verify the assigned cluster, queue, allocated resources, and final execution status.
Note: The Default Routing Rule applies when no specific routing rule matches the job. Secondary-cluster routing depends on the configured rule and resource availability.
Step 8: Verify the routed cluster and queue
Check live queue availability
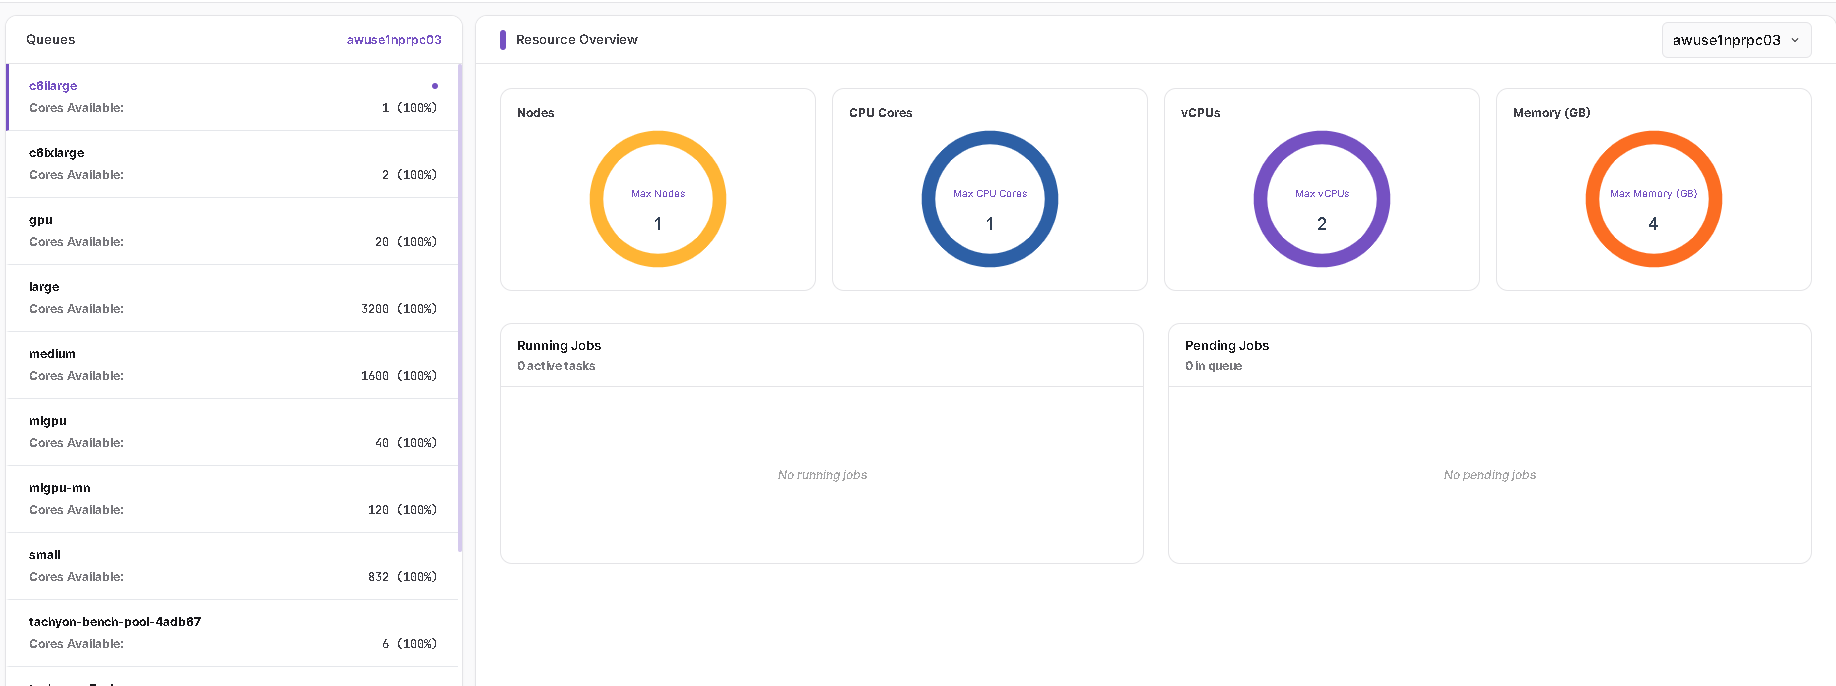
Open Queue Status, choose the cluster, and select the queue. Its list shows available cores; the resource overview shows maximum nodes, CPU cores, vCPUs, memory, and running/pending jobs. Availability can change as jobs start and complete.
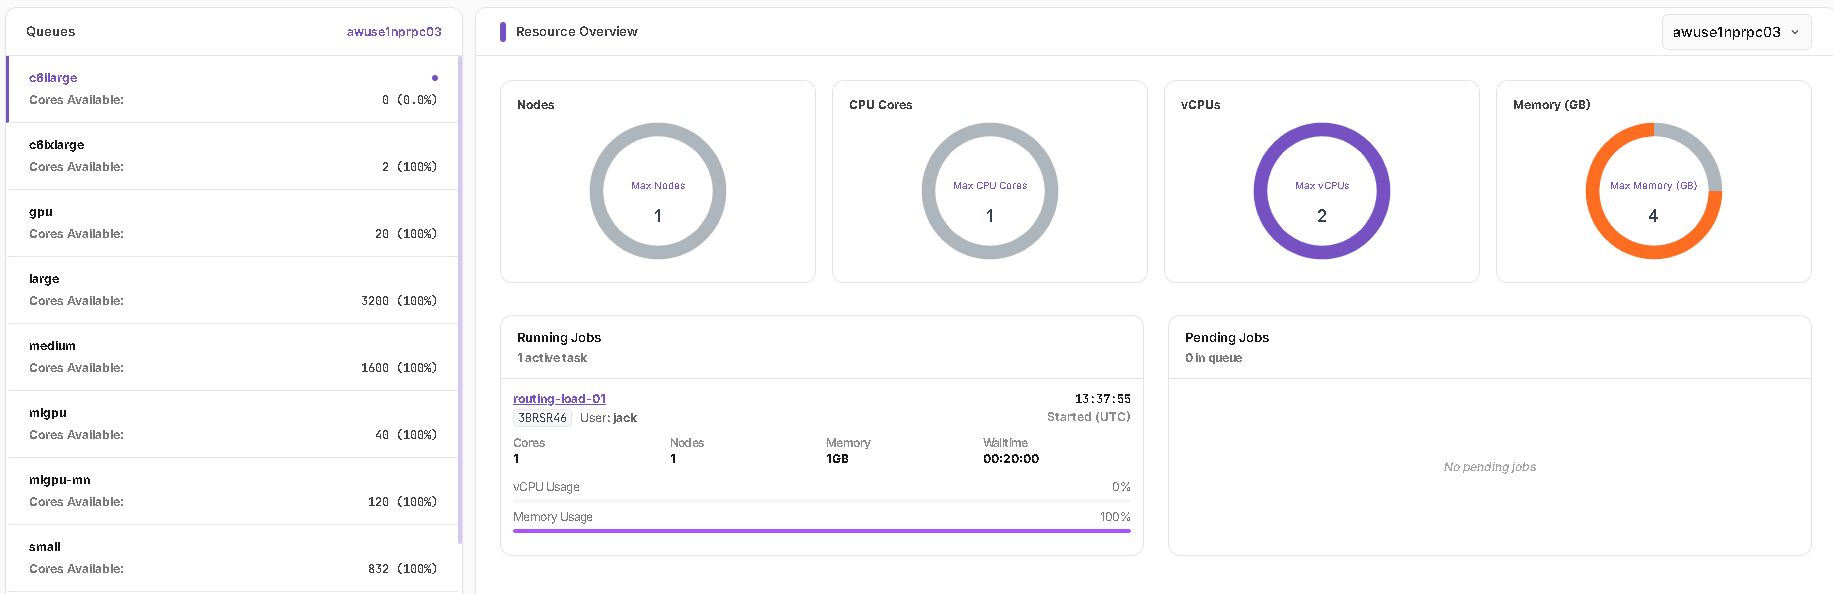
Before the test, c6ilarge on awuse1nprpc03 showed 1 available core (100%), no running jobs and no pending jobs.
Baseline submission: primary cluster
JackUSER submitted a StarCCM+ v2406 Single Job requesting 1 core and 1 GB memory. Job Details showed awuse1nprpc03 as the assigned cluster and c6ilarge as the queue. The baseline job completed.
Queue occupied and alternative queue assigned
A second test job, routing-load-01, requested 1 core / 1 GB and ran on c6ilarge. While it was running, Queue Status showed 0 available cores in that queue and listed the active job.
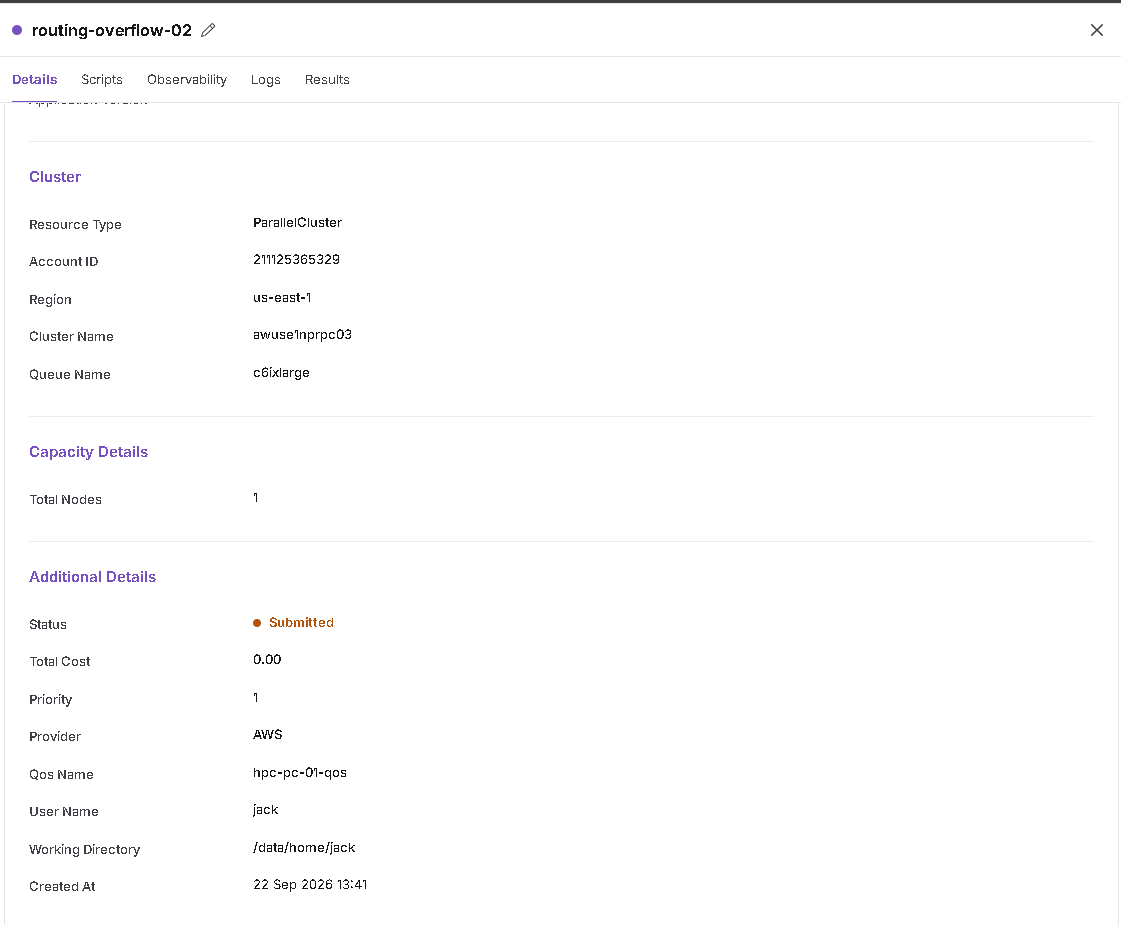
While that queue was occupied, JackUSER submitted routing-overflow-02 with 1 core / 1 GB. Its initial Job Details showed the same primary cluster (awuse1nprpc03) but a different queue (c6ixlarge).
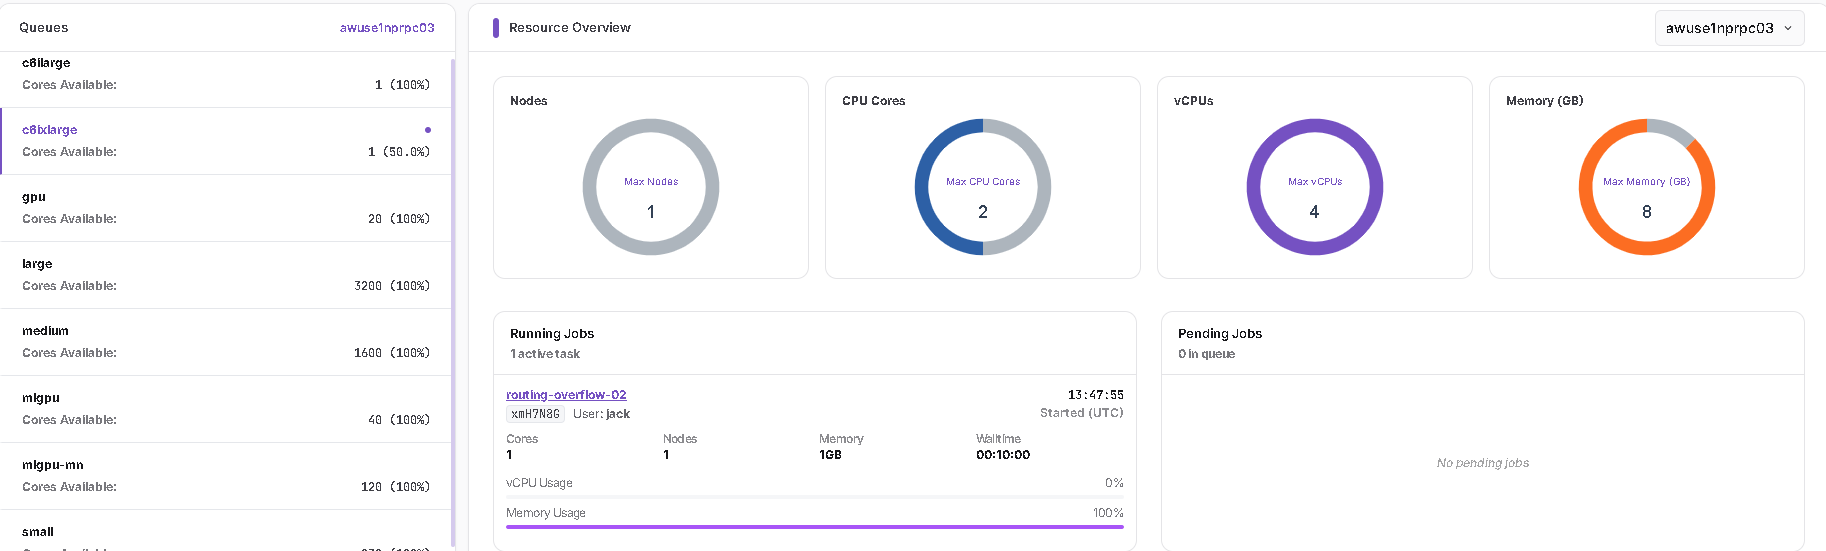
The job later appeared under Running Jobs for c6ixlarge. By that observation, the first job had already completed, so the screenshots do not show simultaneous execution in both queues.
The overflow job subsequently Completed on c6ixlarge with 1 allocated CPU and 1 GB allocated memory.
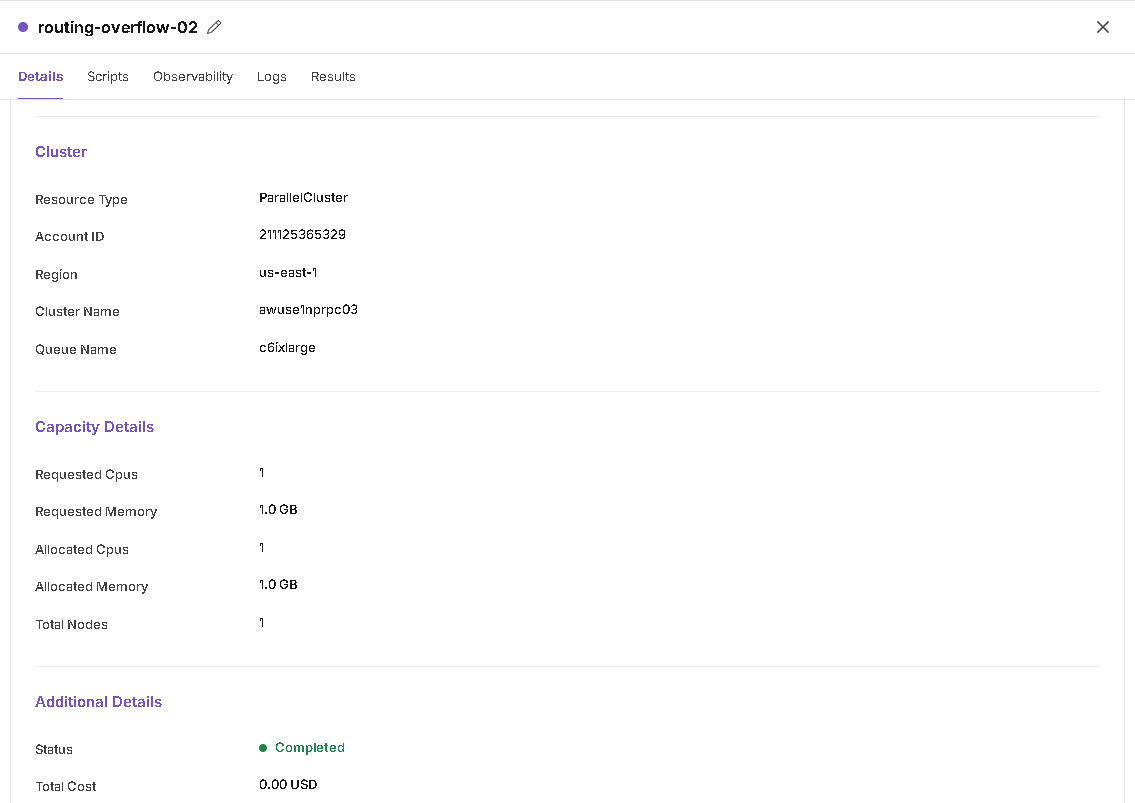
Observed conclusion: The test shows an alternative queue selected and successfully used while the initially selected queue had been fully occupied at submission. It does not by itself prove which internal routing condition fired, that the 00:01 wait threshold was exercised, or that the job moved to the secondary cluster.
General notes
- Rule scope, application/version selection, queue availability, and enabled settings affect routing behavior; check all of them when investigating a routing decision.
- Job Details identifies the selected Cluster Name and Queue Name. Queue Status provides a live capacity view; capture it while the relevant job is running.
- The default rule has no secondary cluster in the captured configuration; do not assume that it offers cross-cluster failover.
- For the user-facing workflow, refer to Job Routing (User Guide). Users do not manage the administrator-only Routing tab.