Submit a Job Using Script Mode
This section explains how to submit a job by entering or uploading a custom job script.
Step 1: Open the Job Submission Page
Navigate to Jobs and click Create Job.

Step 2: Enable Script Mode
In the Create Job window, enter the required basic details such as Job Name, Application, Application Version, Project, and Working Directory as needed. Then turn on the Script Mode toggle.
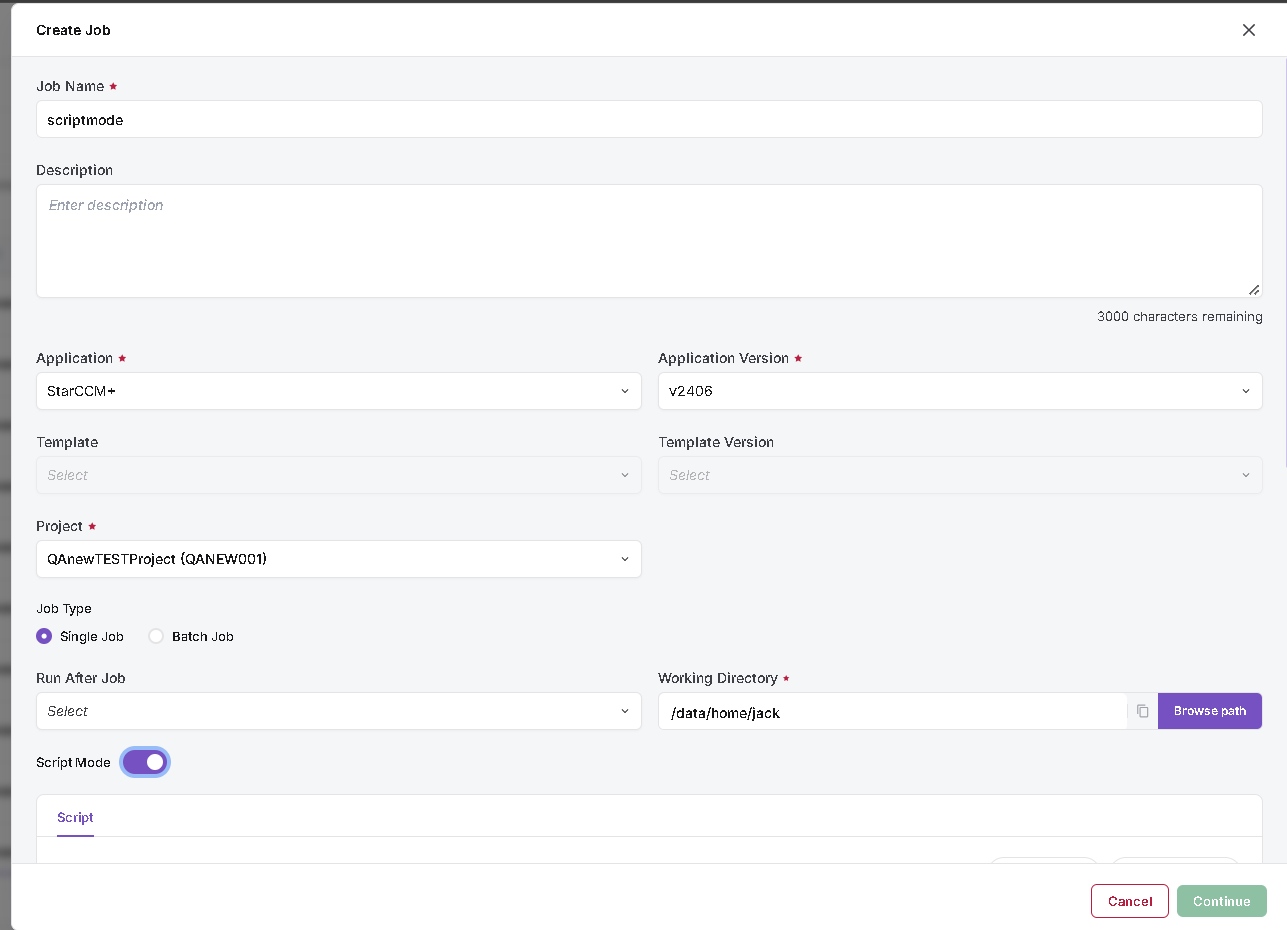
Step 3: Add the Job Script
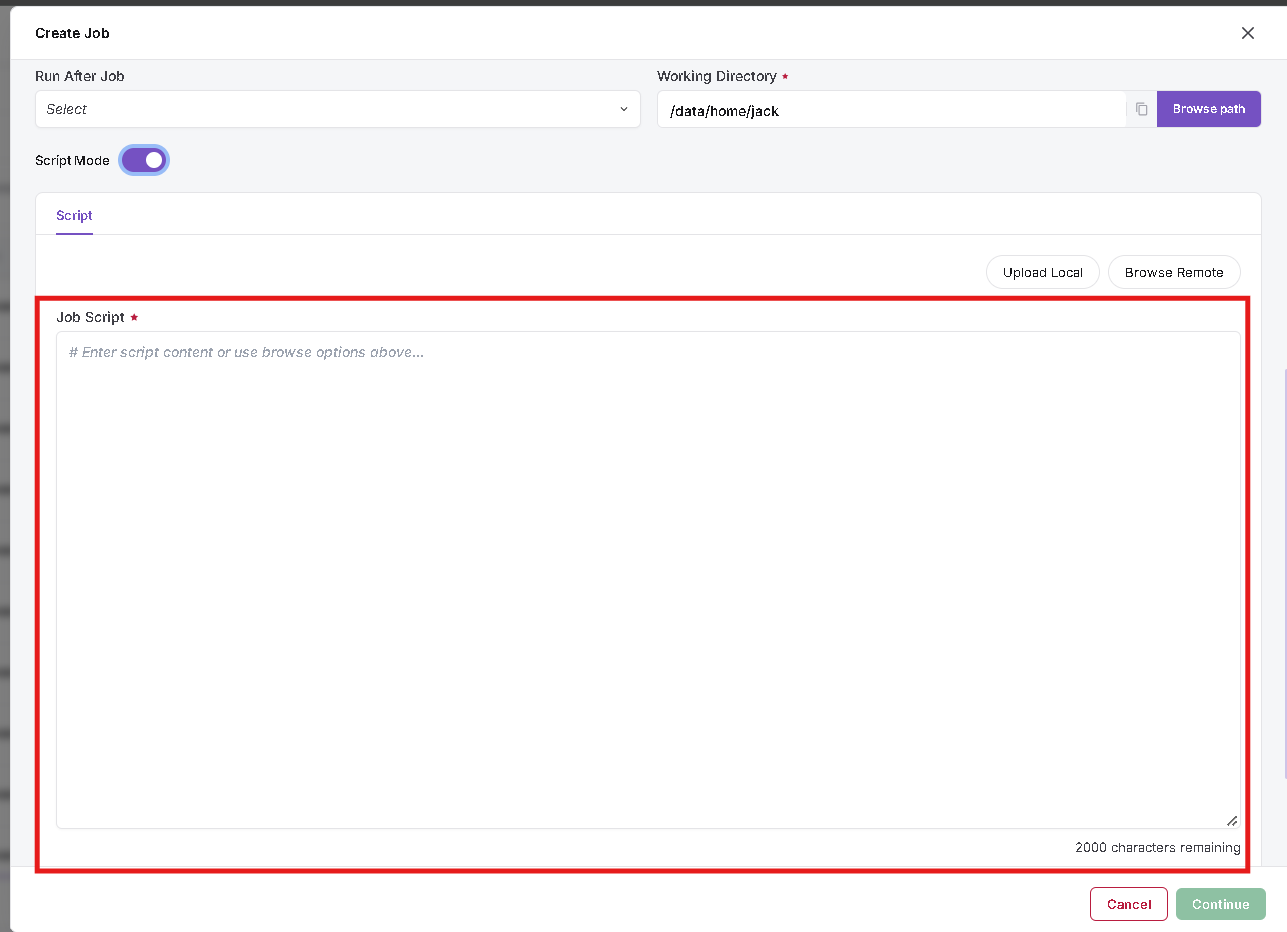
Open the Script tab. You can either:
- click Upload Local to upload a script from your local machine, or
- click Browse Remote to select a script from the remote file system.
You can also paste or type the script directly in the Job Script editor.
After selecting or pasting the script, verify the script content in the editor.
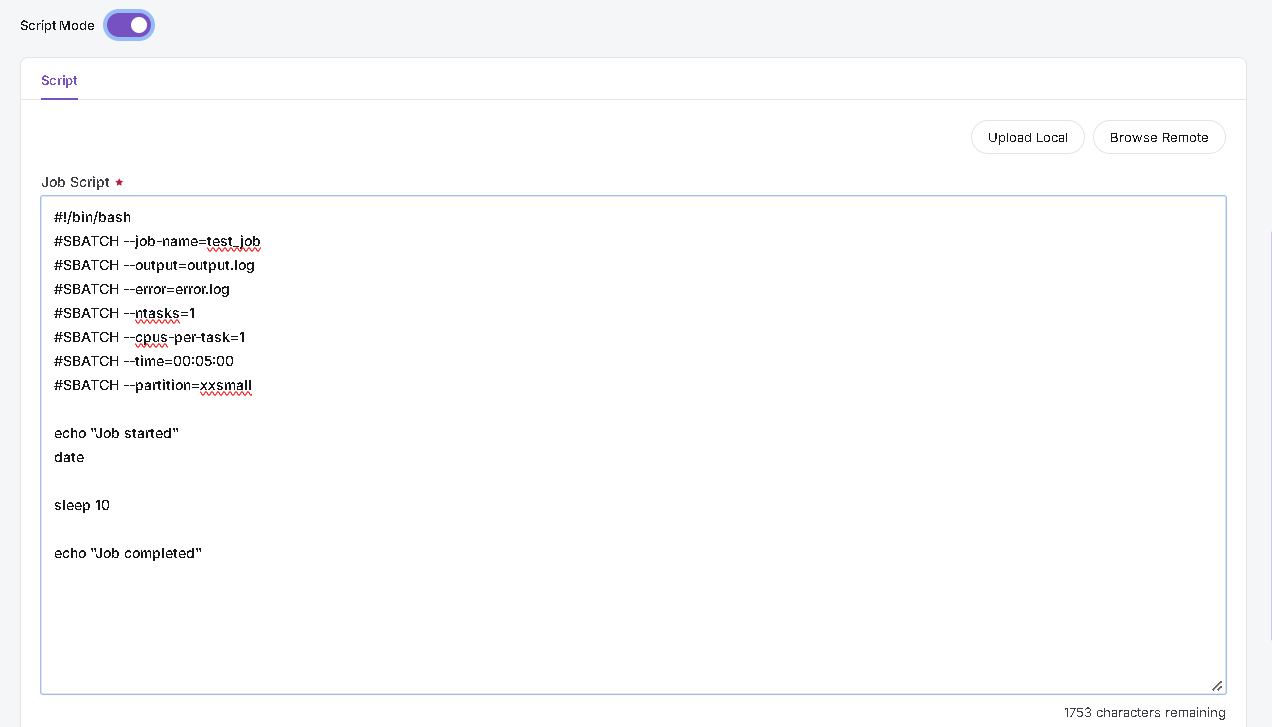
Step 4: Budget Validation
After reviewing the script content and job configuration, proceed to the final review section. The budget summary displays the Budget Type, Total Budget, Used Budget, Available Budget, and Estimated Job Cost.
Click Submit to submit the script job.

Step 5: Job Submission Success
After submission, a success notification is displayed and the job appears in the Jobs list with its initial status.

-
📌 General Notes
- Ensure the job script contains the required scheduler directives and execution commands before submitting the job.
- If you encounter any UI issues or have questions about job submissions or job status, please contact the Admin for support.