Shell Access
Shell Access provides a terminal within File Manager for working with files and directories on the configured host.
Administrators can:
- Configure shell access for selected users and clusters.
- Open their own shell session through File Manager when their account is covered by the access settings.
Configure Shell Access
Open Settings
- Open the user dropdown in the upper-right corner.
- Select Settings.
- Under General, locate Data Management & Shell.
Shell access is managed here rather than through the Edit User page.
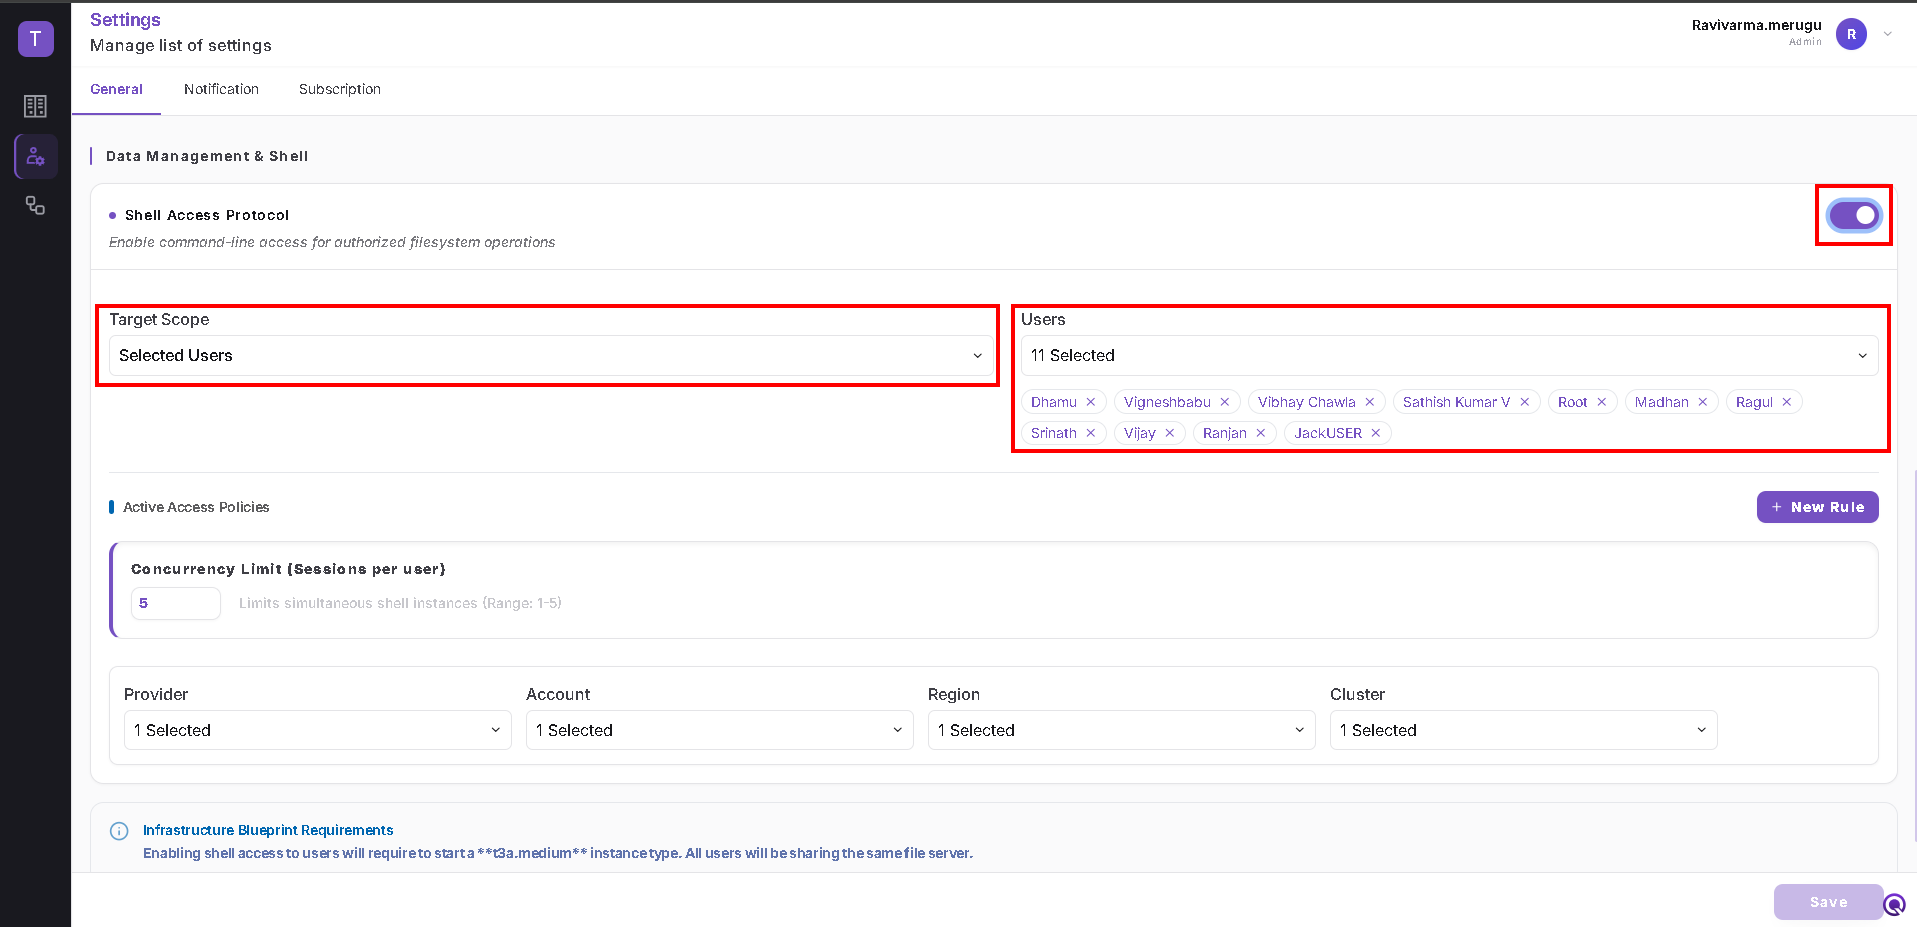
Enable Shell Access and Select Users
- Enable Shell Access Protocol.
- Set Target Scope to Selected Users.
- Open the Users selector and choose the accounts that require shell access.
- To use shell access with your own administrator account, include your account in the selection.
Configure Access Policies
Configure the scope and session limit under Active Access Policies.
| Field | Description |
|---|---|
| Concurrency Limit (Sessions per user) | Maximum simultaneous shell sessions for each user. The displayed range is 1–5. |
| Provider | Cloud provider covered by the policy. |
| Account | Cloud account covered by the policy. |
| Region | Region containing the target cluster. |
| Cluster | Cluster for which shell access is configured. |
Use + New Rule when an additional access policy is required.
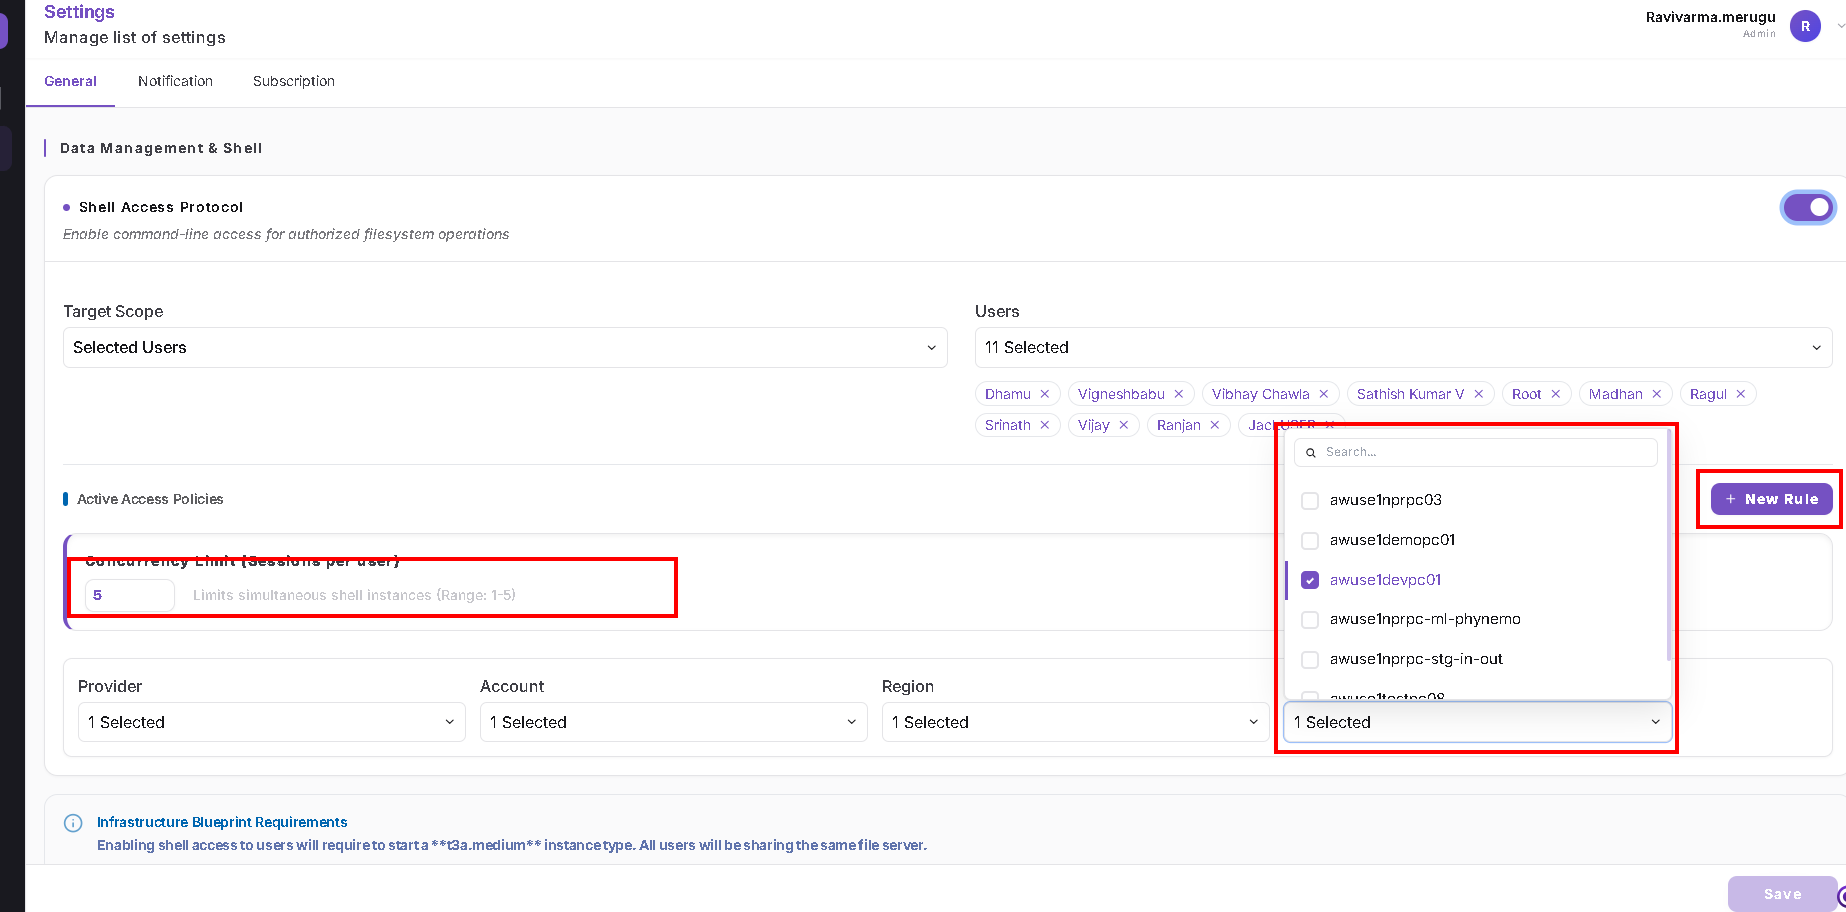
After selecting the required users and configuring the policies, click Save.
Open Your Own Shell Session
Administrators use the same File Manager connection flow as other enabled users.
Before starting, ensure that:
- Shell Access Protocol is enabled.
- Your administrator account is included in the configured user scope.
- The required cluster is covered by an access policy.
- You have the password for your shell account.
Step 1: Select the Target Cluster
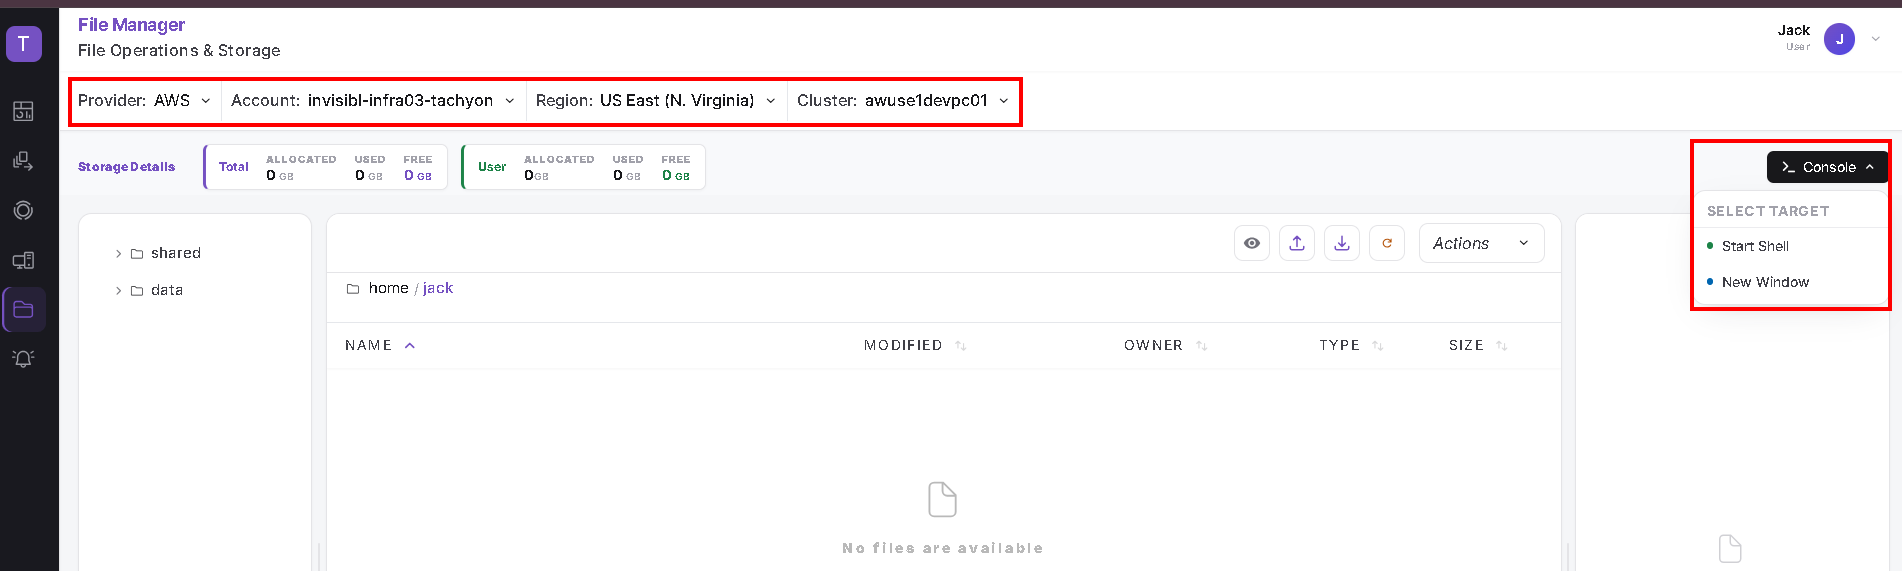
- Open File Manager.
- Select the required Provider, Account, Region, and Cluster.
- Open the Console dropdown.
- Select Start Shell.
The menu also provides a New Window option.
Step 2: Enter Your Password
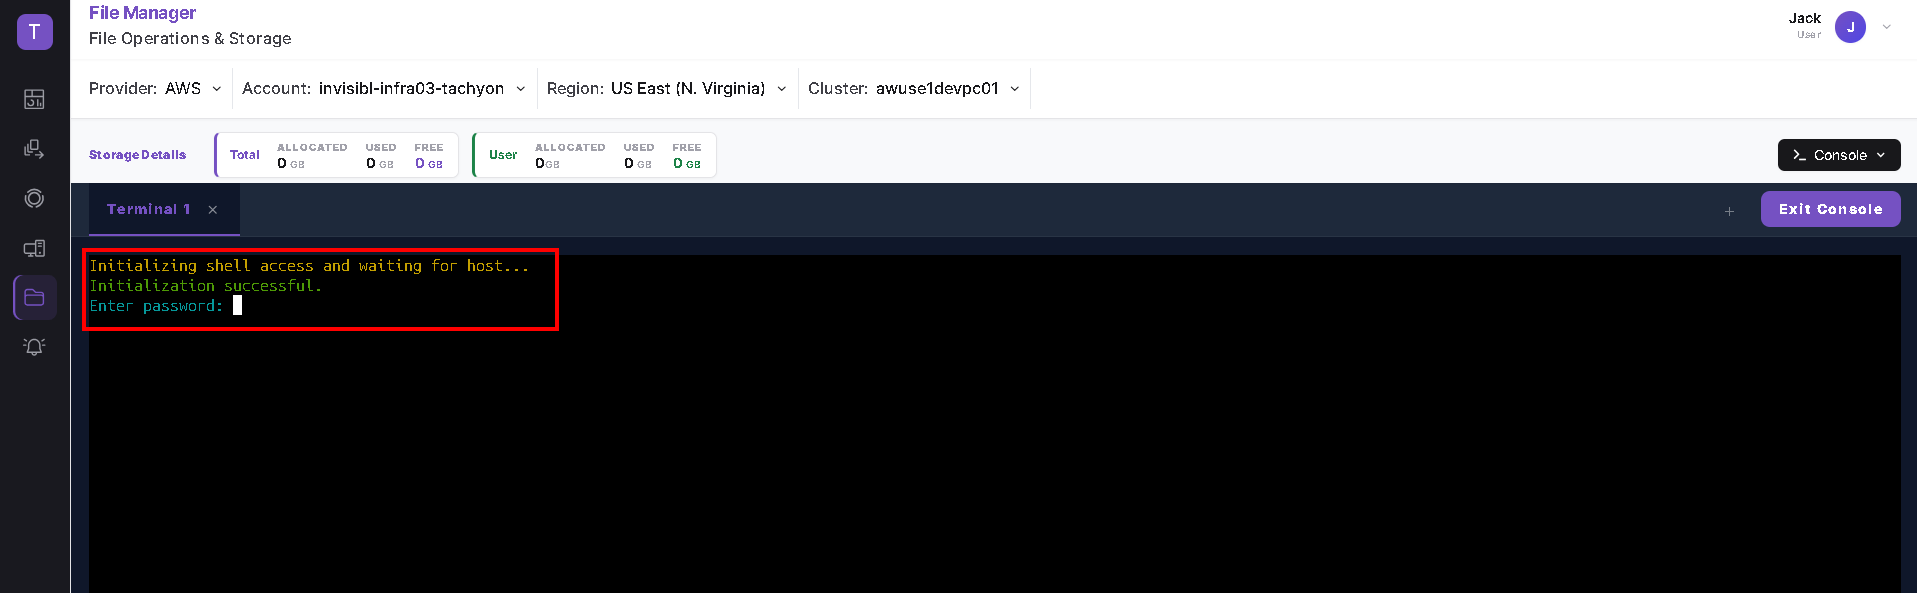
A terminal opens and displays an initialization message.
- Wait for initialization to complete.
- When the terminal displays Enter password, enter your shell account password.
- Press Enter to authenticate.
Step 3: Wait for Authentication
After successful authentication, the terminal displays Authentication successful and the host's welcome message.
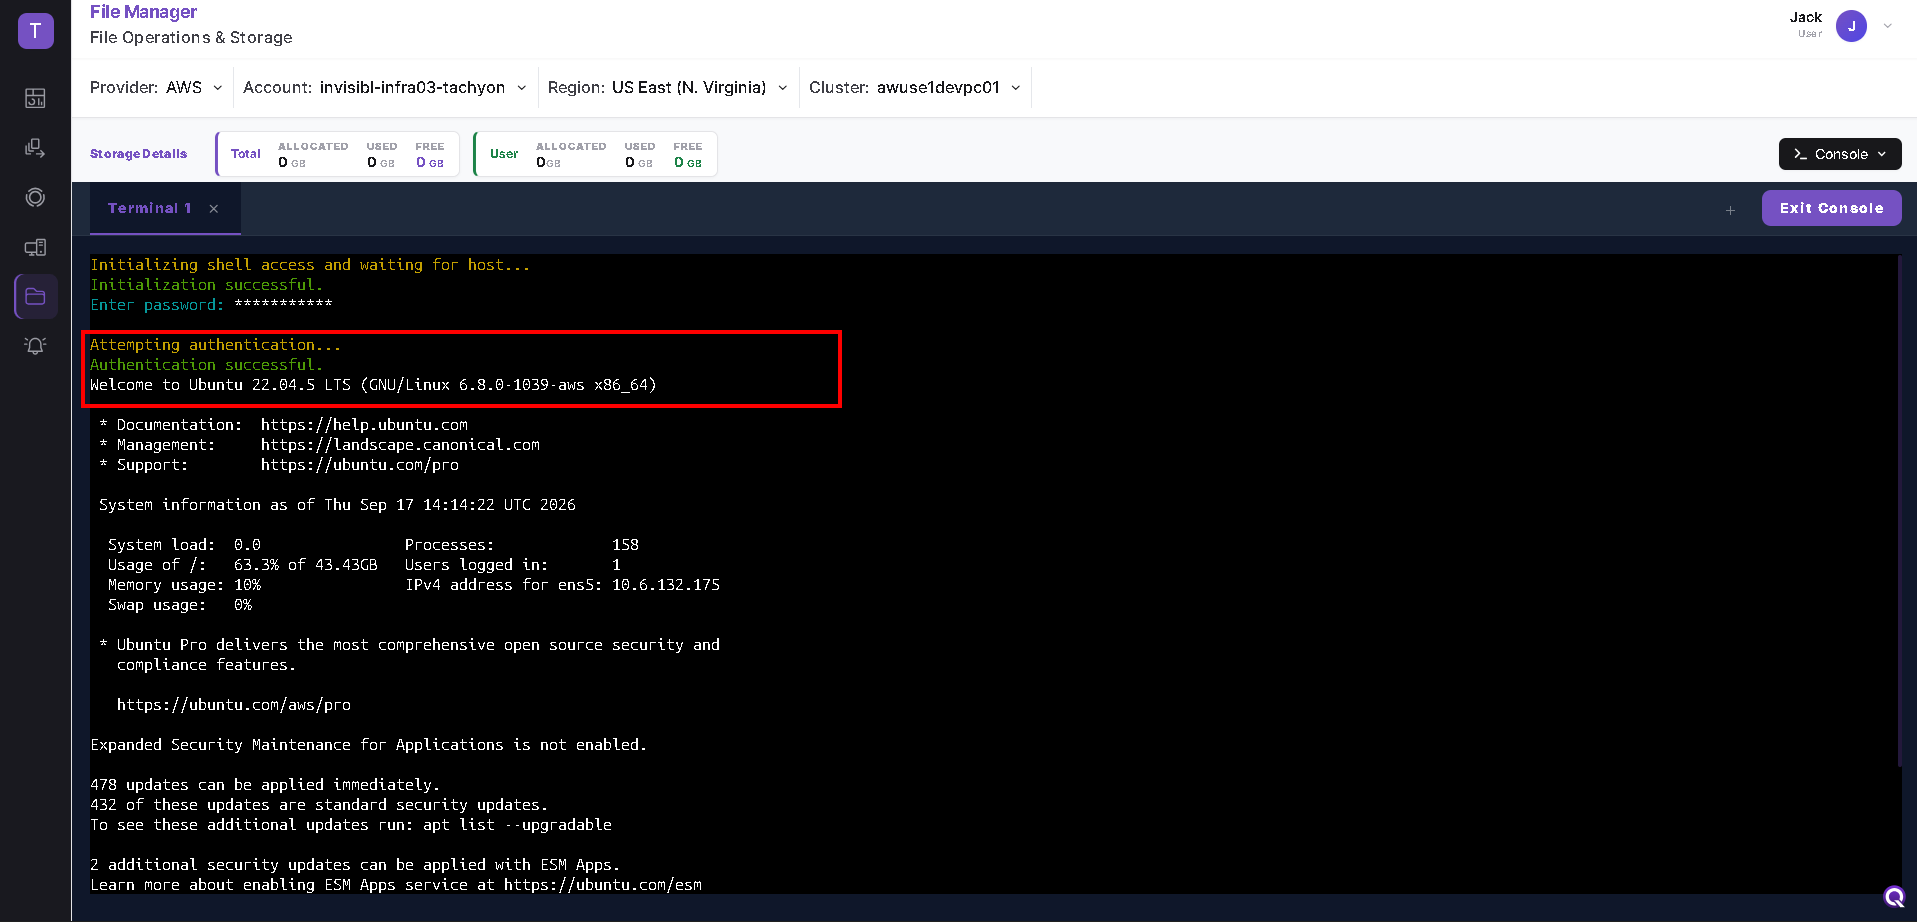
Wait until the command prompt appears before entering commands.
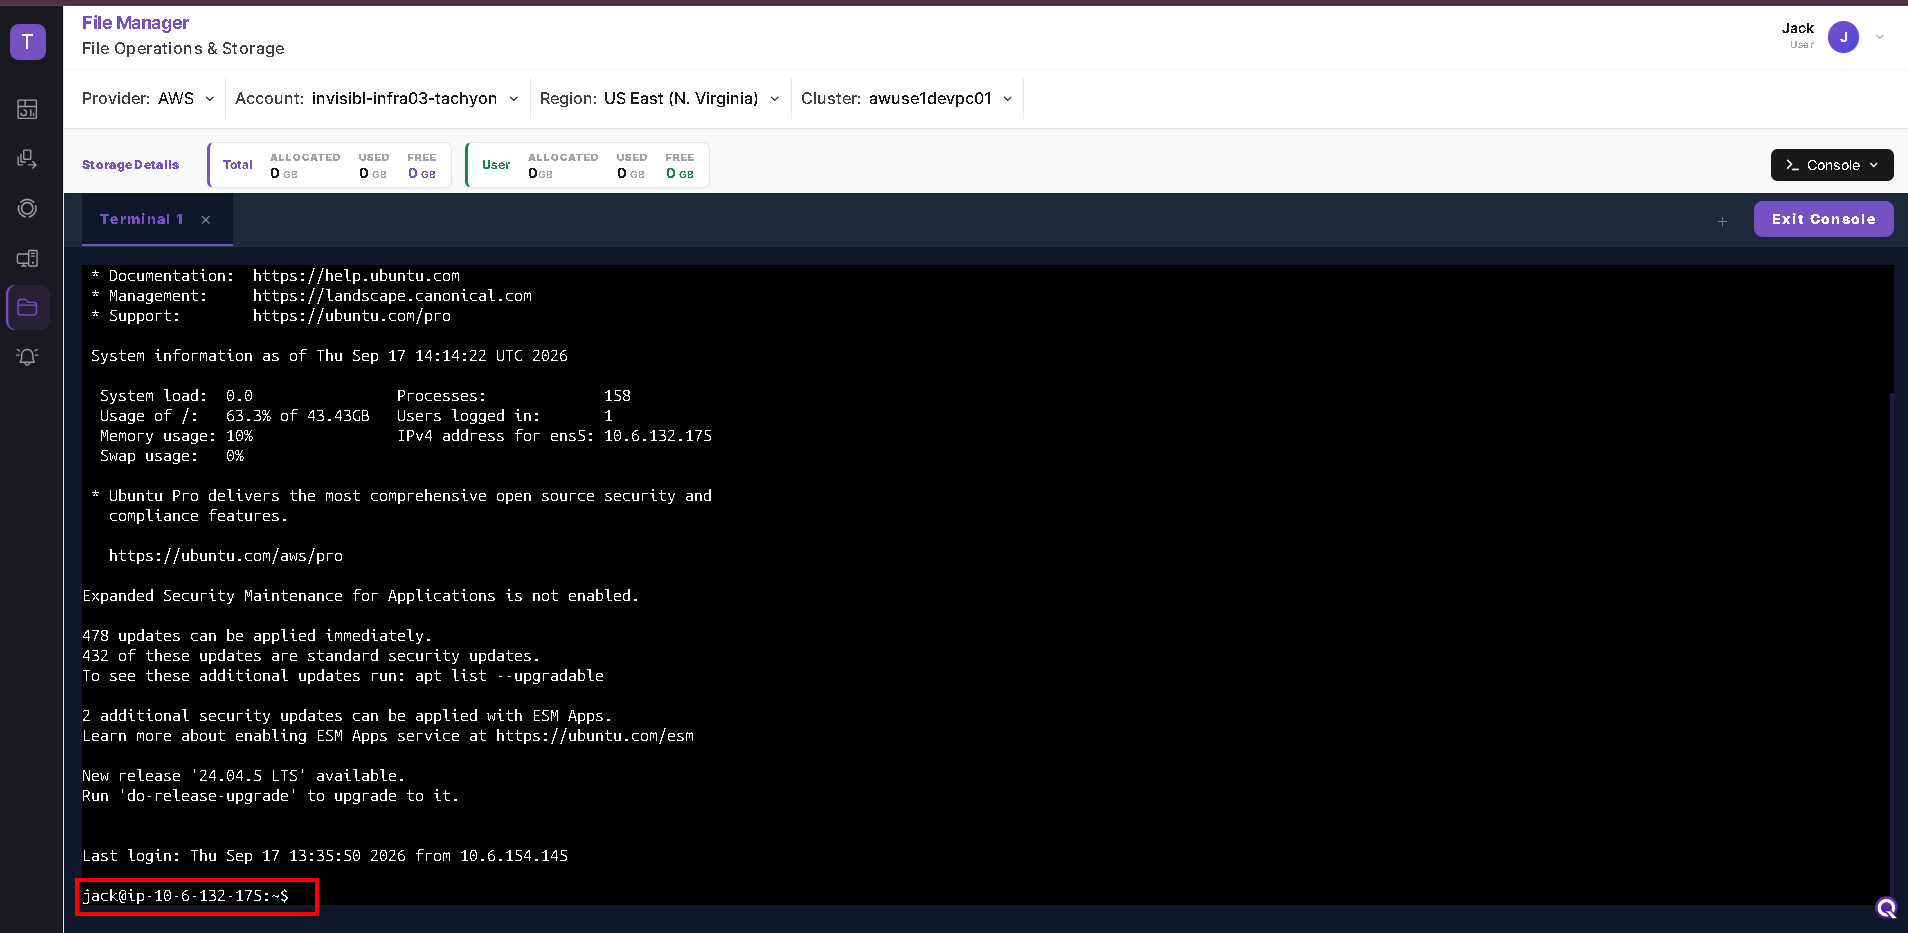
These terminal screenshots show an example session for the user Jack. Administrators follow the same steps using their own account credentials.
Step 4: Work in the Terminal
You can use shell commands to navigate directories and work with files according to your account's filesystem permissions.
For example, display the current directory:
pwd
List its contents:
ls
Terminal Controls
The console includes the following controls:
| Control | Purpose |
|---|---|
| Terminal tab | Select an open terminal session. |
| + | Open an additional terminal, subject to the configured session limit. |
| × on a terminal tab | Close that terminal tab. |
| Exit Console | Leave the console view and return to File Manager. |
To log out of the shell session, enter:
exit
Update or Disable Shell Access
Remove Access for a User
- Open Settings → General → Data Management & Shell.
- Locate the Users selector.
- Remove the required account from the selected users.
- Click Save.
Disable Shell Access
- Open Settings → General → Data Management & Shell.
- Turn off Shell Access Protocol.
- Click Save.
Troubleshooting
| Issue | What to check |
|---|---|
| Message asks you to enable admin settings for the cluster | Confirm that Shell Access Protocol is enabled, the account is selected, and the access policy covers the chosen cluster. Save the settings. |
| Shell initialization does not complete | Verify the selected provider, account, region, and cluster, and check that the target host is available. |
| Authentication fails | Verify the password for the account used to open the shell session. |
| An additional terminal cannot be opened | Check the configured concurrency limit and existing sessions. |
| A file operation returns “Permission denied” | Check the account's permissions for the target file or directory. |