Sharing & Permissions
Overview
The Share action manages access permissions for files and folders under the shared directory.
The shared directory is outside your personal home directory and is visible to users of the shared environment. Access to its contents depends on the permissions assigned to each item.
The current Access Control dialog applies permissions to the Domain Users group. It does not provide an individual-recipient selector.
Locate the Shared Directory
- Open File Manager and select the required cluster.
- In the directory tree, open shared.
- Select the file or folder whose permissions you want to manage.
- Check the Path in the details panel to confirm that the item
is under
/shared.
The Share action is available in this shared-directory workflow. It is not available for items in your personal home directory.
Open Sharing Controls
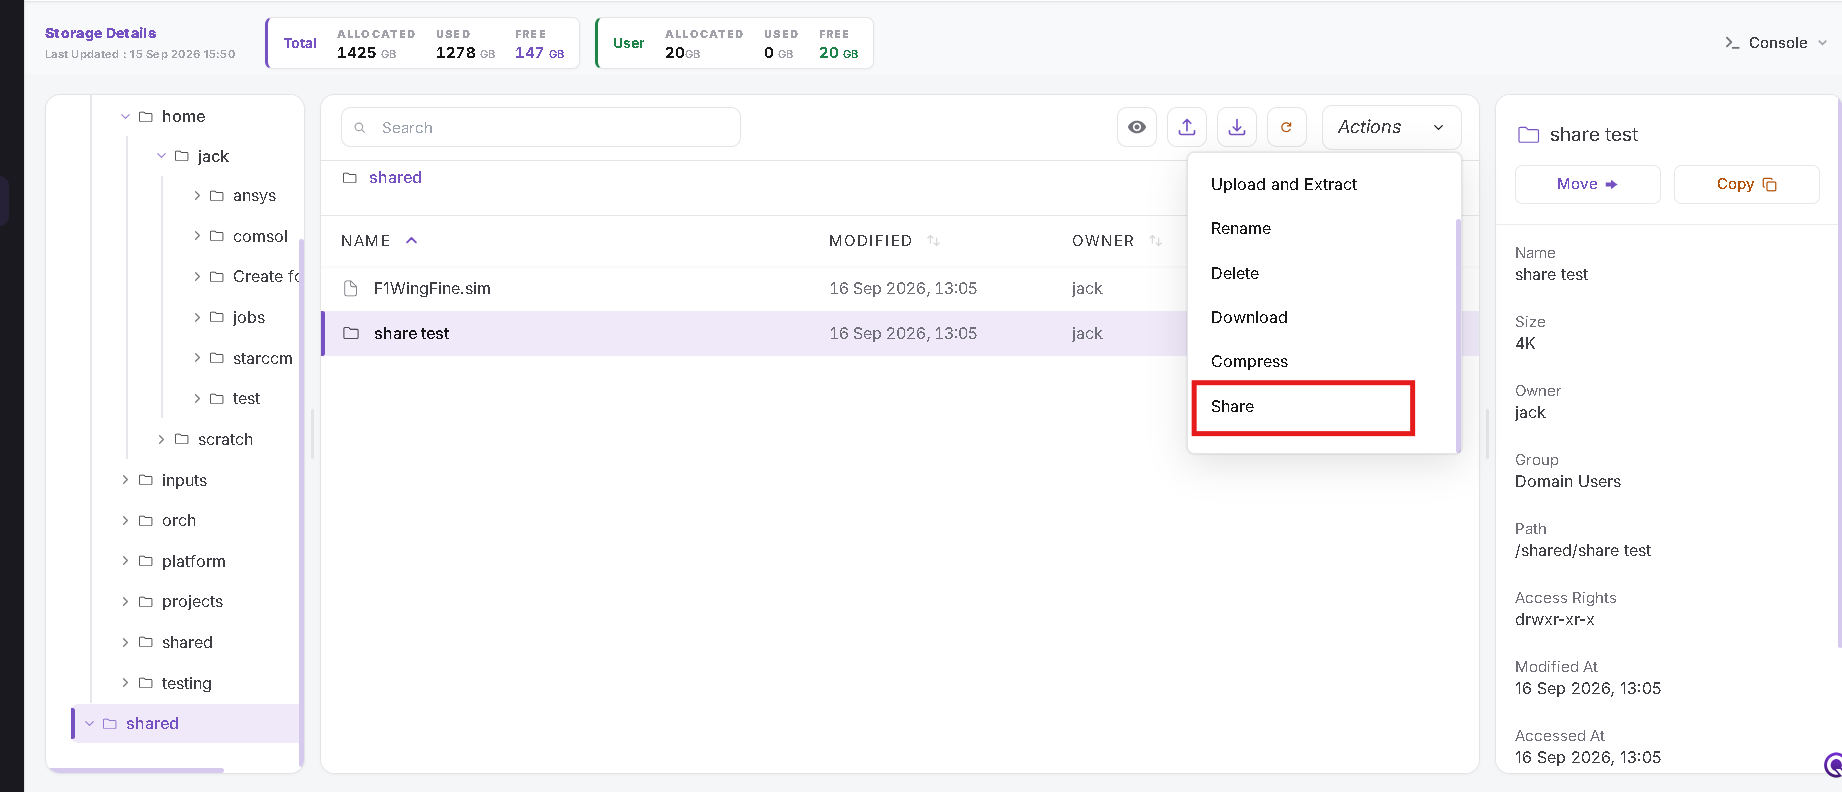
For a Folder
- Select the folder under shared.
- Open the Actions menu.
- Scroll down and select Share.
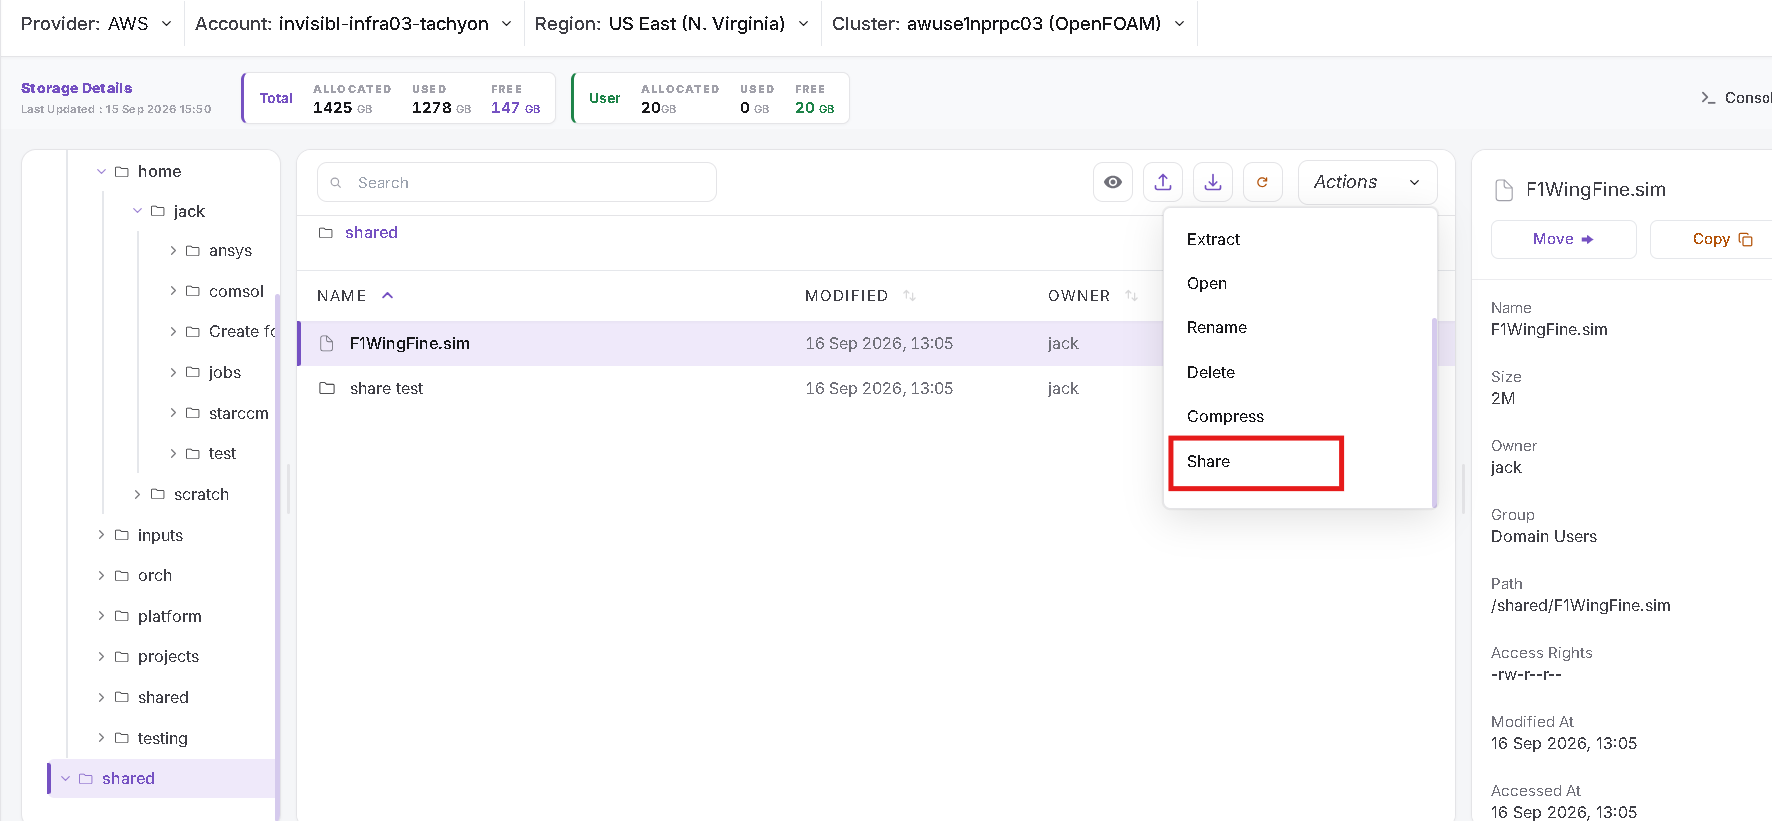
For a File
- Select the file under shared.
- Open the Actions menu.
- Scroll down and select Share.
Set Access Permissions
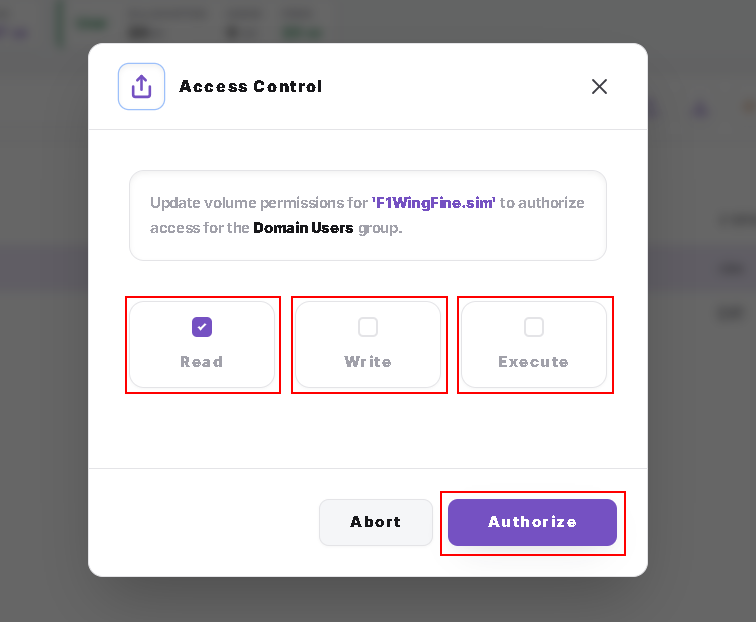
The Access Control dialog identifies the selected item and the Domain Users group.
- Check the item name shown in the dialog.
- Select or clear the Read, Write, and Execute checkboxes according to the access you intend to grant.
- Click Authorize to continue.
The screenshot below is an example with Read selected. Choose permissions according to your sharing requirements.
Click Abort to close the dialog without applying the changes.
Folder Permissions and Child Objects
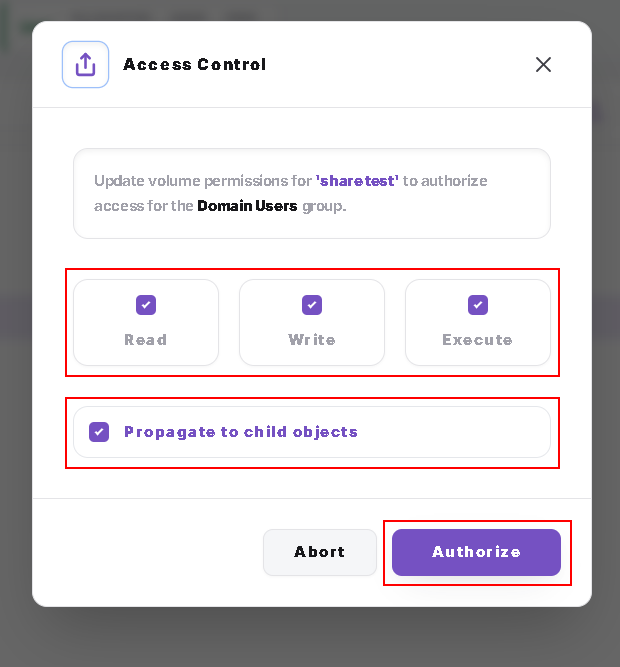
When sharing a folder, the Access Control dialog also includes Propagate to child objects.
- Select the required Read, Write, and Execute permissions for the Domain Users group.
- Select Propagate to child objects if you want the permission change applied to the folder's contents as well.
- Leave this option unchecked when you do not want to propagate the change to child objects.
- Click Authorize, then complete the confirmation described below.
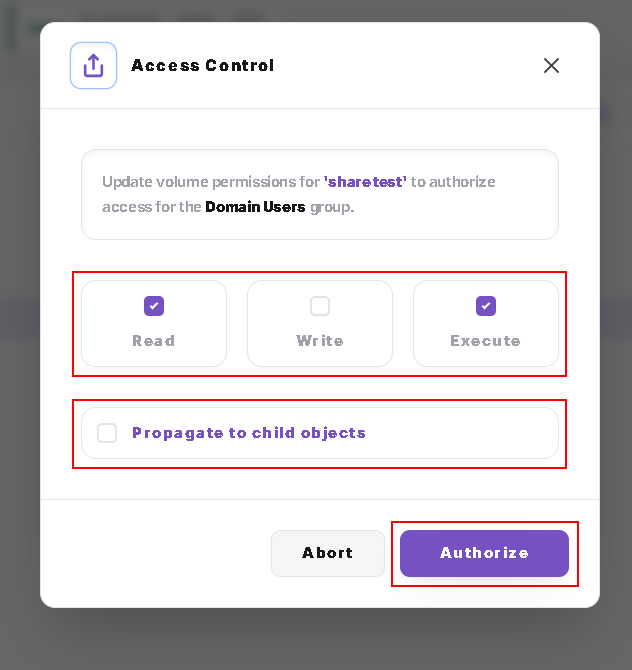
The following example shows all three permissions and propagation selected. Choose only the permissions required for your intended access.
Confirm the Change
- Review the Confirm Action dialog.
- Click Yes, I'm sure to confirm the permission change.
- To stop without confirming, click Cancel.
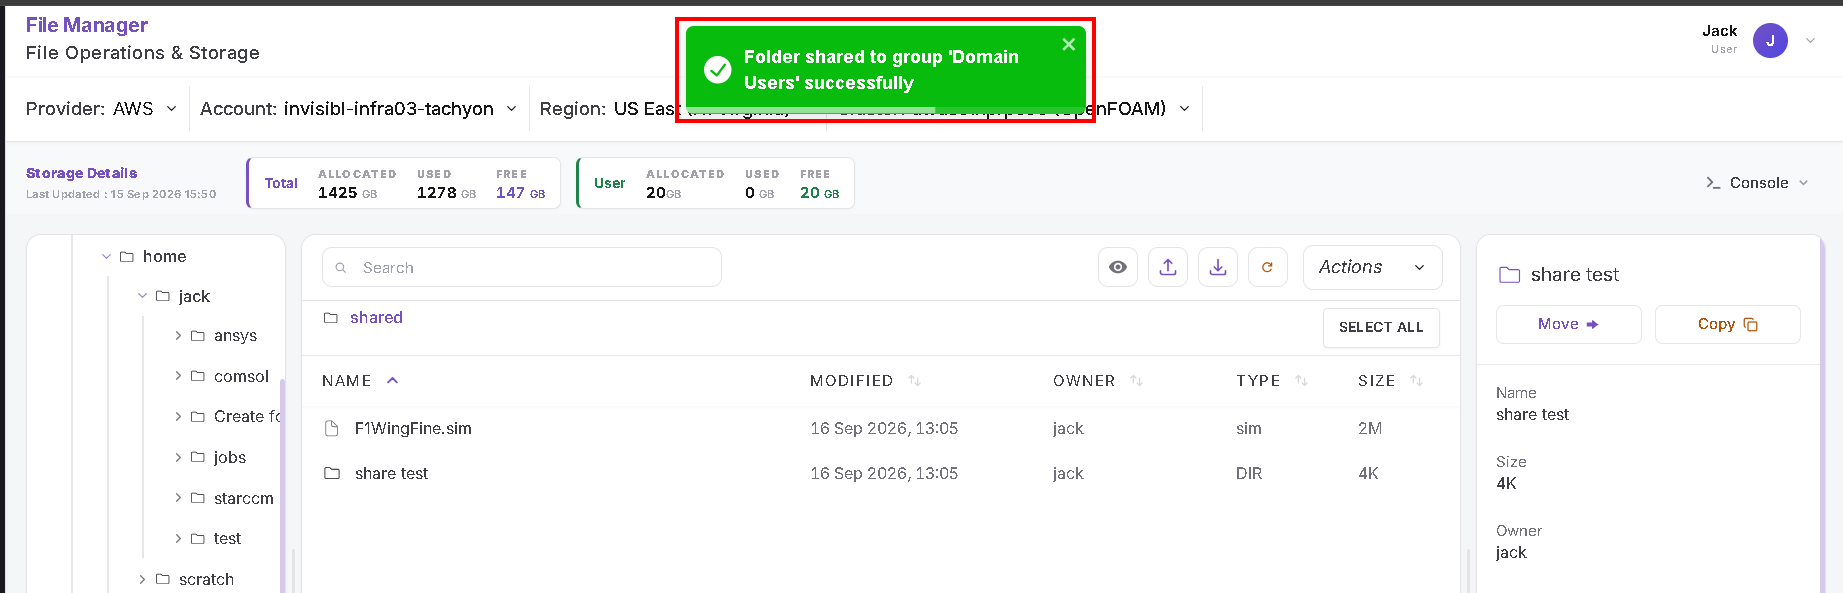
- Wait for the success notification.
- Select the item again and review its Access Rights in the details panel. Refresh the listing if needed.
The following example shows the success notification after updating a folder's sharing permissions.
General Notes
- Seeing the shared directory does not automatically grant full access to every file and folder inside it.
- This sharing flow updates permissions for the Domain Users group, rather than a selected individual.
- Check the selected item's name, path, and permission choices before authorizing a change.
- Contact your administrator if the sharing action is unavailable or the permission update fails.